In the previous blogs we started making two book bag libraries for two little girls. We had loads of fun painting the faces of the characters for our theme on fabric. We then laid the paint brushes aside to sew the bags together. We continue with the sewing today and finally put the finishing touches on the book bags.
Here are the links to the parts of the blog series:
Part 1 - Drawing and painting Goldilocks
Part 2 - Drawing and painting Papa Bear
Part 3 - Drawing and painting Mama Bear
Part 4 - Drawing and painting Baby Bear
Part 5 - Adding educational items to Goldilocks and Papa Bear
Part 6 - Adding educational items to Mama Bear and Baby Bear
Part 7 - Sewing the actual book bags
The first step is to cut the fabric from which we will make the book bags. Cut two pieces of fabric to measure 1 m x 80 cm each.
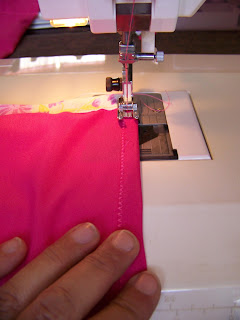
Fold the bottom hem over twice to make a wide rolled hem of 1,5 cm. Pin in place.
Sew the hem as close as possible to the inside seam.
Set your sewing machine to an overlocking stitch (or zigzag stitch) or use your overlocker.
Overlock the top of the fabric. Repeat this for both pieces of fabric.
Lay the panels on the fabric with the heads facing the bottom hem. This hem will be folded back later to restore the character to their upright position. Pin the panel in place.
Set your sewing machine to a fine zigzag. We will applique the panels onto the fabric.
Sew right on the edge of the panels.
Fold the bottom of the fabric over so that it forms a pocket. Leave 20 cm of fabric open at the top. Mark the center of the two panels and pin the fabric in place.
Pin the sides as well.
Sew the center pocket.
Sew the sides.
Measure four lengths of ribbon to just longer than the bags.
Pin a length of ribbon to the side of the bag, with half the ribbon sticking over the side seam of the fabric.
Fold the ribbon over and pin the back, tucking the unfinished side seam neatly between the ribbon.
Sew as close as possible to the edge of the ribbon, making sure to catch the top and bottom of the ribbon.
Fold the top seam over once and pin in place.
Sew the seam.
Now fold the loop at the top of the bag, approximately 7,5 cm wide. This is where the dowel stick will go through when hanging the bags.
Sew the loop to finish the bag.
Insert a dowel stick.
Add some books.
I hung the dowel stick over the backs of two chairs to give you an idea of what it will look like once it is in place.
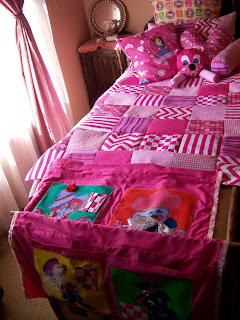
These bags can be hung on a wall or at the foot of a bed. It can even serve as a headset for a bed that does not have one. The only important thing to remember is that they have to be hung low down so that a child will be able to reach inside without a problem.
Here I draped them over a bed so you can see what the four panels look like next to each other.
For more crafty ideas and great products, visit APrettyTalent.com.
Remember to keep nurturing your TALENT for making PRETTY things.
You can subscribe to this blog and receive regular updates by email by simply registering your email address at the top of the current blog.


No comments:
Post a Comment