Here are the links to the parts of the blog series:
Part 1 - Drawing and painting Goldilocks
Part 2 - Drawing and painting Papa Bear
Part 3 - Drawing and painting Mama Bear
Part 4 - Drawing and painting Baby Bear
Part 5 - Adding educational items to Goldilocks and Papa Bear
Part 6 - Adding educational items to Mama Bear and Baby Bear
Part 7 - Sewing the actual book bags
We are going to start by painting the four faces on fabric. For this purpose we cut 4 squares from white cotton fabric. Each square should measure 30 cm x 30 cm.
I use an HB pencil to draw the pictures on the fabric. Keep an eraser and a sharpener handy as well.
I found the design that inspired the drawing in a book on scrapbooking; Creative Scrapbook Piecing 2, by Marina du Plesis.
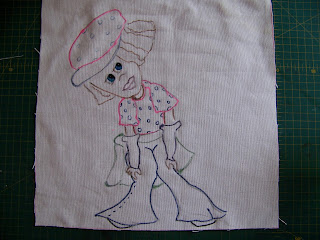
Start by drawing the hat.
Next comes the outline for the face and the hair.
Add the details for the mouth and nose.
Concentrate on adding enough detail to the eyes.
Draw the upper body.
Add the arms and gloves.
Draw the pants.
Add the jersey tied around her waist and complete the hands.
I use Acrilpen to block the colors in on the drawing.
Color blocking done.
I use blue on the outside of the fuchsia to add depth.
The same blue is used to paint the cap and pants. I then black on the edges of the blue to add depth and detail.
The jersey is painted in olive green.
The edges are deepened with blue.
I use Donnington Blue on the gloves with blue on the edges.
The hair is painted with Oxide. I then use the back of the brush to scratch detail into the hair.
I paint the skin in Flesh.
The shadows above the eyes are achieved with Oxide. Use white to whiten the whites of the eyes even more.
I pain the lips with Fuchsia and use the blue Acrilpen to draw the polka dots.
All that is left to do is to paint the background Yellow. In the next blog we will paint Papa Bear.
For more crafty ideas and great products, visit APrettyTalent.com.
Remember to keep nurturing your TALENT for making PRETTY things.
You can subscribe to this blog and receive regular updates by email by simply registering your email address at the top of the current blog.


No comments:
Post a Comment