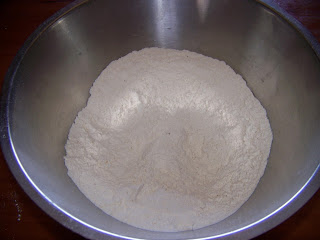
In a medium mixing bowl, measure 4 cups (4 x 250 ml) White Bread Flour, 2 teaspoons (10 ml) salt and a tablespoon (12,5 ml) sugar.
Mix the dry ingredients well.
Option 1: If using Instant Dry Yeast, add a packet to the dry ingredients.
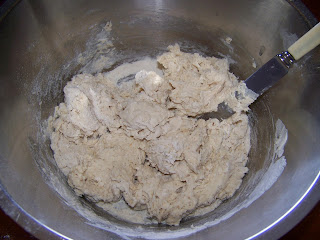
Now add a cup (250 ml) sourdough starter and lukewarm water. Start by adding only half a cup of water and bring the dough together. Add a tablespoonful of water at a time if necessary to bring the dough together into a sticky dough.
Option 2: If using Active Dry Yeast, allow a packet of yeast to develop a cup of lukewarm water and the sugar for about 10 minutes before adding it to the dough.
Bring the dough together. You can see my dough needs only a little more water here as there is still flour in the bottom of the bowl that will not mix into the rest of the dough.
Knead the dough on a lightly floured surface for about 10 minutes.
I am making very small vetkoek. I therefore roll my dough out thinly. You may prefer to simply break balls of dough off.
I cut my dough diagonally.
And then I cut it diagonally in the opposite direction to make small interestingly shaped vetkoek. There is no reason for this, other than that I was in a playful mood.
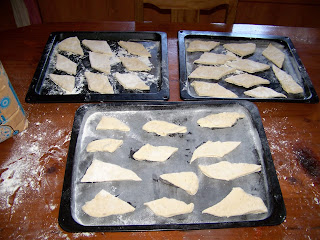
Spread your dough on a baking, sheet, allowing enough space between the pieces for the dough to expand.
I had quite a few smallish vetkoek laid out on lightly floured baking trays.
Cover with plastic and allow to rise in a warm dry place for a couple of hours.
Once your dough is risen, you can heat a pan with cooking oil.
Transfer the vetkoek to the oil.
Use a spoon to scoop the scalding oil over the vetkoek. This will result in big air bubbles in the center of the vetkoek.
Turn them over to fry the other sides.
Lay them out on some kitchen towels to absorb any extra oil.
Vetkoek and mince is the norm, but I felt like a sweet snack in between meals and dripped some syrup on mine.
Marietjie Uys (Miekie) is a published author. You can buy the books here:
You can purchase Designs By Miekie 1 here.
Jy kan Kom Ons Teken en Verf Tuinstories hier koop.You can purchase Designs By Miekie 1 here.
Jy kan Kom Ons Kleur Tuinstories In hier koop.
Jy kan Tuinstories hier koop.
For more crafty ideas and great products, visit A Pretty Talent on Facebook.
Remember to keep nurturing your TALENT for making PRETTY things.
You can subscribe to this blog and receive regular updates by email by simply registering your email address at the top of the current blog.


No comments:
Post a Comment