
Here is the gift bag that we received, unpacked so you can see what you will need. You need two lengths of wire ribbon. The longest should measure 30 cm and the shorter 20 cm. The ice cream stick is optional, but it does make the whole task much simpler. You will also need a bell, a piece of string and a flower or star rhinestone embellishment.

Use the ice cream stick to guide you in how wide you should make the folds in the ribbon. Start with the longest ribbon and fold it back and forth in a zigzag pattern.


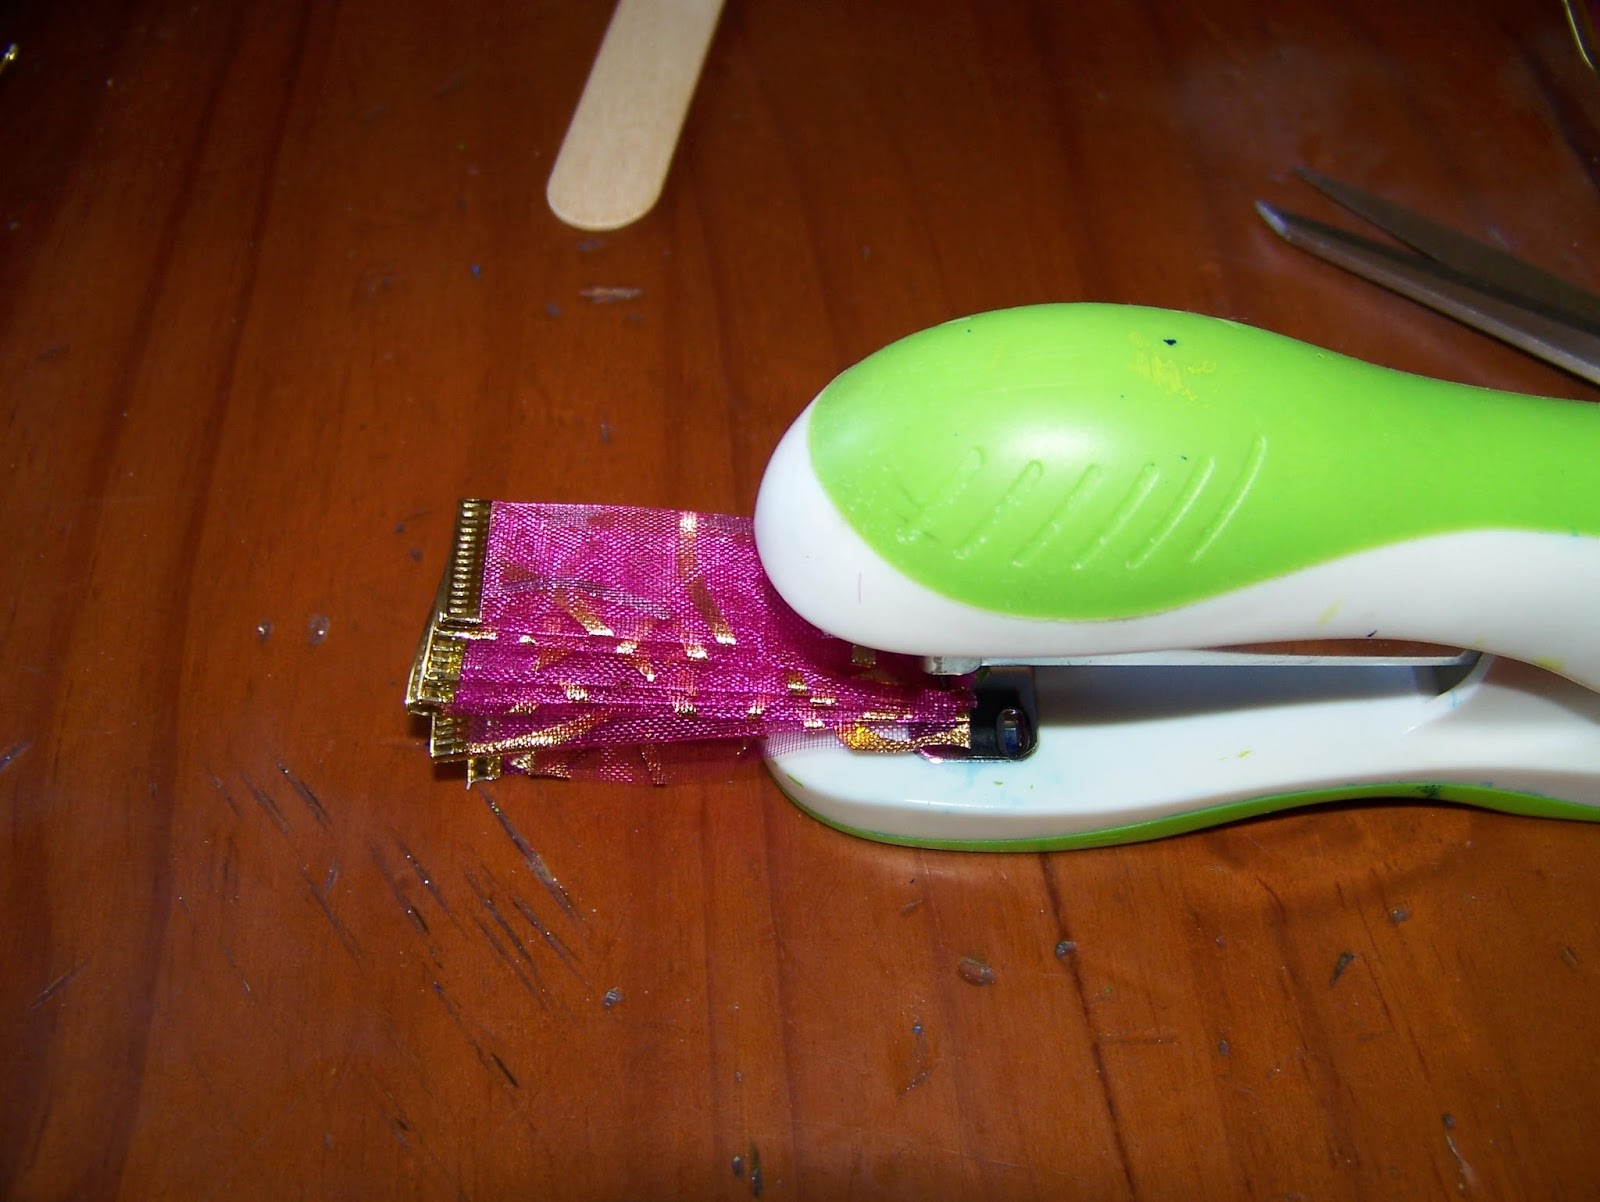
Snip one side of the ribbon off just below the wire.

Staple the folded ribbon together, close to the top of the side that you snipped off.
You can now open the ribbon out to unfold the angel's dress.

Fold the shorter ribbon in the same zigzag pattern as before, using the ice cream stick as a guide.

Fold this ribbon in half to find the center.

Staple on the center mark.

You can now open the angel's wings.

I prefer to make a tiny fold at the top of the angel's dress and to staple it again. This simply gives me a more secure base to which to attach the wings. This is my own trick and you can use it or loose it as you prefer.

Use your hot glue gun to put a blob of glue on top of the dress.

Place the center of the wings, where the staple is, on the blob of glue.

Put another blob of glue where the body is attached to the wings, on the front of the angel.

Put your rhinestone embellishment on this blob of glue.

String the chord through the bell and tie it with a knot to make a loop on which the angel can hang.

Put a blob of glue on the wings where the head should be.

Put the bell on the glue, with the string pointing upwards. The bell doubles as the angel's head.

I do not have a Christmas tree up yet and simply hung the angel on a door knob to give you an idea of what it would look like on a tree.

A better picture of the completed angel.

Marietjie Uys (Miekie) is a published author. You can buy the books here:
You can purchase Designs By Miekie 1 here.
Jy kan Kom Ons Teken en Verf Tuinstories hier koop.You can purchase Designs By Miekie 1 here.
Jy kan Kom Ons Kleur Tuinstories In hier koop.
Jy kan Tuinstories hier koop.
For more crafty ideas and great products, visit A Pretty Talent on Facebook.
Remember to keep nurturing your TALENT for making PRETTY things.
You can subscribe to this blog and receive regular updates by email by simply registering your email address at the top of the current blog.
No comments:
Post a Comment