
This is the shoe box that I will be covering for today's project.

When you open this box up, you realize that covering it will be slightly tricky. No fears, I'll walk you through it step by step.

Taking accurate measurements are key to getting it right. Measure the length of the box, from one end to the furthest point. In this photo, I start on the table, all the way across the box (pulling the tape taut!) and ...

... down to where the other end of the box rests upon the table.

I then take the measurement for the width of the box.

I also take the measurement for the height of the box.

Each of my measurements get 3 cm added to it to make space for a seam allowance of 1,5 cm on each end.

I cut the fabric to the length and width of the determined measurements.

I then double-check to make sure that my measurements were correct.

I cut 4 side panel to the width and height of the determined measurements. Again, I fit them against the box. All of the fittings should have a seam allowance of 1,5 cm overhanging the edges of the box.

The four pieces for the side panels.

I use the fabric as pattern guide to cut the lining, making sure they fit each other perfectly. I do the same with the four side panels, cutting these from the lining as well.

You will not be able to iron the fabric again. It is therefore imperative that all wrinkles should be ironed out before you start sewing.

Lay a side panel on the length of fabric. Line the edges up precisely. You should have the height of the box lined up here. Mark the 1,5 cm seam allowance with a pin.

Lay another side panel along the edge, this time on the width of the box. Overlap the seam allowance. Pin the side panel that is laid down on the width of the box. Remove the first side panel, as this was only a space keeper to help get the second side panel in the right position.

Follow the steps above once more along the same edge of the fabric. You should have the height of the box, plus 1,5 cm seam allowance, left over on the other end of the fabric, if you were measuring accurately.

Now, fold the fabric in half in its length, and pin the side panels on the opposite edge to line up with the side panels on the first edge.

Sew the four side panels on in the width of the box. Leave 1,5 cm seam allowance un-sewn on both ends of each of the side panels.

Cut little openings into the seams at every spot where the sewing started or ended.

Fold one end of the fabric up and pin it to the height of the side panel.
If you look on the right side of the fabric, you should now see a box starting to take shape. Sew the two opposite sides of one of the side panels to the fabric on the height of the side panel, where you have pinned it. Repeat the same steps on the other side of the fabric as well.

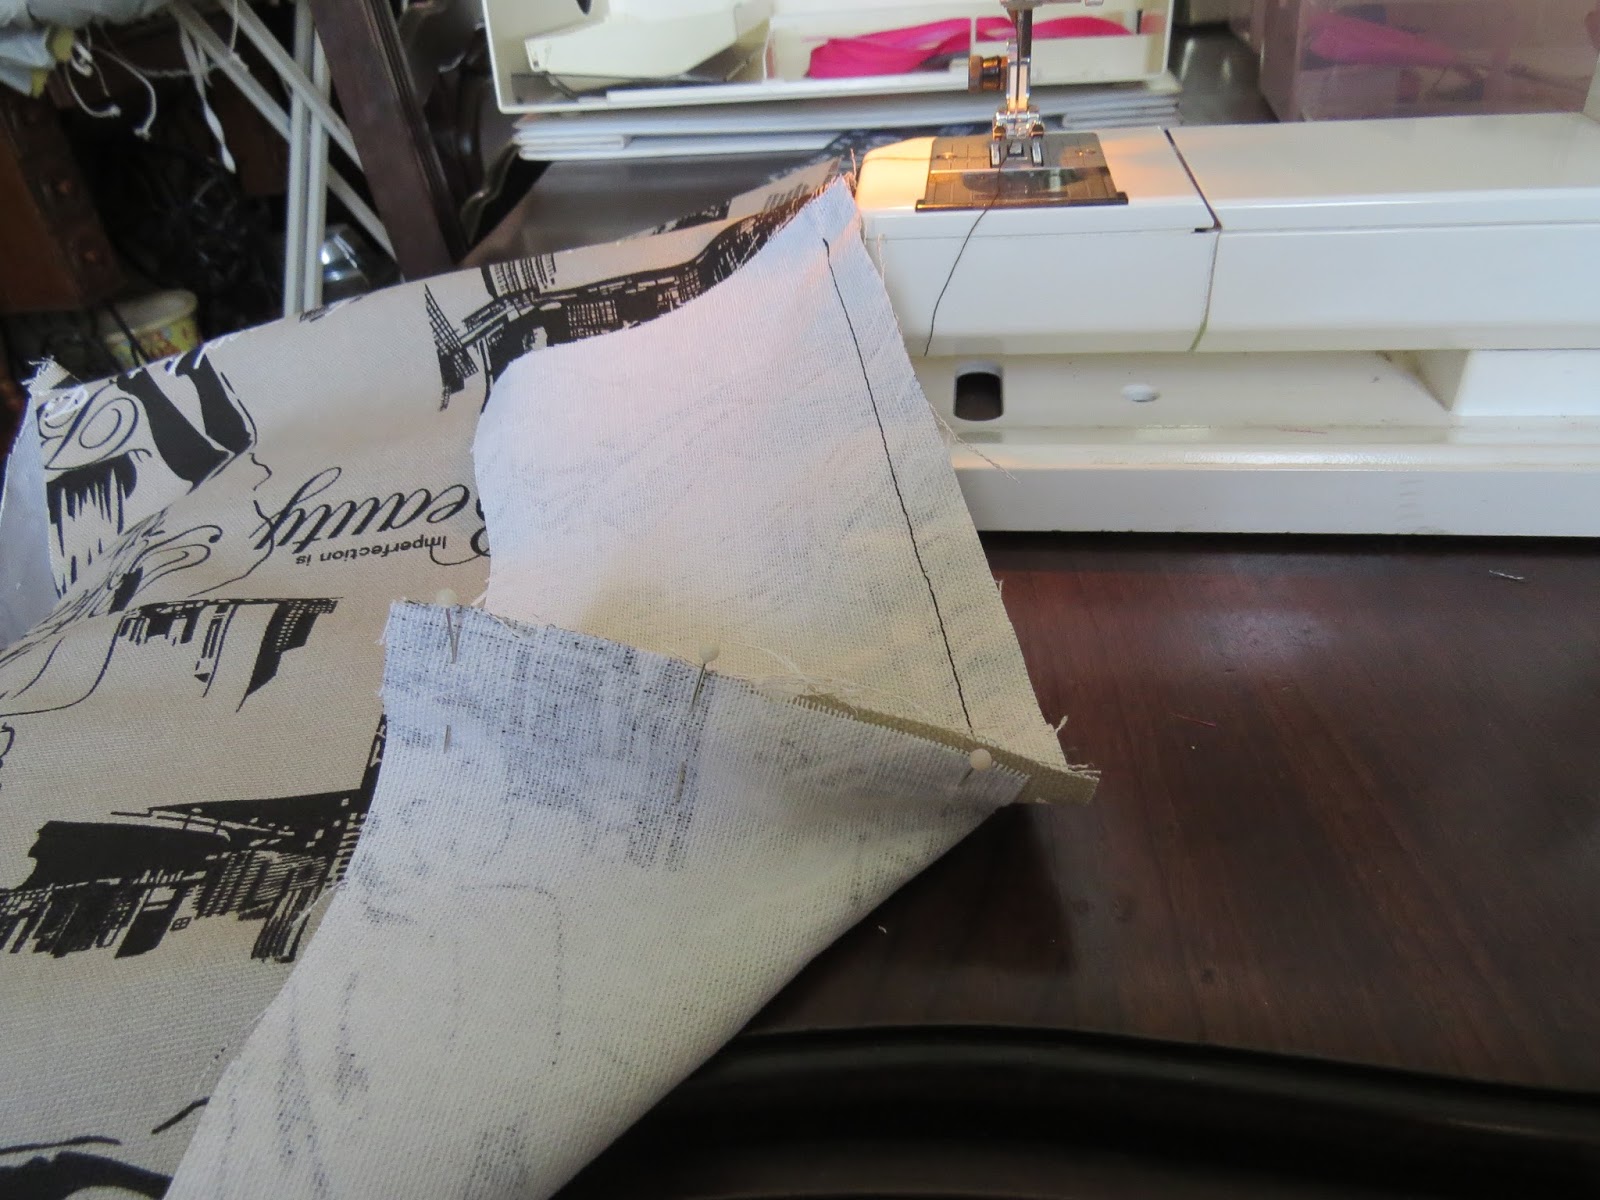
Fit the fabric to the box. It should now be clear where the remaining side panel should be attached to the fabric. Pin it while fitted to the box to ensure a neat fit.

Here you can see the pinned side panel on one side of the box. I will now sew the pinned seams on both sides of the covering.

With the sewing done, I turn the fabric right side out and fit it on the box.

Follow the exact same steps to make the lining for the box, and place the lining inside the box when you are done.

Fold the edges of both the fabric as well as the lining in and pin all around.

Sew the lining to the fabric by hand to ensure a neat finish.

The covered box, when open.

The covered box when closed.

Marietjie Uys (Miekie) is a published author. You can buy the books here:
You can purchase Designs By Miekie 1 here.
Jy kan Kom Ons Teken en Verf Tuinstories hier koop.You can purchase Designs By Miekie 1 here.
Jy kan Kom Ons Kleur Tuinstories In hier koop.
Jy kan Tuinstories hier koop.
You can follow Miekie's daily Bible Study blog, Bybel Legkaart, here in English & Afrikaans.
For more crafty ideas and great products, visit A Pretty Talent on Facebook.
Remember to keep nurturing your TALENT for making PRETTY things.
You can subscribe to this blog and receive regular updates by email by simply registering your email address at the top of the current blog.
No comments:
Post a Comment