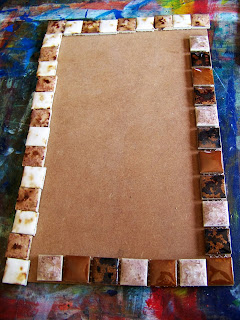
I decided to test my idea on a piece of masonite I had in the wood stash. This small piece measured only 17 x 29 cm. I decided upon some tiles I would use and measured the width and length of a frame that could accommodate these tiles.
Once I had the basic measurements in place, it was time to get a square to make sure that I did not end up with an oddly shaped frame!
I then sawed the board that would form the base for the frame from a larger piece of masonite.
I used a file on both masonite boards to make the edges smoother.
I fitted the smaller piece and was satisfied that the width of the frame would work for me.
I had different tiles in this range and now needed to decide which ones to use.
I tried out a couple of options. I won't bore you with the whole range of attempts.
In the end, this is what I settled on. The layout is rather predictable and boring, but I was still only testing a theory. Once I knew that it really worked, I would design more intricate mosaics for my frames.
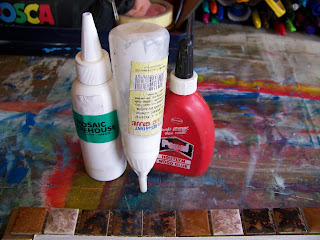
I would use glue to fix the tiles in place. Any old wood or craft glue would work just fine.
The tops and bottoms could be fixed on a string.
The sides needed to be cut apart to space them better.
Note that I trimmed the backing net neatly, or otherwise I would struggle to lay the tiles neatly. Do not pull the backing net away. This net will create the necessary roughness to fix the smooth tiles to the smooth wood.
I prefer gluing a whole line of tiles and then setting them in place in a rapid succession. This makes it easier to move them up or down if needed.
With all of the tiles glued on, I left the picture board in place to make sure it fit properly. I have now painted it with Dala gesso to prepare it to accept paint later on. I preferred this, as it made it easier to see when the board was in, and when not, for the purpose of taking photos for the blog.
Once the glue was set, I removed the board.
Mixing grout is very simple. A tiny bit of water mixed in with the grout is all you need.
Lumps are easily dissolved by stirring. Use your fingers to work the grout into the openings between the tiles. Leave to dry.
Once the grout is dry, you can use a damp cloth to wipe away the excess grout and to clean up the tiles.
I put the board back to show you the finished product. My theory worked. Provided I use standard sized canvasses, I can make interchangeable frames for my art by simply mosaic-ing the edges of masonite boards.
Marietjie Uys (Miekie) is a published author. You can buy the books here:
You can purchase Designs By Miekie 1 here.
Jy kan Kom Ons Teken en Verf Tuinstories hier koop.You can purchase Designs By Miekie 1 here.
Jy kan Kom Ons Kleur Tuinstories In hier koop.
Jy kan Tuinstories hier koop.
For more crafty ideas and great products, visit A Pretty Talent on Facebook.
Remember to keep nurturing your TALENT for making PRETTY things.
You can subscribe to this blog and receive regular updates by email by simply registering your email address at the top of the current blog.


No comments:
Post a Comment