In today's blog we make a set of very versatile magnetic chalkboard labels. The idea behind this is that you can move the labels from one tin to another as you need to. Also, the chalk can be wiped clean and a new label written on it with zero effort. How cool is that? This is a really easy and quick project to do and will you will have pretty labels to mark your tins with in less than an hour.
I started by painting three coasters with White Gesso.
Once the gesso was dry, I would paint them with Chalkboard Paint. Both Heritage and Dala have marvelous colour ranges in this. My choice fell on Teal. A common misunderstanding among crafters these days, is the difference between chalk paint and chalkboard paint. Chalkboard paint is used to paint any surface that will be used to write on with chalk. Chalk paint is a versatile paint, often used to paint furniture with, that will cling to a variety of surfaces. It is called chalk paint because of its distinctive dull chalky finish.
When painting the coasters, make sure to paint the edges as well for a neat finish.
Once the first coat of paint is dry, apply a second coat. You may even want to apply a third if the coverage is not monotone and smooth yet after the second coat.
While waiting for the paint to dry, I prepare a template. I have this marvelous stencil, but I want the reverse of one of its designs. I find myself an off-cut piece of paper to cut the template from.
Laying the stencil on the paper, I trace the outline with a pencil.
I then use a craft knife to cut the template along the pencil lines.
The frame that is left after the template is cut out, is saved for another day. Nothing ever gets discarded in my craft room.
I then lay the template in place on top of the coaster.
I use Dala Fabric Spray in Red to spray the coaster.
Removing the template, you can now see that I have created a pretty little border for my label, while leaving the majority of the surface untouched so you can use it to write your chalk messages on.
The same template is used on the second coaster, after I have flattened it again. The wetness from the Fabric Spray caused it to curl up. It flattened again without a hassle.
With the three coasters done, I lay them aside to dry.
This template looks quite pretty when I am done with it. It too, goes into a box to be used in another project at a later date.
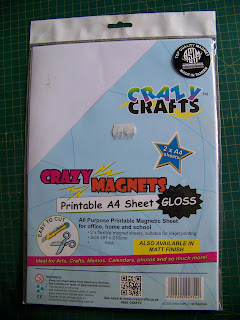
I now go in search of my magnet sheets.
I cut strips of 2 cm x 6 cm from these magnet sheets.
I will need 6 magnetic strips in total.
I use Tombow glue on the backs of the magnet strips.
The magnets are glued to the backs of the coasters.
Once everything is dry, the mini chalkboards are ready to be written on.
The chalk wipes away as easily as on any other chalkboard.
Your set is now ready to go on your tins.
This is over kill for the poor tin I chose to use as an example, but you can see where I'm going with this.
For more crafty ideas and great products, visit APrettyTalent.com.
Remember to keep nurturing your TALENT for making PRETTY things.
You can subscribe to this blog and receive regular updates by email by simply registering your email address at the top of the current blog.


No comments:
Post a Comment