In a large mixing bowl, mix together 2 (500 ml) cups White bread flour and 1 1/2 (375 ml) cups semolina.
Add 2 teaspoons (10 ml) salt, 1 teaspoon (5 ml) aniseed and 1 teaspoon (5 ml) sugar. Mix all the dry ingredients together.
Option 1: You may wish to speed things up by adding a packet of Instant Dry Yeast to your dry ingredients, instead of (or accompanying) the sourdough starter.
Add a cup (250 ml) lukewarm water and a cup (250 ml) sourdough starter to the dry ingredients.
Option 2: If you opt to use active dry yeast, you can add a packet to the water and wait 10 minutes for it to froth up.
Bring the dough together.
Knead the dough for 5-10 minutes.
Divide the dough into 6 equal balls.
I highly recommend getting a little helper if you have one at hand. They enjoy playing with the dough even more than I do!
Roll the dough into balls in the palm of your hands.
Flatten the dough balls.
Set the dough out on a baking tray prepared with non-stick spray.
Brush some olive oil over the tops of the dough balls. (Or simply release a small child on them!)
Cover with plastic and allow to rise in a warm dry place.
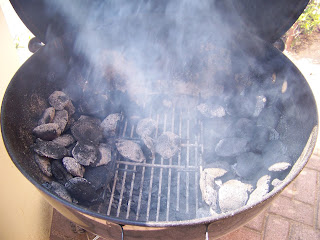
As I mentioned before, I will be baking my bread over the coals, but if you opt for the oven you can preheat it to 200 °C. In the meantime, I have lit the briquettes.
It is best not to bake the bread over direct heat. That is why I put the dividers into the kettle braai.
When the briquettes are ready, I decant the chimney to spill the coals on the side of the braai.
As I am working in a traditional bread pan and not a cast iron one, I put my bread pan inside an oven pan to provide a thicker base between the dough and the fire. The pan is put inside the kettle braai. If you are familiar with kettle braais, you will know that it is important to have everything lined up with the front handle of the braai for circulation purposes.
Close the lid and check your thermometer. Mine stayed at 150 °C for about 5 minutes before finally climbing to around 200 °C. Do NOT open the lid to check on the progress as this will cause the temperature to drop and may result in the bread falling flat. Regardless of whether you are using a conventional oven or a kettle braai, the bread will bake for approximately 20-425 minutes. Check after 20 minutes.
Remove from the heat. Mine came out a little pale on top.
I turned them over and put them back in the kettle braai for a further 5-7 minutes.
This seemed to do the trick and this time they looked much more scrumptious.
This is a lovely treat to enjoy while waiting for the meat to braai, which is exactly what we did!
Marietjie Uys (Miekie) is a published author. You can buy the books here:
You can purchase Designs By Miekie 1 here.
Jy kan Kom Ons Teken en Verf Tuinstories hier koop.You can purchase Designs By Miekie 1 here.
Jy kan Kom Ons Kleur Tuinstories In hier koop.
Jy kan Tuinstories hier koop.
For more crafty ideas and great products, visit A Pretty Talent on Facebook.
Remember to keep nurturing your TALENT for making PRETTY things.
You can subscribe to this blog and receive regular updates by email by simply registering your email address at the top of the current blog.


No comments:
Post a Comment