Blogs 1-50
Blogs 51-100
Blogs 101-150
Blog 1 - Step-by-Step: Decoupage a Tissue box & make an accompanying card
"It is the first month of a new year filled with wonderful opportunities. It is also the beginning of a whole new year filled with upcoming birthdays. That is why I thought I’d get an early start on giving you some great DIY gift ideas. Not only are these cost effective, but they are also fun to make. And of your recipients are anything like me, they will appreciate the time and effort that went into the gift and love it the more for it. It is always a great idea to give a one-of-a-kind gift, rather than a mass-produced factory item. (Though I would not decline the gift of a car ;-) In fact, I might make an exception in this case, and say that I’d prefer the factory produced version.)
Jokes aside, I thought I’d show you step-by-step how to make a decoupage tissue box holder and accompanying card. In fact, I figured I’d double up on my time and make two while I’m at it. This way you could see how easy it was to get completely different results following the same steps and using basically the same materials."

Blog 2 - Decoupage an album cover with old tea bags
"In this project I am going to decorate a masonite album cover. The album can be used as an art journal or as a scrapbook album. Tea stains have some of the warmest, richest colours you can find. Add to that the fact that tea bags are wonderfully absorbent, semi-transparent and a perfect surface to paint/draw on, and you have a perfect product for your next craft product."

"In this project I am going to decorate a masonite album cover. The album can be used as an art journal or as a scrapbook album. Tea stains have some of the warmest, richest colours you can find. Add to that the fact that tea bags are wonderfully absorbent, semi-transparent and a perfect surface to paint/draw on, and you have a perfect product for your next craft product."

Blog 3 - Decoupage with Fabric
"Everyone is always carrying on about decoupaging with tissue paper, or serviettes or any other paper you can imagine, but did you know you can decoupage fabric with equal success? In this BLOG, I decoupage the covers of a masonite album with fabric. The album is intended to be used as an art journal and is slightly bigger than A4."

Blog 4 - Decorating a Girly Album
"I love pink and every so often I need to simply over-indulge myself and create something very, very pink. You can of course substitute colours to suit your needs and likes, but I shall stick to my girly pink for this project. I am still decorating the album covers I started with in the previous BLOG. I've taken another look at what I've done and decided I could be more creative. Therefore, I pulled the fabric off and set it aside to use on another project later. I still intend to use the fabric, but I would go about it differently. Here is what we are making:"

Blog 5 - How to strengthen paper to take paint
"Did you ever have a piece of paper that you wanted to paint on, but you knew it would not be able to 'take' the paint? Then this BLOG is for you! A lot of people keep an art journal and often run into this problem. Mixed media artists also frequently encounter this problem. The solution is gesso. Gesso is the stuff that you paint on canvas to prepare the surface to accept paint. Few people know that this can also be applied to paper for the same purpose."
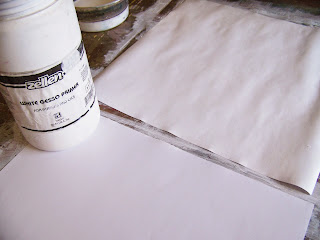
"Did you ever have a piece of paper that you wanted to paint on, but you knew it would not be able to 'take' the paint? Then this BLOG is for you! A lot of people keep an art journal and often run into this problem. Mixed media artists also frequently encounter this problem. The solution is gesso. Gesso is the stuff that you paint on canvas to prepare the surface to accept paint. Few people know that this can also be applied to paper for the same purpose."

Blog 6 - Decoupage a Tissue Box with Fabric
"You have jumped in and made yourself a beautiful new duvet cover, or even a quilt. You made matching curtains, fashionably hung with grommets, and you have painted and made scatter cushions to round everything off. What about that unsightly tissue box? Make a quilted cover? Possible. Sew a cover? Also possible. But how about simply decoupaging it in the leftover fabric from your room make-over? Let me show you how."

Blog 7 - How to fold a neat corner
"Have you ever covered books or gifts and gotten yourself into a jam with the excess paper on the corners? Or maybe you were sewing something that made a right angle somewhere, perhaps a table cloth or a curtain, and you had to struggle with a thick wad of fabric on the corner. Let me show you a quick and easy solution to folding neat corners."

Blog 8 - Geometric Paper Piecing
"Have you been doing scrapbooking for a while now? Then odds are that you have stacks of 12" x 12" white papers taking up space in your life. Being a scrapper, you are probably sentimental and don't like throwing anything away. Besides, every time you bought refill pockets for your albums, they listed those blank pages as an asset. Problem is, you have not been able to figure out what to do with them. Good news! I love using those blank pages and from time to time I will post a BLOG where I have done just that. Today is one of those days. Of course you can use any size paper, but I used 12" x 12" paper. Let me show you how I turned a blank page into this:"

"Have you been doing scrapbooking for a while now? Then odds are that you have stacks of 12" x 12" white papers taking up space in your life. Being a scrapper, you are probably sentimental and don't like throwing anything away. Besides, every time you bought refill pockets for your albums, they listed those blank pages as an asset. Problem is, you have not been able to figure out what to do with them. Good news! I love using those blank pages and from time to time I will post a BLOG where I have done just that. Today is one of those days. Of course you can use any size paper, but I used 12" x 12" paper. Let me show you how I turned a blank page into this:"

Blog 9 - Fusing Papers with Plastic
"I wanted to make a pretty birthday card for someone special. I found myself with absolutely the perfect paper for the person I had in mind. The problem was that both sheets of paper I wanted to use were single-sided, meaning the back was white. I almost always use double-sided paper/cardboard when making cards."

"I wanted to make a pretty birthday card for someone special. I found myself with absolutely the perfect paper for the person I had in mind. The problem was that both sheets of paper I wanted to use were single-sided, meaning the back was white. I almost always use double-sided paper/cardboard when making cards."

Blog 10 - Making a Masonite Album
"I have been wanting to start an art journal for a very long time. What kept hindering me, was the fact that I could not find a single journal/paper pad that would be able to accommodate all of techniques and mediums I would inevitably want to put in there. I finally realized that the only solution would be to make my own album and slide the pages in there. It was an idea I borrowed from scrapbooking."

"I have been wanting to start an art journal for a very long time. What kept hindering me, was the fact that I could not find a single journal/paper pad that would be able to accommodate all of techniques and mediums I would inevitably want to put in there. I finally realized that the only solution would be to make my own album and slide the pages in there. It was an idea I borrowed from scrapbooking."

Blog 11 - Fusing Fabric with Plastic Wrap
"Having successfully fused two sheets of paper to each other using heat and Glad Wrap, I wondered whether I could fuse a piece of fabric to paper using the same method. Once the idea was born, I had to try it. True to form, I decided to record the whole process for your benefit. I start by laying down a piece of white paper. I used a 12" x 12" sheet."

"Having successfully fused two sheets of paper to each other using heat and Glad Wrap, I wondered whether I could fuse a piece of fabric to paper using the same method. Once the idea was born, I had to try it. True to form, I decided to record the whole process for your benefit. I start by laying down a piece of white paper. I used a 12" x 12" sheet."

Blog 12 - Preparing Mini Features
"In a previous blog I told you how to make your own album from masonite. We had some off-cuts left ever from that project and I promised to show you how to put them to use. We'll do exactly that in this blog. Let me step back first for the sake of those who had not read the previous blog. After measuring the sizes of the album I was going to saw from the masonite, I was left with a thin strip of wood. I measured the width and divided it into squares. I happened to get 5 squares and an odd-sized piece. The measurements doesn't matter here, because you are allowing your off-cuts to determine size for you. Mine worked out to approximately 6,5 x 6,5 cm."

Blog 13 - Mosaic an Album Cover
"As is so often the case, I started wondering if it would be possible (read practical) to mosaic an album cover. The more I thought about it, the better I liked the idea. It was inevitable that I would put it to the test. Read on to see the problems I encountered and how I overcame them. In the process I'll walk you step-by-step through a very basic mosaic project and you'll pick up a new hobby, if you're not already into it."

Blog 14 - Fridge Magnet Chalk Board
"I've had these chalkboards in store for a while now and ever since receiving them I have found them boring. I know they are intended to be used in school by the junior grades, but I could not help fantasizing about PRETTY-ing it up. I finally settled upon the idea of turning one into a fridge magnet, handy for quick notes and jotting down info when there isn't paper around."

Blog 15 - Fridge Magnet Note Pegs
"Having started with fridge magnets, I simply could not help myself and carried on with the same theme. I had a brand new set of wooden clothes pegs lying on my craft table. I use only plastic pegs for the washing and purposefully but these for crafts. Can anyone relate?"

Blog 16 - Mixed Media on Paper
"Have you ever found an object and just knew immediately that you would put it to a completely different use than what it was intended for? This blog was created around just such an item. Here is what we are going to make today.
I worked on a surface I had prepared during a previous blog. In that blog I took a normal printer quality paper of 80 gsm. I painted it with two layers of gesso and left it to dry. This will strengthen the paper to be able to take paint. I then painted the whole page yellow, using acrylic paint and a flat brush. I put the flower wheels on this background and drew random flowers in a variety of colours, using the markers I bought."

Blog 17 - Painting with Oils on Paper
"A while ago I did a blog on strengthening paper with gesso. I showed you how it was possible to turn any paper, even printer paper of 80 gsm, into paper that was strong enough to handle paint. This blog follows up on that one, showing you how I continue with oil colours on one of the papers I prepared in this way."

Blog 18 - Small Paintings Triptych Part 1 of 2
"I love today's project, because it cost me next to nothing to make, since I worked solely on cut-off pieces of wood, that most other people would have discarded. See how nice it turned out?"

Blog 19 - Small Paintings Triptych Part 2 of 2
"Yesterday I published the first of two blogs on how to turn some discarded wood off-cuts into decorative works of art. This follow-up blog will give you the final steps in the process."

Blog 20 - Mosaic a Tactile Mirror
"One of my besties has a birthday coming up. To an artist/crafter this means an opportunity to make something PRETTY! This time it would have to be a little different. This friend of mine is completely blind. I have painted something for her in the past which she could enjoy (I'll do a blog about that in the future) and I wanted to once again make her something that she could enjoy, but which would still serve a decorative and useful purpose in her house. My choice fell on a mosaic mirror."

Blog 21 - Compiling a Masonite Album Part 1 of 3
"I have talked a lot about masonite albums for art journaling and scrapbooking in previous blogs. In the next three blogs I am going to show you how to bring it all together. But let's first recap what has already been covered:

Blog 22 - Compiling a Masonite Album Part 2 of 3
"I have talked a lot about masonite albums for art journaling and scrapbooking in previous blogs. Yesterday I started the first of three blogs, showing you how to put together an album that is visually appealing. But let's first recap what has already been covered:

Blog 23 - Compiling a Masonite Album Part 3 of 3
"It is finally time to start putting the album, that we have been working on over the last couple of weeks, together. But let's first recap what has already been covered:

"One of my besties has a birthday coming up. To an artist/crafter this means an opportunity to make something PRETTY! This time it would have to be a little different. This friend of mine is completely blind. I have painted something for her in the past which she could enjoy (I'll do a blog about that in the future) and I wanted to once again make her something that she could enjoy, but which would still serve a decorative and useful purpose in her house. My choice fell on a mosaic mirror."

Blog 21 - Compiling a Masonite Album Part 1 of 3
"I have talked a lot about masonite albums for art journaling and scrapbooking in previous blogs. In the next three blogs I am going to show you how to bring it all together. But let's first recap what has already been covered:
- The starting point would be the blog on Making a Masonite Album;
- There were three widely different blogs on how to decorate these albums, the first one showing you how to Decorate with Tea Bags;
- The second one was on Decorating a Girly Album;
- The third one showed you how to do a Mosaic Album Cover.

Blog 22 - Compiling a Masonite Album Part 2 of 3
- The starting point would be the blog on Making a Masonite Album;
- There were three widely different blogs on how to decorate these albums, the first one showing you how to Decorate with Tea Bags;
- The second one was on Decorating a Girly Album;
- The third one showed you how to do a Mosaic Album Cover.

Blog 23 - Compiling a Masonite Album Part 3 of 3
"It is finally time to start putting the album, that we have been working on over the last couple of weeks, together. But let's first recap what has already been covered:
- The starting point would be the blog on Making a Masonite Album;
- There were three widely different blogs on how to decorate these albums, the first one showing you how to Decorate with Tea Bags;
- The second one was on Decorating a Girly Album;
- The third one showed you how to do a Mosaic Album Cover.

Blog 24 - At the Cross
"It is Easter Friday. This is the day on which we as Christians commemorate the indescribable grace Christ Jesus showed us when He willingly laid down His life so that our broken relationship with God could be restored. I did not want to simply publish another blog today. Instead, I wanted to write a blog that would bring honour to Jesus and underscore His sacrifice on the cross."

"It is Easter Friday. This is the day on which we as Christians commemorate the indescribable grace Christ Jesus showed us when He willingly laid down His life so that our broken relationship with God could be restored. I did not want to simply publish another blog today. Instead, I wanted to write a blog that would bring honour to Jesus and underscore His sacrifice on the cross."
Blog 25 - Fabulously Easy Key Holder
"Have you ever noticed how keys have a tendency to multiply without any effort? My mom suddenly found herself with such an increase in keys and exasperatedly voiced the opinion that my brothers (who are carpenters and a great source of off-cut wood to their crafting sister) ought to make her a bigger key holder. I figured I was better suited to the task and set out to prove it. This blog details what followed."

"Have you ever noticed how keys have a tendency to multiply without any effort? My mom suddenly found herself with such an increase in keys and exasperatedly voiced the opinion that my brothers (who are carpenters and a great source of off-cut wood to their crafting sister) ought to make her a bigger key holder. I figured I was better suited to the task and set out to prove it. This blog details what followed."
Blog 26 - Acrilpen on Fabric
"I recently came across a product I had never seen before – an acrylic pen, claiming to be filled with acrylic ink intended for writing on fabrics. I wondered how well they worked and if they kept their colour, and if you could use it with other acrylics on paper and … What to do? Buy a few and bring them home to put them to the test, of course! So I did. And I loved them. The name of the pens? Acrilpen."

"I recently came across a product I had never seen before – an acrylic pen, claiming to be filled with acrylic ink intended for writing on fabrics. I wondered how well they worked and if they kept their colour, and if you could use it with other acrylics on paper and … What to do? Buy a few and bring them home to put them to the test, of course! So I did. And I loved them. The name of the pens? Acrilpen."
Blog 27 - Acrilpen on Paper
"In a previous blog I told you about the acrylic pens I bought and tested, called Acrilpen. It states on the pens that they are meant to be used on fabric and I have tried it on fabric already, posting my findings here. I was not done with those pens yet. I still wanted to know how they would fare on paper! I keep a few sheets of paper at hand that has been prepared with gesso. I talked about strengthening paper with gesso to prepare it to accept paint in a previous blog as well. I grabbed one of these sheets, because I would want to use the pens in combination with normal acrylic paint to see how well it worked together."

"In a previous blog I told you about the acrylic pens I bought and tested, called Acrilpen. It states on the pens that they are meant to be used on fabric and I have tried it on fabric already, posting my findings here. I was not done with those pens yet. I still wanted to know how they would fare on paper! I keep a few sheets of paper at hand that has been prepared with gesso. I talked about strengthening paper with gesso to prepare it to accept paint in a previous blog as well. I grabbed one of these sheets, because I would want to use the pens in combination with normal acrylic paint to see how well it worked together."
Blog 28 - Using the Mouth Atomizer with Ink
"The main aim of today’s project is to show you how to use the mouth atomizer with ink. I am going to make a page for my art journal commemorating a painting I have done repeatedly for clients (albeit every time with small changes). The scene is of the Knysna heads in theWestern Cape province of South Africa

"The main aim of today’s project is to show you how to use the mouth atomizer with ink. I am going to make a page for my art journal commemorating a painting I have done repeatedly for clients (albeit every time with small changes). The scene is of the Knysna heads in the
Blog 29 - Decoupage Glass Tiles Part 1 - Cutting the glass to size
"One of the blog followers contacted me recently to ask if I knew of anyone who might be interested in purchasing sheets of glass. I did not and suggested I rather do a few blog on using glass for crafts and she seemed keen on the idea. Here is the first of these blogs with promises of more to follow."

Blog 30 - Decoupage Glass Tiles Part 2 - Decoupage the cut glass tiles
"In the previous blog I showed you how to cut glass. Actually it was more like learning together. In this blog we take the next step and I’ll show you how to decoupage glass to create your own glass tiles."
"One of the blog followers contacted me recently to ask if I knew of anyone who might be interested in purchasing sheets of glass. I did not and suggested I rather do a few blog on using glass for crafts and she seemed keen on the idea. Here is the first of these blogs with promises of more to follow."
Blog 30 - Decoupage Glass Tiles Part 2 - Decoupage the cut glass tiles
"In the previous blog I showed you how to cut glass. Actually it was more like learning together. In this blog we take the next step and I’ll show you how to decoupage glass to create your own glass tiles."
Blog 31 - Painting Flowers using Leaves
"This blog is aimed at breaking through the misconception a lot of people seem to have that they can't paint. I am going to use some unconventional methods to help you paint the picture below. Once you have done this, I hope that you will feel more confidant to pick up a brush and paint so as to start creating the wonderful pictures you have always dreamed of doing. This is also a fun painting project to do with kids, allowing for a great deal of freedom and easy success."

"This blog is aimed at breaking through the misconception a lot of people seem to have that they can't paint. I am going to use some unconventional methods to help you paint the picture below. Once you have done this, I hope that you will feel more confidant to pick up a brush and paint so as to start creating the wonderful pictures you have always dreamed of doing. This is also a fun painting project to do with kids, allowing for a great deal of freedom and easy success."
Blog 32 - Mixed Media Art Journal - The measure of a woman
"Today's project is a fun one in which we are going to make a page for our art journal. I have the concept of womanhood in my mind and I keep playing with the word measurement, perhaps because I've been cutting out patterns."

"Today's project is a fun one in which we are going to make a page for our art journal. I have the concept of womanhood in my mind and I keep playing with the word measurement, perhaps because I've been cutting out patterns."
Blog 33 - Mosaic a Tissue Box Cover
"I was very excited to start today's blog project. As a matter of fact, I have been looking forward to it for a very long time and now finally I get to it. Remember those glass tiles we made ourselves in a previous blog? Let me refresh your memories. We cut glass tiles and then decoupaged pretty pictures on the backs of them to create our own beautiful glass tiles. Click here to read that blog. Here is what we are going to be making today."

"I was very excited to start today's blog project. As a matter of fact, I have been looking forward to it for a very long time and now finally I get to it. Remember those glass tiles we made ourselves in a previous blog? Let me refresh your memories. We cut glass tiles and then decoupaged pretty pictures on the backs of them to create our own beautiful glass tiles. Click here to read that blog. Here is what we are going to be making today."
Blog 34 - Using Derwent Inktense on Fabric
"Derwent is renowned for great quality art products and their Inktense pencils and bars certainly rank among the best watersoluble products on the market today. I fell in love with Inktense on first use because if its intense vibarant colours. I had read that it could be used on fabric, but remained so fascinated by the beautiful results I got on paper, that I never bothered with using them on fabric. Then I started making hand-painted handbags and suddenly my interest was peeked by everything that promised to put colour on fabric. I dove into my art supplies and pulled out the Inktense sets."

"Derwent is renowned for great quality art products and their Inktense pencils and bars certainly rank among the best watersoluble products on the market today. I fell in love with Inktense on first use because if its intense vibarant colours. I had read that it could be used on fabric, but remained so fascinated by the beautiful results I got on paper, that I never bothered with using them on fabric. Then I started making hand-painted handbags and suddenly my interest was peeked by everything that promised to put colour on fabric. I dove into my art supplies and pulled out the Inktense sets."
Blog 35 - Using Inktense on Wood
"Today's blog is about using Derwent's Inktense on wood. I know you will think me silly for even attempting this, but I found myself in a tight spot recently. You see, I had decided to show you how great Inktense was when used on fabric. You can read all about this here. When I was done, I liked the project so much that I did not want to condemn it to an album, but decided that I could much more easily use it in a panel for one of my Art Bags. I naturally painted a second one and had all but made up my mind to paint the handles with acrylic paint when it dawned on me that I might very well be able to use the Inktense itself to paint the handles as well. This would have the advantage of colours and techniques matching automatically. I simply had to give it a try."

"Today's blog is about using Derwent's Inktense on wood. I know you will think me silly for even attempting this, but I found myself in a tight spot recently. You see, I had decided to show you how great Inktense was when used on fabric. You can read all about this here. When I was done, I liked the project so much that I did not want to condemn it to an album, but decided that I could much more easily use it in a panel for one of my Art Bags. I naturally painted a second one and had all but made up my mind to paint the handles with acrylic paint when it dawned on me that I might very well be able to use the Inktense itself to paint the handles as well. This would have the advantage of colours and techniques matching automatically. I simply had to give it a try."
Blog 36 - Mosaic a tissue box with uneven tiles
"A while ago I showed you how to decoupage your own glass tiles for mosaic projects. Since then, I have been having great fun putting those tiles to work in my own projects. I recently showed you one of these projects where I used the glass tiles to decorate a tissue box cover. I then started wondering if I could use tiles of uneven height on another tissue box cover. I've done this successfully on flat surfaces in previous blogs, but not on a 3 dimensional surface. To increase the difficulty level of the project, I decided to use a box with a more intricate pattern on the opening. Want to see what I did?"

"A while ago I showed you how to decoupage your own glass tiles for mosaic projects. Since then, I have been having great fun putting those tiles to work in my own projects. I recently showed you one of these projects where I used the glass tiles to decorate a tissue box cover. I then started wondering if I could use tiles of uneven height on another tissue box cover. I've done this successfully on flat surfaces in previous blogs, but not on a 3 dimensional surface. To increase the difficulty level of the project, I decided to use a box with a more intricate pattern on the opening. Want to see what I did?"
Blog 37 - Covering buttons with fabric
"There was a time when everybody knew how to cover buttons with fabric. Then covered buttons became unfashionable, as did wearing home-sewn clothes. Lately this has changed, partly due to the poor quality of workmanship in factory made clothing and partly due to the fact that there is a new-found appreciation for craftsmanship of any kind, including sewing and tailoring. Buttons have also moved out of needlepoint and into a variety of other crafts, making it all the more popular to once again learn the neglected 'art' of covering buttons in fabric."

"There was a time when everybody knew how to cover buttons with fabric. Then covered buttons became unfashionable, as did wearing home-sewn clothes. Lately this has changed, partly due to the poor quality of workmanship in factory made clothing and partly due to the fact that there is a new-found appreciation for craftsmanship of any kind, including sewing and tailoring. Buttons have also moved out of needlepoint and into a variety of other crafts, making it all the more popular to once again learn the neglected 'art' of covering buttons in fabric."
Blog 38 - Transferring an image from paper to fabric
"I've had this fabulous paper in my paper stash for a few years now and have always been reluctant to use it because I loved it so much. Have you experienced the same? I found the perfect craft for it though when I was looking for a design for two panels for a handbag I was making. This design would be perfect! But how to get it from paper to fabric? No fear, there is a great product on the market for this purpose; Dala's Picture Perfect!"

Blog 39 - Rock, paper, scissors? No! Paper, fabric, wood - all in one project
"We spent a great many hours yesterday transferring an image from paper to fabric. What do we do with it now? Well, I turned it into a handbag, but you are free to do with it what you please. Let me share with you some of my ideas."

"I've had this fabulous paper in my paper stash for a few years now and have always been reluctant to use it because I loved it so much. Have you experienced the same? I found the perfect craft for it though when I was looking for a design for two panels for a handbag I was making. This design would be perfect! But how to get it from paper to fabric? No fear, there is a great product on the market for this purpose; Dala's Picture Perfect!"
Blog 39 - Rock, paper, scissors? No! Paper, fabric, wood - all in one project
"We spent a great many hours yesterday transferring an image from paper to fabric. What do we do with it now? Well, I turned it into a handbag, but you are free to do with it what you please. Let me share with you some of my ideas."
Blog 40 - Mixed Media Collage Board Part 1 of 2
"I have been stuck in front of the sewing machine for the past week and my fingers are itching to get back into my art and craft supplies. A lot of people have been asking about transferring an image to wood the same way I transferred the image to fabric in an earlier blog. I planned today's blog around this request and will show you how to go about this. I will also do some distressing, stamping and all sorts of other fun stuff. Do not miss these two blogs! Today's project combines so many techniques that I will rather split it over two blogs in order to keep the amount of photos down per blog, making it easier for you to open the post."

Blog 41 - Mixed Media Collage Board Part 2 of 2
"We started with the creation of a mixed media collage in yesterday's blog and today we will finish it. Let's recap. Yesterday we did two kinds of decoupaging; one transferred the image to the surface, while the other simply stuck the paper to the surface. Today we will do some distressing, inking, stamping and journaling before we are done. Let's get started!"
"I have been stuck in front of the sewing machine for the past week and my fingers are itching to get back into my art and craft supplies. A lot of people have been asking about transferring an image to wood the same way I transferred the image to fabric in an earlier blog. I planned today's blog around this request and will show you how to go about this. I will also do some distressing, stamping and all sorts of other fun stuff. Do not miss these two blogs! Today's project combines so many techniques that I will rather split it over two blogs in order to keep the amount of photos down per blog, making it easier for you to open the post."
Blog 41 - Mixed Media Collage Board Part 2 of 2
"We started with the creation of a mixed media collage in yesterday's blog and today we will finish it. Let's recap. Yesterday we did two kinds of decoupaging; one transferred the image to the surface, while the other simply stuck the paper to the surface. Today we will do some distressing, inking, stamping and journaling before we are done. Let's get started!"
Blog 42 - Comparing and testing permanent markers for craft purposes
"I recently had a client contacting about markers, wanting something that would be able to write on wood without smudging or smearing. It had to be of high quality and permanent. Sometimes the wood would be painted and other times not. Sadly she had wasted money on a substandard marker and got uneven lines that had darker and lighter spots in it at random. This could be the ruin of any project. So how do you know what to buy? Good quality markers do not come cheap and if you are going to pay good money, you want good quality. With this incident in mind, I decided to put a few high end markers to the test to give you an idea of what they are capable of. These are all available in store on APrettyTalent.com if you click here."

"I recently had a client contacting about markers, wanting something that would be able to write on wood without smudging or smearing. It had to be of high quality and permanent. Sometimes the wood would be painted and other times not. Sadly she had wasted money on a substandard marker and got uneven lines that had darker and lighter spots in it at random. This could be the ruin of any project. So how do you know what to buy? Good quality markers do not come cheap and if you are going to pay good money, you want good quality. With this incident in mind, I decided to put a few high end markers to the test to give you an idea of what they are capable of. These are all available in store on APrettyTalent.com if you click here."
Blog 43 - Make a Stylish Photo Pin-Up Board
"Ever since I bought this fabric to make a series of handbags from, I have been toying with the idea of using it to make a comforter and some scatter cushions from. I was working towards a goal though, and did not spend too much time pondering the idea. Then I had some time today and decided to make a photo pin-up board with the little fabric I had left. I loved this so much that I think I will buy some more fabric if it is still available and make the bed set after all. In the meantime, let me show you how to make this Photo Pin-Up Board for yourself. Or simply buy the one in the picture from APrettyTalent.com by clicking here."

"Ever since I bought this fabric to make a series of handbags from, I have been toying with the idea of using it to make a comforter and some scatter cushions from. I was working towards a goal though, and did not spend too much time pondering the idea. Then I had some time today and decided to make a photo pin-up board with the little fabric I had left. I loved this so much that I think I will buy some more fabric if it is still available and make the bed set after all. In the meantime, let me show you how to make this Photo Pin-Up Board for yourself. Or simply buy the one in the picture from APrettyTalent.com by clicking here."
Blog 44 - Choosing between using markers or paint
"I have been working quite a bit with markers over the past few projects and when it came time to paint two more sets of handles for handbags I was making, I wondered how far I could push the markers? Could they replace paint altogether? Whenever I ask questions like these, I put it to the test to find out the answers. I share my findings with you in this blog after I discovered there is no clear cut answer that applies to all."

"I have been working quite a bit with markers over the past few projects and when it came time to paint two more sets of handles for handbags I was making, I wondered how far I could push the markers? Could they replace paint altogether? Whenever I ask questions like these, I put it to the test to find out the answers. I share my findings with you in this blog after I discovered there is no clear cut answer that applies to all."
Blog 45 - Make a Travel Booklet for your Earrings
"It is difficult enough to keep your jewelry organized and handy at home. The task becomes ever so much more intricate when traveling. On my last birthday I received a couple of sets of earrings neatly presented in a booklet folder. I immediately saw the potential of this for traveling. Simply add your favorite earrings and pop it in your vanity. No more scratching to find the other half of the pair. Tidy, compact, easy to make and, to top it all, CHEAP, this project offers a solution to many a traveller's problems. All I did was to make it slightly larger to accommodate my more bulky earrings and to add a second ribbon to secure it better for those pesky long earrings that always seem to want to slide out."

"It is difficult enough to keep your jewelry organized and handy at home. The task becomes ever so much more intricate when traveling. On my last birthday I received a couple of sets of earrings neatly presented in a booklet folder. I immediately saw the potential of this for traveling. Simply add your favorite earrings and pop it in your vanity. No more scratching to find the other half of the pair. Tidy, compact, easy to make and, to top it all, CHEAP, this project offers a solution to many a traveller's problems. All I did was to make it slightly larger to accommodate my more bulky earrings and to add a second ribbon to secure it better for those pesky long earrings that always seem to want to slide out."
Blog 46 - Make a Creative Roll as Gift for a Creative Friend
"One of the groups I am part of on Facebook came up with the idea to make a Creative Roll and then the members share it among each other. Or perhaps they borrowed it from somewhere? Anyway, I loved the idea and jumped at the chance to be a part of this. The idea is to cut a length of fabric to which you attach all sorts of nick knacks which can be put to creative use. I expand a bit on this idea in today's blog. All of the products listed in this discussion are available in APrettyTalent.com. Simply click on the highlighted word for easy navigation to the listed products."

"One of the groups I am part of on Facebook came up with the idea to make a Creative Roll and then the members share it among each other. Or perhaps they borrowed it from somewhere? Anyway, I loved the idea and jumped at the chance to be a part of this. The idea is to cut a length of fabric to which you attach all sorts of nick knacks which can be put to creative use. I expand a bit on this idea in today's blog. All of the products listed in this discussion are available in APrettyTalent.com. Simply click on the highlighted word for easy navigation to the listed products."
Blog 47 - Painting Proteas on a Runner Part 1
"I have been asked to paint a table runner with Proteas, to match a set of place-mats and coasters. Since the client was thousands of kilometres away, I only had photographs to work from. The challenge was on! Let me show you how I met it."

Blog 48 - Painting Proteas on a Runner Part 2
"In Part 1 of this project we carefully planned and drew the Proteas on the runner. We then started adding color with Acrilpen, outlining the various parts to make the drawings clearer and to add essential shadows. Today we start painting in all earnest."

"I have been asked to paint a table runner with Proteas, to match a set of place-mats and coasters. Since the client was thousands of kilometres away, I only had photographs to work from. The challenge was on! Let me show you how I met it."
Blog 48 - Painting Proteas on a Runner Part 2
"In Part 1 of this project we carefully planned and drew the Proteas on the runner. We then started adding color with Acrilpen, outlining the various parts to make the drawings clearer and to add essential shadows. Today we start painting in all earnest."
Blog 49 - Chalk Paint Place Mats
"Chalk Paint is all the rage these days and painters and designers alike love them for the chalky finish that lends itself to distressing and vintage styles. It is about time we did a blog on chalk paints then! In today's blog I am going to paint a set of 4 place mats with chalk paint. These place mats are available from APrettyTalent.com at Miekie Crafts. Click here to purchase these."

"Chalk Paint is all the rage these days and painters and designers alike love them for the chalky finish that lends itself to distressing and vintage styles. It is about time we did a blog on chalk paints then! In today's blog I am going to paint a set of 4 place mats with chalk paint. These place mats are available from APrettyTalent.com at Miekie Crafts. Click here to purchase these."
Blog 50 - Chalk Paint & Decoupage Combo Warmer Mats
"I love the mat finish that you get from chalk paint. It makes a lovely background for a variety of products and is brilliant for use on furniture. Today I decorate a set of 4 warmers for the table or sideboard to put the warm pots on. I again paint a distressed background with chalk paint before I make my own flowers to decoupage onto the background. This set is available from APrettyTalent.com under Miekie Crafts. Click here to navigate there."

"I love the mat finish that you get from chalk paint. It makes a lovely background for a variety of products and is brilliant for use on furniture. Today I decorate a set of 4 warmers for the table or sideboard to put the warm pots on. I again paint a distressed background with chalk paint before I make my own flowers to decoupage onto the background. This set is available from APrettyTalent.com under Miekie Crafts. Click here to navigate there."
For more crafty ideas and great products, visit APrettyTalent.com.
Remember to keep nurturing your TALENT for making PRETTY things.
You can subscribe to this blog and receive regular updates by email by simply registering your email address at the top of the current blog.
Remember to keep nurturing your TALENT for making PRETTY things.
You can subscribe to this blog and receive regular updates by email by simply registering your email address at the top of the current blog.
No comments:
Post a Comment