
Tea stains have some of the warmest, richest colours you can find. Add to that the fact that tea bags are wonderfully absorbent, semi-transparent and a perfect surface to paint/draw on, and you have a perfect product for your next craft product.
Save your teabags after you used them. Dry them on an old newspaper, cooling rack or something well ventilated.

When they are perfectly dry, snip them open with some sharp scissors and empty the contents. Save this to add to your plants. Mine went straight to the herb garden that I planted in an old bath tub after renovating the bathroom.


You will now need a paint brush, acrylic gel medium, the empty tea bags and the surface you want to work on. I have decoupaged tea bags onto stretched canvas, paper and wood with equal success. For this project I chose a masonite album that my nephew (13) makes to supplement his allowance.

Paint a corner, just bigger than the size of a tea bag with the Acrylic Gel Medium. Carefully position your bag in place. Paint over the bag with the acrylic gel medium and paint the space for the next tea bag. Repeat this step until the whole board is covered. We are relying in the excellent adhesive qualities of the gel medium in this project.
When you reach the edges of your board, you will need to decide whether you want to let the bags run over, or whether you want them to overlap. I opted to let them overlap. If you let them run over, you'll have to wait till it is completely dry before you trim the edges. My tea bags did not quite make it to the bottom of my board, but I decided to leave it be. I had other ideas with the bottom anyway.


With everything properly pasted down and a good layer of acrylic gel medium on top, I take a coffee break while I wait for it to dry. This will take a substantial amount of time, depending on the temperature of the day and humidity. It was right about now that a good thunderstorm struck where I was and I had to wait for the next day before I could continue. The sky had turned so dark that it made it impossible to take good pictures.

The following day I had two perfectly dry covers to work with.


All that remained to do, was to finish the bottom edge of the front cover. I decided to use Washi Tape for this.

This is a close-up of the bottom once the washi tape was stuck down.

With the surfaces of the album covers prepared, it was time to start decorating them. My intention is to use the album to collect and store art journal pages. The covers had to say something about that. I always keep a handy assortment of paper cut-outs in an album. Most of these are from wrapping paper that I either recycle or buy for the purpose of cutting them to pieces. I find it therapeutic to cut these out in front of the TV or with an audio book playing in the background. I had the perfect stash for this project.


I was right about now that I remembered I hadn't re-opened the holes in the album yet after covering them with the tea bags. I grabbed my sharp point scissors and set to work. Simply shoving the scissors in there and twisting them around, ought to be enough. Cut only the stubborn pieces away.


I once again set my front cover aside to dry and turned to the back cover. It was at this moment that I had to sit down and have a good laugh at myself. I made very sure that my sheet music was not upside down, but not pay the album the same attention. The holes were on the wrong side and my music score would end up upside down after all! Never mind, I'll turn it into a focus point. That is after all what art journalling is about; learning to accept and love yourself as you are, mistakes and all.
Once again I had the perfect stash of pictures in my album and I pulled them closer, repeating the same process of selecting and eliminating, until I was satisfied with the results, before I decoupaged everything into place.


I again had to wait until the next day before I could continue. I still wanted to add some journal writing to the covers. I opted to use my Pigma Pens for this purpose and did not want to mess them up by working on a surface that might still be slightly wet.


I added the writing on the front cover.


Then I added the writing on the back cover. Here I chose to stick a wooden heart down, rather than to write out the word 'heart'. I used Tombow's glue for this purpose, since I know that the album will be handled a lot and this glue should be able to withstand it.


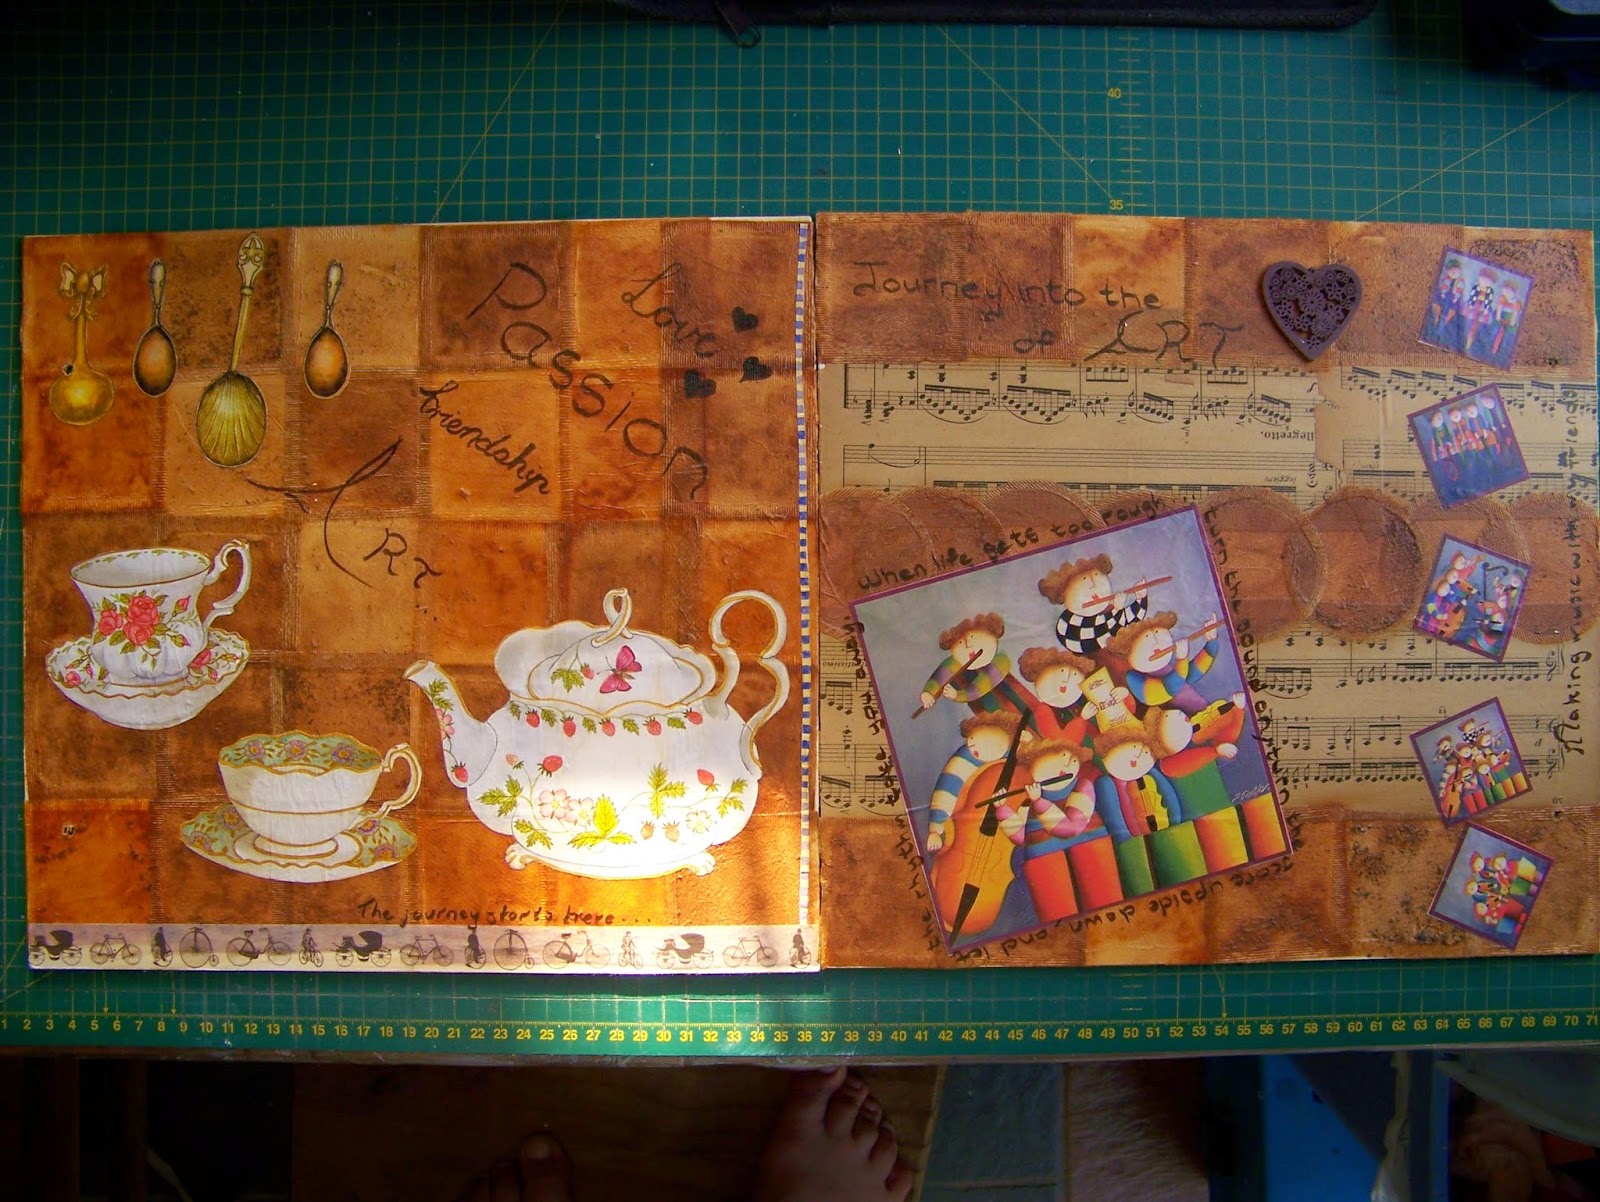
This is what the album covers look like when laid down 'spine' to 'spine'.
Product Links:
Dala Acrylic Gel
Medium: http://aprettytalent.com/products/dala-acrylic-gel-medium
Masonite albums: http://aprettytalent.com/products/ruans-crafts
Die-cut pictures: http://aprettytalent.com/products/vintage-romantic-die-cut-pictures
No comments:
Post a Comment