
I built the mosaic on a 12"x12" palet. My selection of tiles was a compliment of red, orange, purple and shades of green. I started by cutting all of the tiles apart.

The tiles were then organized into colours.

I decided where I wanted the bird die-cuts to go on the layout.

I then used a ruler and pencil to divide the whole palet into 1"x1" squares.

I worked hard on distributing the tiles evenly across the board without creating any obvious colour pattern.

I then realized that I had forgotten to get my birds in place after drawing the squares and interrupted myself to attend to this first.

I traced the outline of the birds with a pencil onto the palet.

These outlines would allow me to remove the birds for planning the layout of the tiles, but I would easily be able to see where to add them in.

I then completed the random layout of the tiles.

I removed the tiles from where the birds were to go and cut out small tile pieces to fill the gaps surrounding the birds.

These small pieces of tile were carefully arranged in place.

I then replaced the birds to make sure they still fitted into the space left for them.


I laid them on top of the tiles to check how they fitted with my idea.

I then removed the tiles under them and laid them on the wood.

The tiles that were removed were laid in place on the side of the palet.

I then traced the outline of these shapes with a pencil.


Be careful of splinters when cutting tiles.

The cut tiles were carefully arranged around the shapes.

The same procedure was followed with the hearts.

I then carefully unpacked the mosaic row by row. A line of glue was laid down and the tiles replaced on top of the glue to fix it permanently to the palet.

Progress photo. At this stage all of the tiles are glued down, but the birds remain unfixed.

I had to wait till I got home before I could finish the project as I did not want to duplicate what I already had at home by buying more of the same while on holiday. When I finally could continue with the mosaic, I started by selecting four different patterned papers to decoupage the birds with. The important thing here was to make sure that the colors and style of the paper matched the general theme of the mosaic.

I put the paper aside for the moment and mixed some Light Grey Grout with water.

I generously lathered the grout all over the mosaic, filling all the gaps as well as possible.

I then put the birds in their places, wiping the excess grout away from the birds.

I left the birds in the mosaic until the grout started to set a little.

I then removed the birds before they were set in place, leaving the grout to continue drying.

Having washed and dried the birds, I traced their outlines on the base paper with a pencil.

I used a craft knife to cut the shapes out, but you could use a pair of sharp scissors with equal success.

I cut three hearts from the heart-patterned paper.

I traced the fronts of birds on a third of the patterned papers.

Laying the pieces on the bird, I could see the progress clearly.

I traced the wings and tails on the last of the patterned papers.


I likes how the pieces came together and duplicated this two more times for the remaining birds.

I would use Dala Acrylic Gel Medium for the decoupaging as this product has excellent adhesive qualities.

Paint the top of the bird with the gel medium.

Lay the base paper on top, rubbing out any trapped air bubbles and paint another layer of the gel medium over it.

Lay the front of the bird on top and paint with the gel medium again.

Get the wing in place and cover with the gel medium.
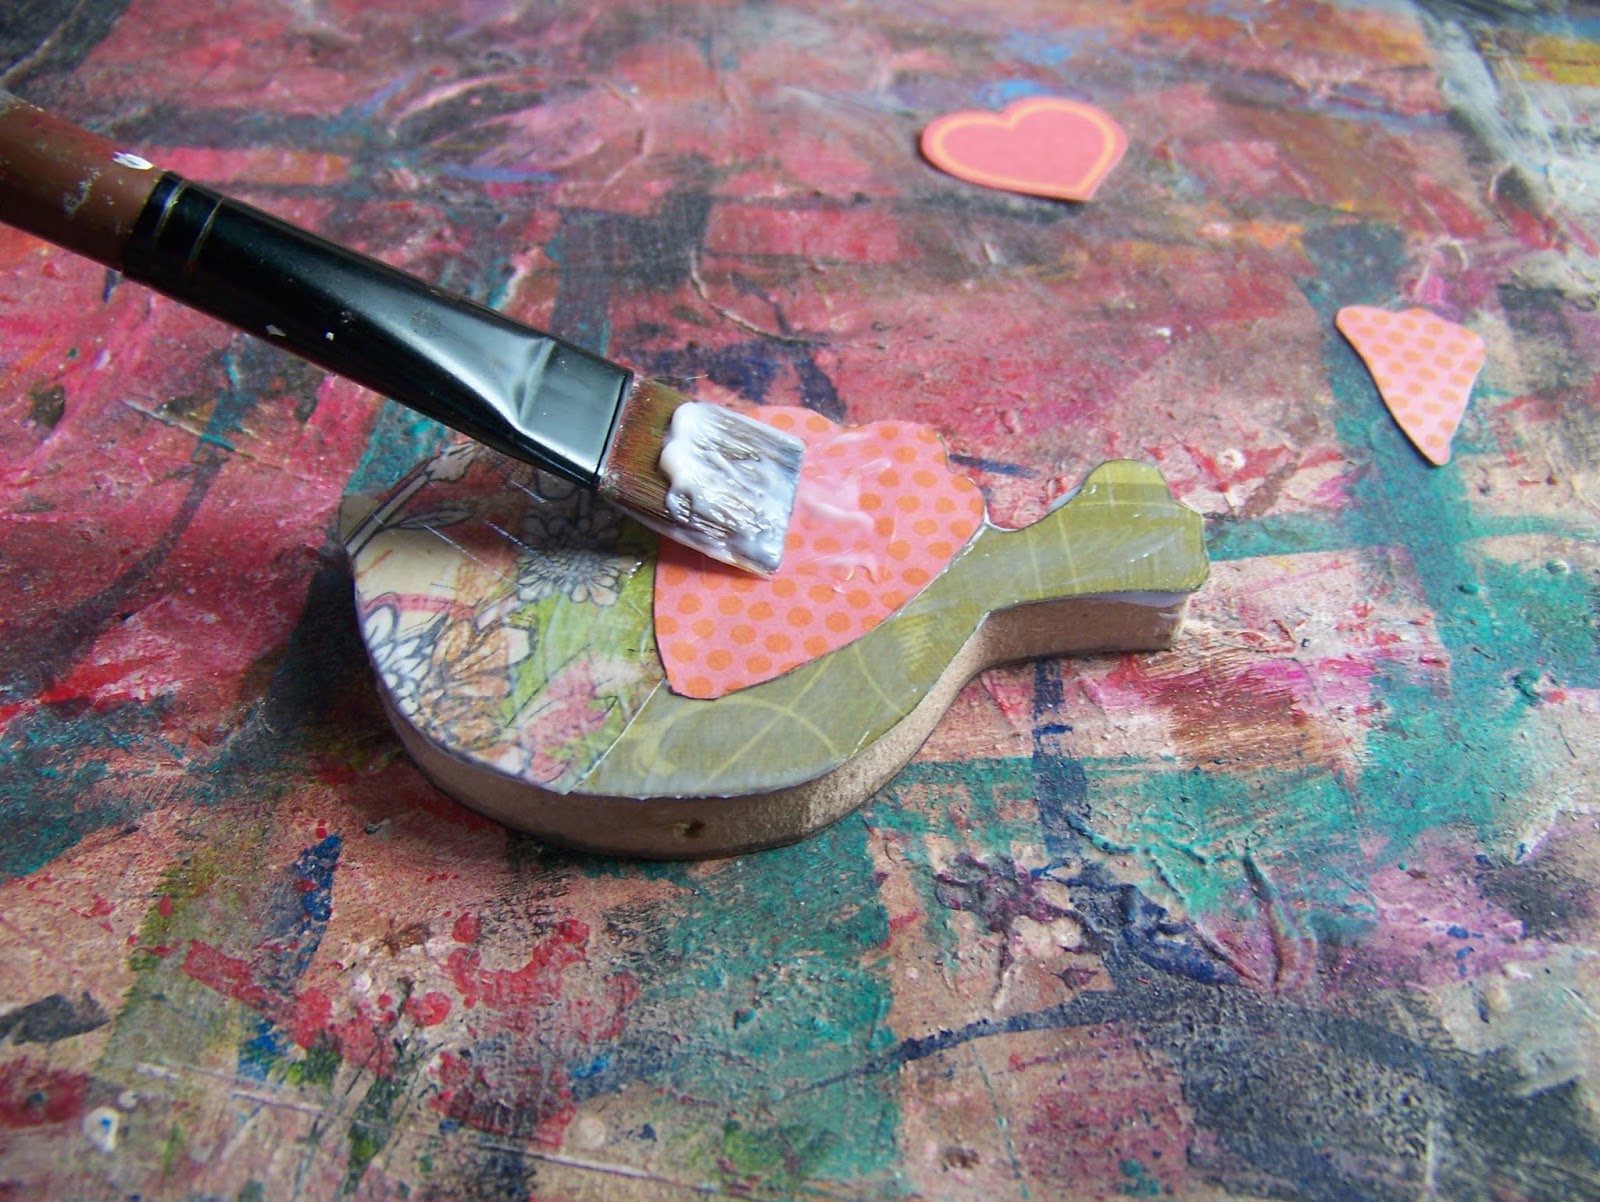
Now get the tail in place and paint with the gel medium.

Lastly the heart is laid in place and the whole bird is once again covered with the gel medium.

The bird is then left to dry.

The same procedure is repeated twice more for the other birds.

By this time my grout has dried enough for me to start wiping it away with a damp cloth.

I use a palette knife to work the grout out of the small grooves.

It was slow going, but finally the mosaic is clean.

I then return to the palette knife to scrape the excess grout away from the spaces left for the birds.

I then turn to Dala Acrylic Paint in Sap Green.

I use the acrylic paint to paint the sides of the palet.

I also use it to paint the sides of the birds. The paint is then given a few minutes to dry.

I then use a Sharpie Marker in Gold to add some details and outlines to the birds.

I apply wood glue to the backs of the birds.

The birds are finally stuck down in their places on the mosaic.

And at long last the project is done! This 3 Bird Mosaic is available for purchase from the Miekie Crafts collection on APrettyTalent.com.
This 3 Bird Mosaic is available for purchase from the Miekie Crafts collection on APrettyTalent.com.
For more crafty ideas and great products, visit APrettyTalent.com.
Remember to keep nurturing your TALENT for making PRETTY things.
You can subscribe to this blog and receive regular updates by email by simply registering your email address at the top of the current blog.
No comments:
Post a Comment