
Melette chose a wind pump as base for her mosaic.

She liked the idea of using shades of blue on the wind pump and I helped her to select a number of tiles and pebbles that would give her what she wanted.

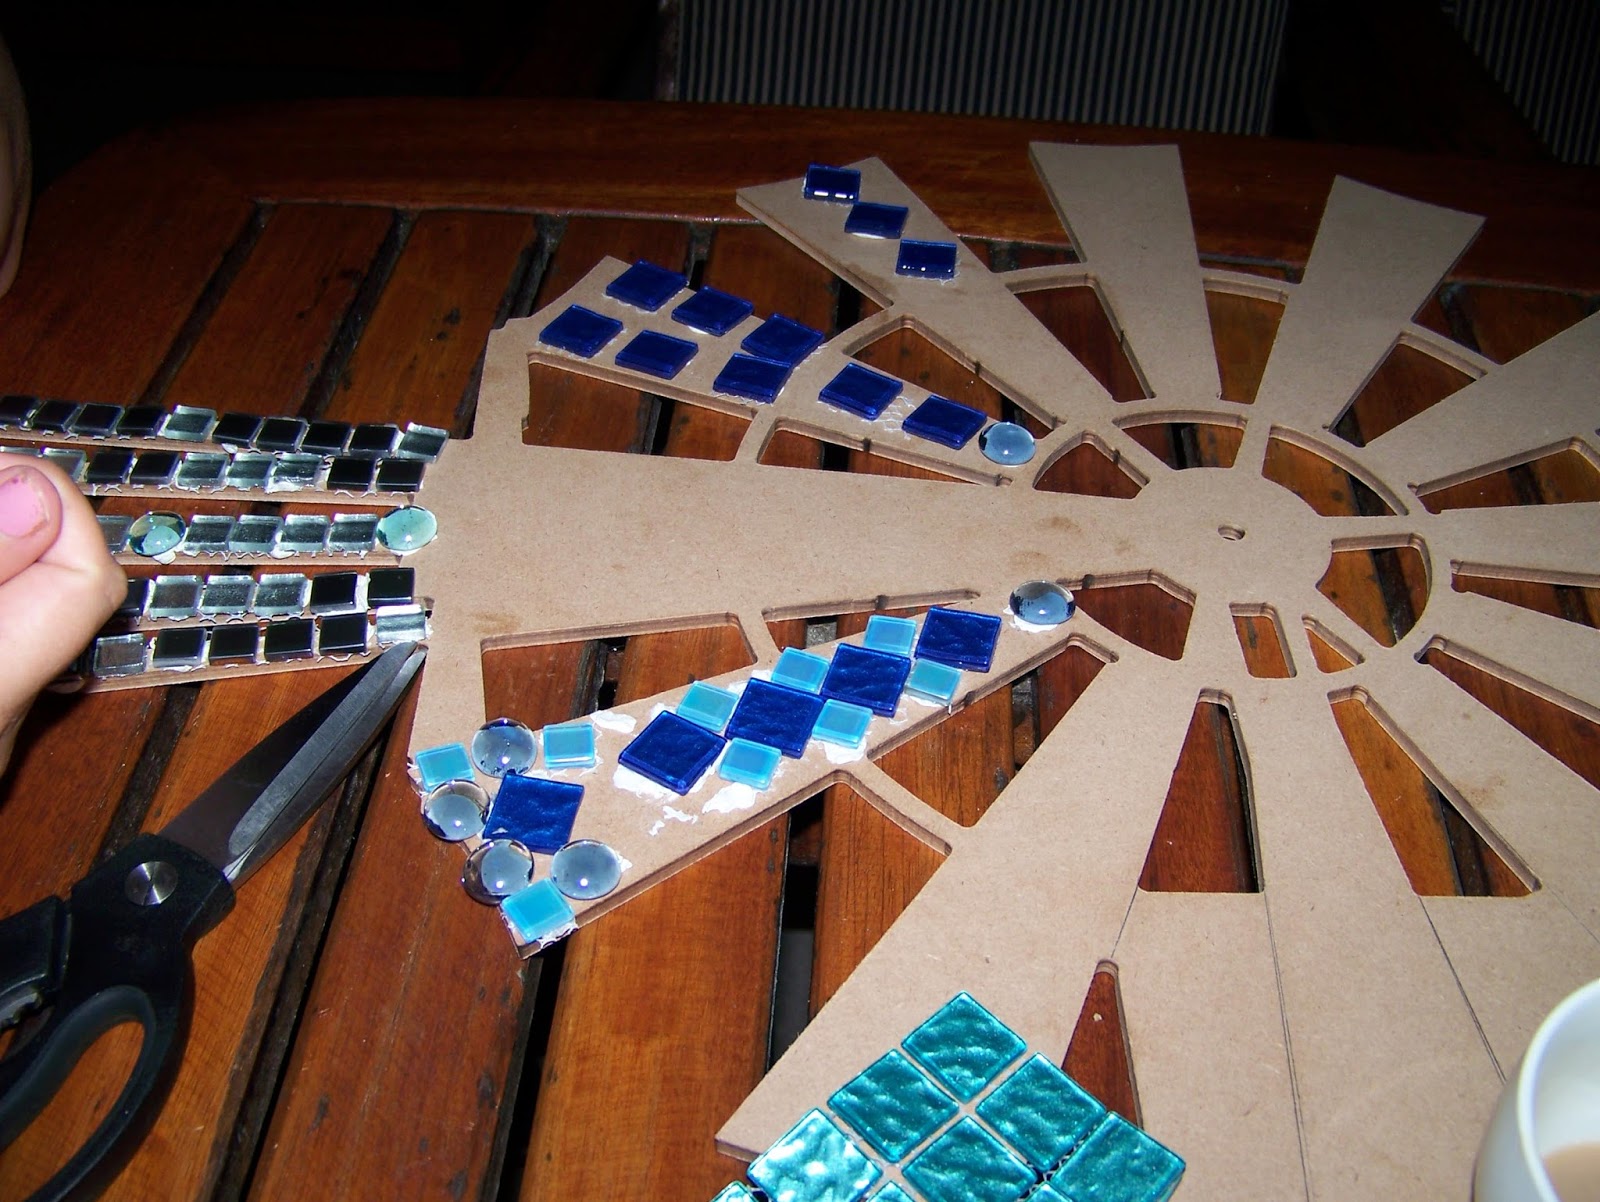
As the wind pump did not have engraved lines to show the detail where parts overlapped, I used a ruler, a pencil and a small plate to complete the lines.

I then used a craft knife to engrave the lines so as to make them 'visible' to her, who relied on sensory touch to see lines.

Having sorted the tiles into an order that made sense to Melette, she started on the legs of the wind pump, deciding herself on the pattern she wanted to mosaic and simply double-checking with me to make sure it was visually pleasing.

Melette needed no help in cutting the tiles apart or finding the right place for them on the wind pump. She temporarily fixed them to the wind pump with Prestik to make sure she did not shove them out of place again when feeling for the correct place to put the next tile.

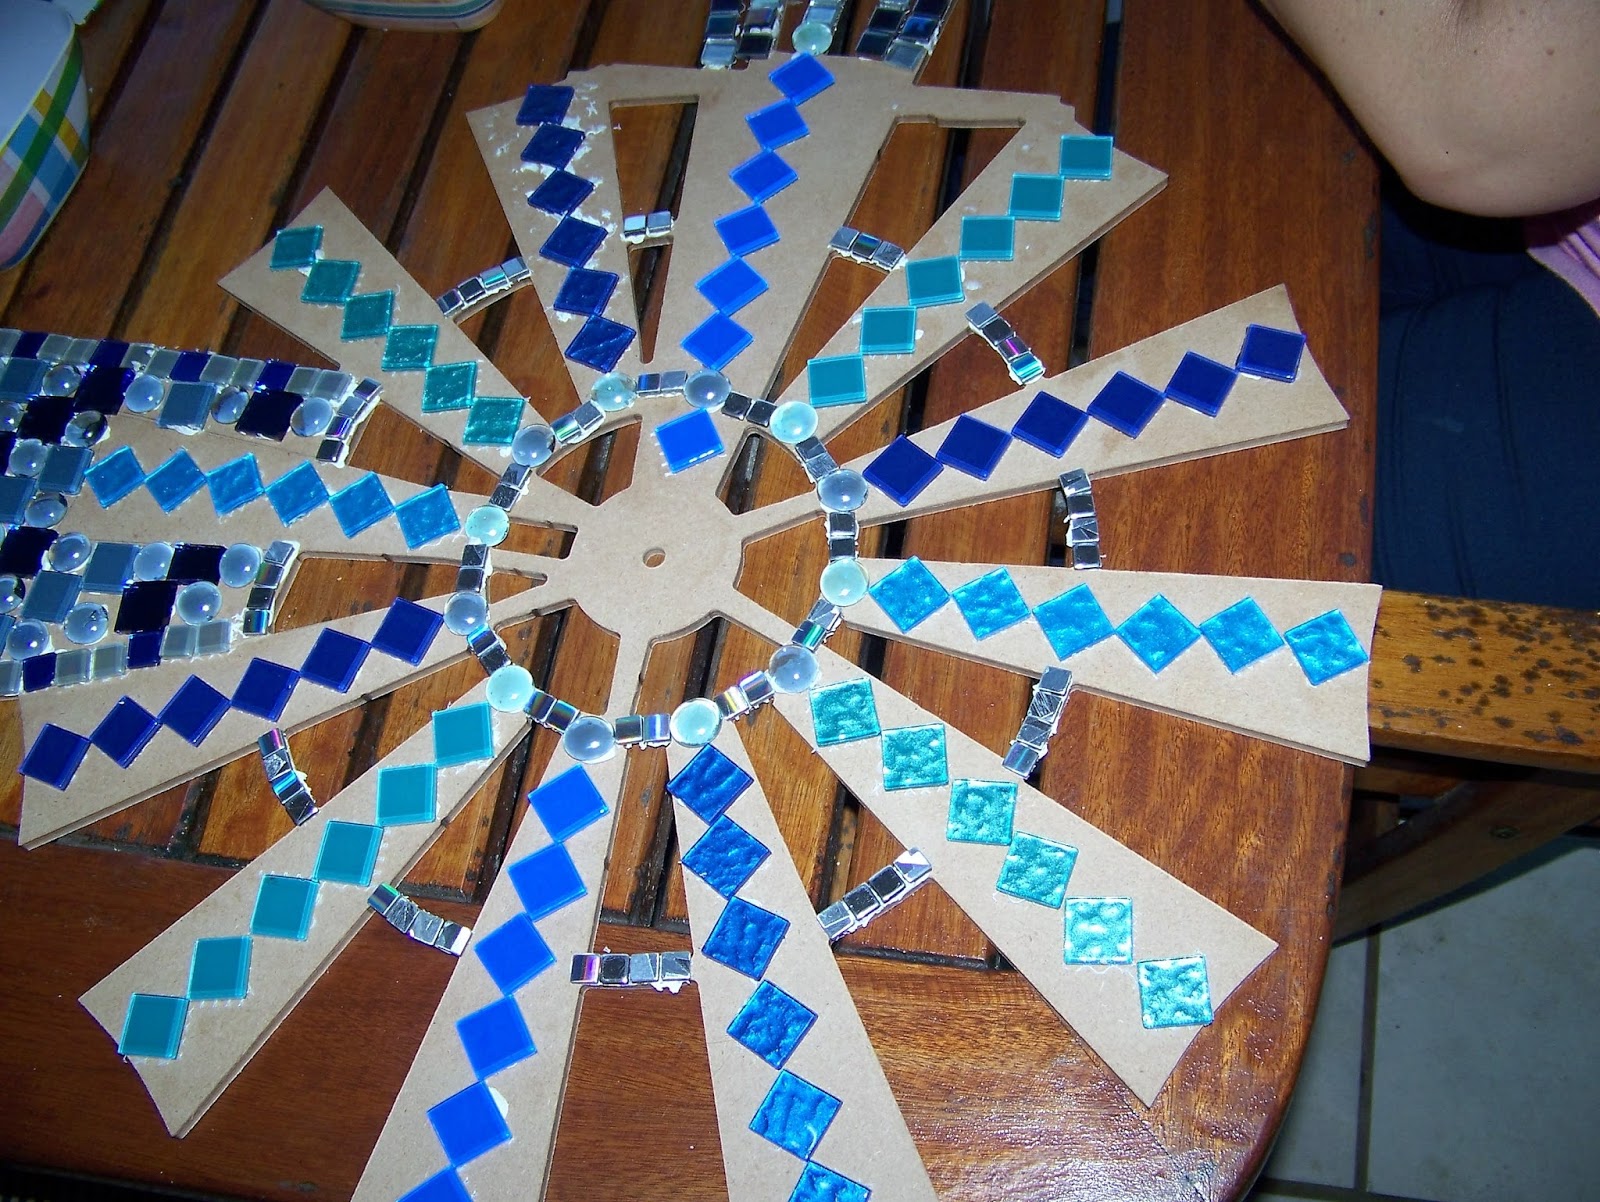
I snapped this quick progress shot once the legs and the pump rod were done.

Melette then double-checked to see that the tiles were neatly lined up. She would not glue any tiles down until the whole wind pump was laid out, to ensure that everything fitted correctly.

Next, she moved on to the blades. Melette experimented with a number of layouts before finally settling on the layout she finished the project with. I snapped a couple of these experiments.
Another possibility considered.

She then concluded that it would make more sense to build the fan first, as that would determine how much tiles she had left for the blades and how many more would be needed to purchase. She then started experimenting with layouts for this part of the wind pump.

Progress.

An overview of one of the experimental phases the wind pump underwent.

Melette finally settled on a layout for the fan that satisfied her.

At this stage she knew for certain that she did not have enough tiles to finish the project with and that she would not be able to plan properly until she acquired more tiles. So off we went to the shops once more to get some more tiles and came home with these beauties.

Having fixed on an idea for the blades, Melette laid out the centers for all of them.

She then moved on to the spikes to get those tiles in place.

Progress photo.
It was then time to start filling the gaps on the blades.

Progress photo of the layout of the blades.

All that was left to do, was to fill in the center and the platform for the layout part of the mosaic to be completed. Astonishingly beautiful!

The leftover tiles were organized into plastic bags.

Now came the task of unpacking the tiles row by row. The Prestik was then removed from the back of the tiles, as well as from the wood.

The unpacked tiles were carefully arranged in the sequence in which they were removed from the wind pump.

A line of glue was laid down where the tiles were removed.

The tiles were then carefully put back in place on top of the glue to fix them permanently in place.

Precious few tiles needed to be cut smaller, but I assisted when this was necessary.

Progress photo of the fan once the tiles were glued in place.

The legs were done in the same way as the fan, but we used a metal ruler to assist in lining the tiles up in a straight line.

Each blade is carefully unpacked.

Glue is applied to the blade.

Then the tiles are carefully put back in place.

This is the only way of ensuring that the pattern remains fixed when the Prestik is replaced with glue.

It took a while, but finally all of the tiles for the blades were glued down.

Next followed the platform.

This was followed by the outer rim for the spikes.

Then came the inner rim and the cut tiles.

Finally it was the turn of the tiles in the center.

Melette and I then waited patiently for the glue to dry completely before continuing on to the grouting.

Once the glue was all dry, we mixed some white grout with water and plastered the whole wind pump with it. We left it to dry for a couple of hours.

When the grout was dry enough Melette and I started wiping the excess grout away with a damp cloth.

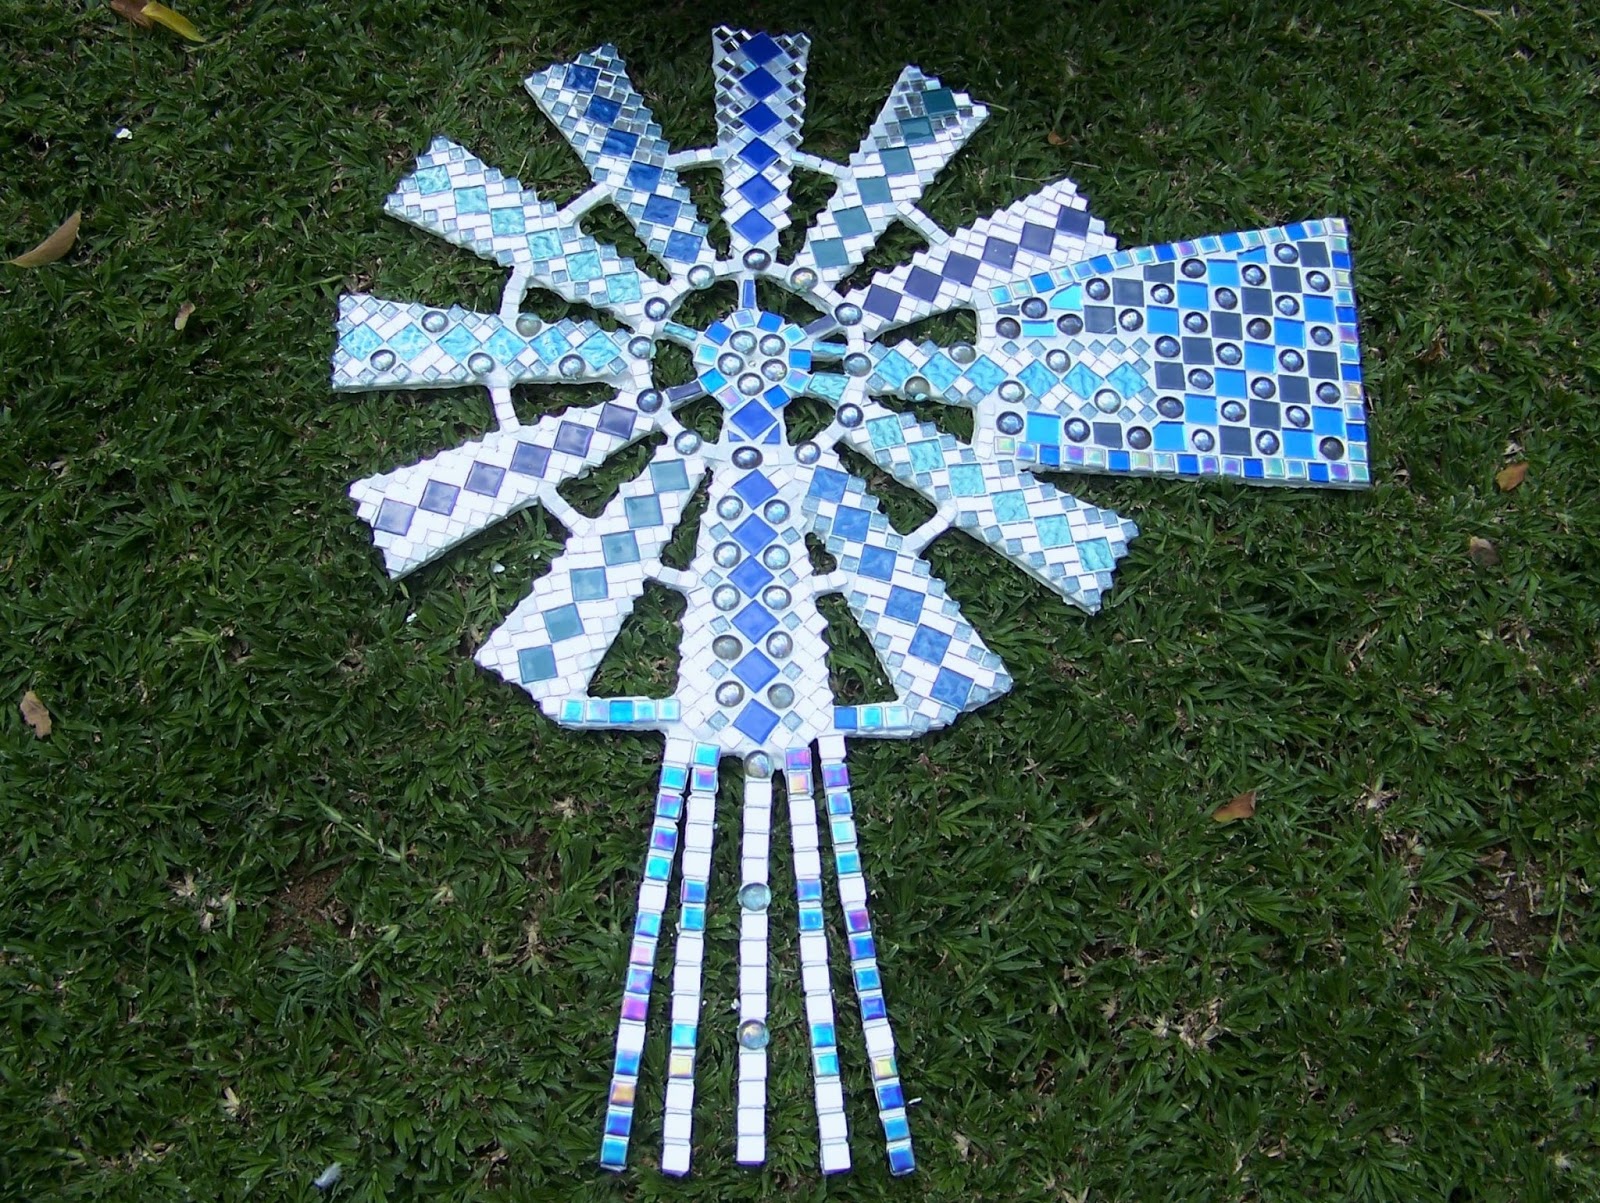
The final product was set against its natural surroundings on the lawn.
For more crafty ideas and great products, visit APrettyTalent.com.
Remember to keep nurturing your TALENT for making PRETTY things.
You can subscribe to this blog and receive regular updates by email by simply registering your email address at the top of the current blog.
No comments:
Post a Comment