Here are the links to all of the blogs in the series:
Part 1
Part 2
Part 3
Part 4
I am using 8 different fabrics in the comforter and I decide on using 8 different quilting patterns as well. This means that each fabric square will be quilted with the same pattern every time. It makes it a whole lot easier to keep track of the quilting sequence. I start with the narrow striped fabric. I mark the 20 cm width and length at 5 cm intervals and draw connecting lines with a fabric pencil and ruler.
Make sure that the tension on your sewing machine is exactly right as you will be sewing upside down and any problems with the tension will show in your top stitching. Make sure you sew as straight as possible, staying on the lines you drew with the pencil.
This is what the wrong side of the square looks like.
This is the right side of the square.
The gingham design is also marked at 5 cm intervals. This time the lines intersect on the diagonal.
The wrong side of the square once sewn.
The right side of the square.
The wide pink an white striped pattern is marked at 5 cm intervals and the lines are drawn to lie in the opposite direction to the lines in the pattern.
The wrong sides once sewn.
The right side once sewn.
The pink and purple shades pattern is once again marked at 5 cm intervals, but this time the lines run in the same direction as the pattern in the fabric.
The wrong side once sewn.
The right side once sewn.
The pink and white square pattern is marked at 5 cm intervals. Draw diagonal lines from the top left corner to the bottom right corner. These lines will run in this direction throughout. (We marked the tops of the squares when we laid out the pattern and it is easy to recognize the top now). The photo shows the wrong side once sewn.
The right side once sewn.
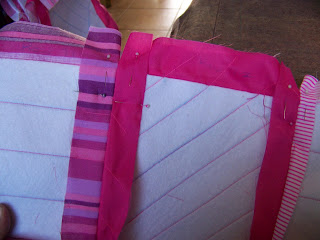
The plain pink is marked at 5 cm intervals, but this time the diagonal lines run from the top right to the bottom left.
The wrong side once sewn.
The right side once sewn. (The right side is the mirror image of the wrong side and therefore the position of the lines shifts).
The circle pattern is marked at 10 cm intervals/in the middle. Simply draw a cross through it.
The wrong side once sewn.
The right side once sewn.
The zigzag pattern does not get marked. Simply connect the corners with diagonal lines for a differently shaped cross.
The wrong side once sewn.
The right side once sewn.
Can you see the markings at the top of the squares? Match the first and second square to sew them together at the sides. Make sure your top sides are both at the top.
Lay the first two squares on top of each other with the right sides facing. Line the batting up at the corners and put pins in to secure them.
Take out the pins that are in the stitch line.
Sew exactly next to the batting. You do not want to catch that extra thickness in your seam line.
The wrong side of square 1 and 2.
The right side of square 1 and 2.
The comforter is compiled of 11 rows of 7 squares each. Complete the first row as above, sewing all 7 squares together in a row. The wrong side of the first row is depicted in the photo.
The right side of the first row.
Complete the first 6 rows in the same way as the first row.
Line up row 1 and 2 to match exactly at the corners. Use LOTS of pins to keep your fabric precisely in place. The right sides of rows 1 & 2 should be facing. (Remember to match the top of row 2 to the bottom of row 1).
Sew right next to the batting, from square 1 right through to square 7.
Attach the third row in exactly the same way. Put the first three rows aside and sew rows 4, 5 and 6 together so that you have two sections of 3 rows each.
Line up rows 3 and 4 to attach the two parts to each other. This is very heavy and you need to make sure that there is enough table top to your left and in front of you to rest the heavy fabric on or it will pull out from under the foot of your sewing machine and cause very untidy sewing.
6 of 11 rows in your comforter are finished. Set this aside to make the remaining 5 rows in the same way.
Assemble the two pieces by sewing them together at the connecting rows. I did not have access to a single bed and draped the cover over a 3/4 bed instead (I also added one of the matching pillowcases). This is what the project should look like now.
For more crafty ideas and great products, visit APrettyTalent.com.
Remember to keep nurturing your TALENT for making PRETTY things.
You can subscribe to this blog and receive regular updates by email by simply registering your email address at the top of the current blog.


No comments:
Post a Comment