
This photo is the source that the client gave me.

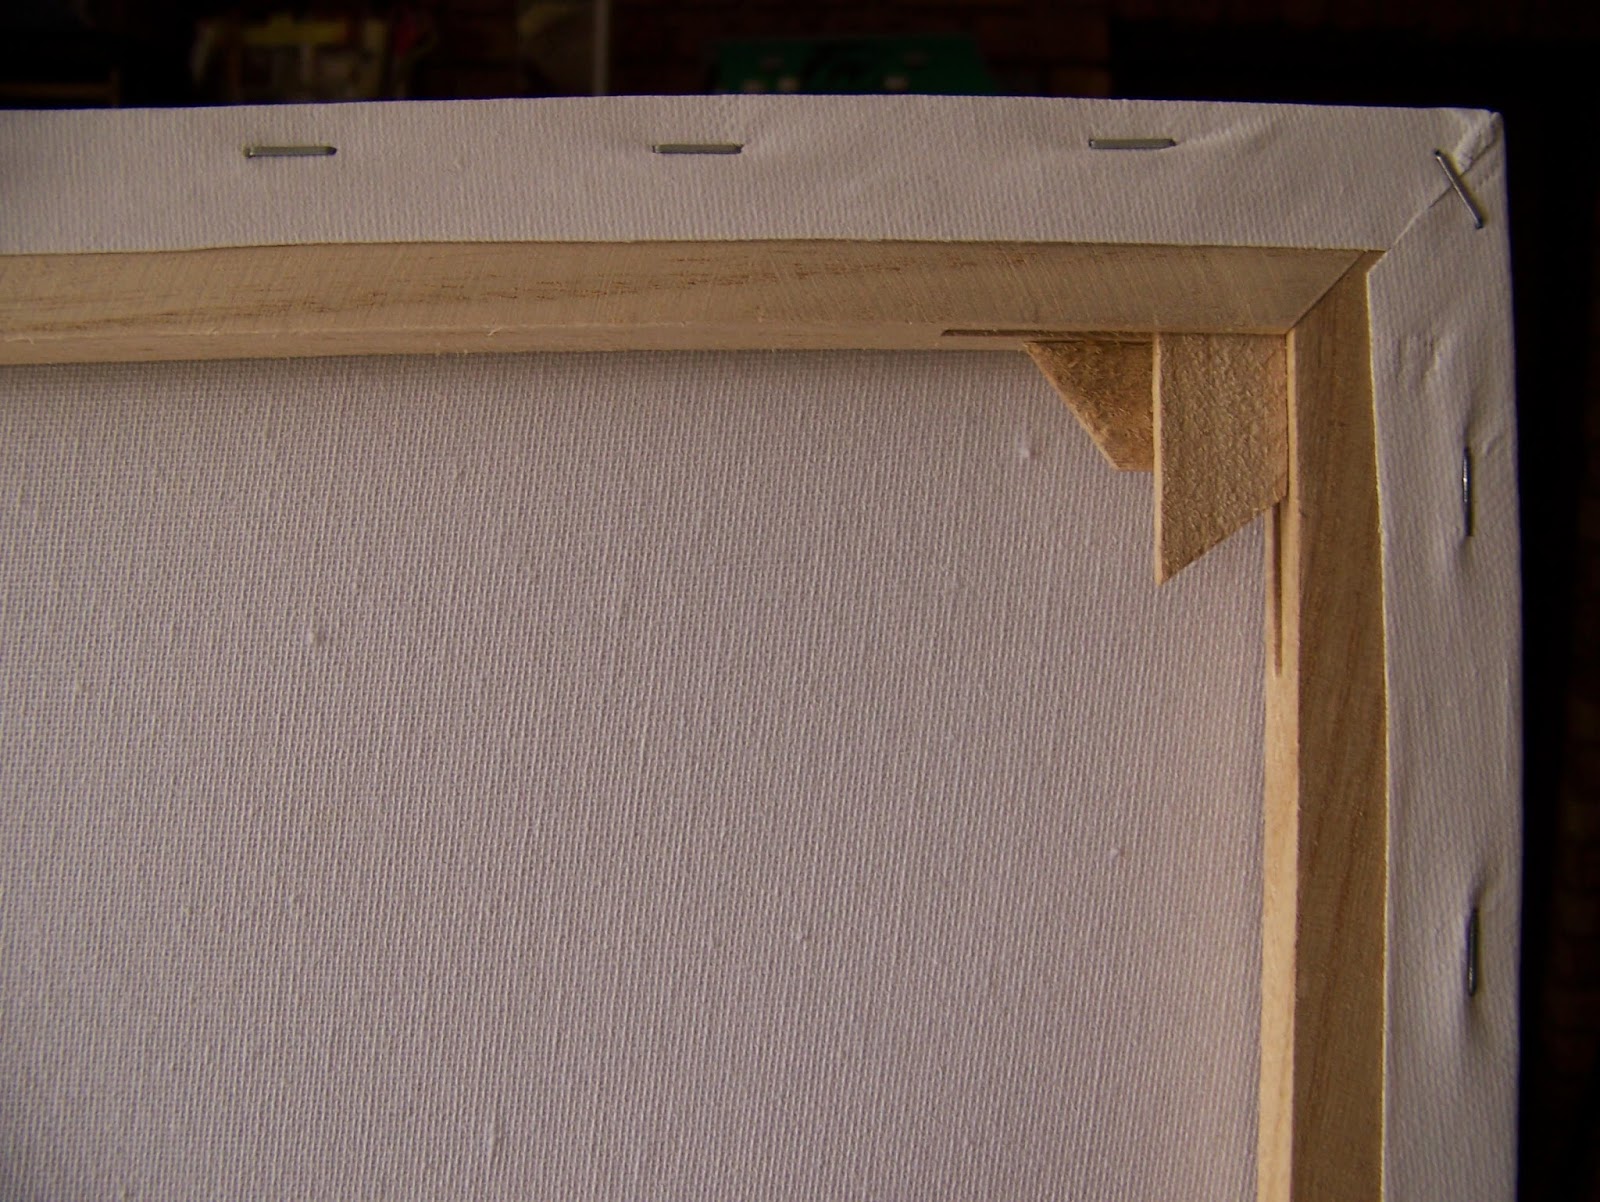
I use a triple primed stretched canvas of 841 mm x 1188 mm (A0).


I insert the corners at the back to strengthen the corners before I begin.
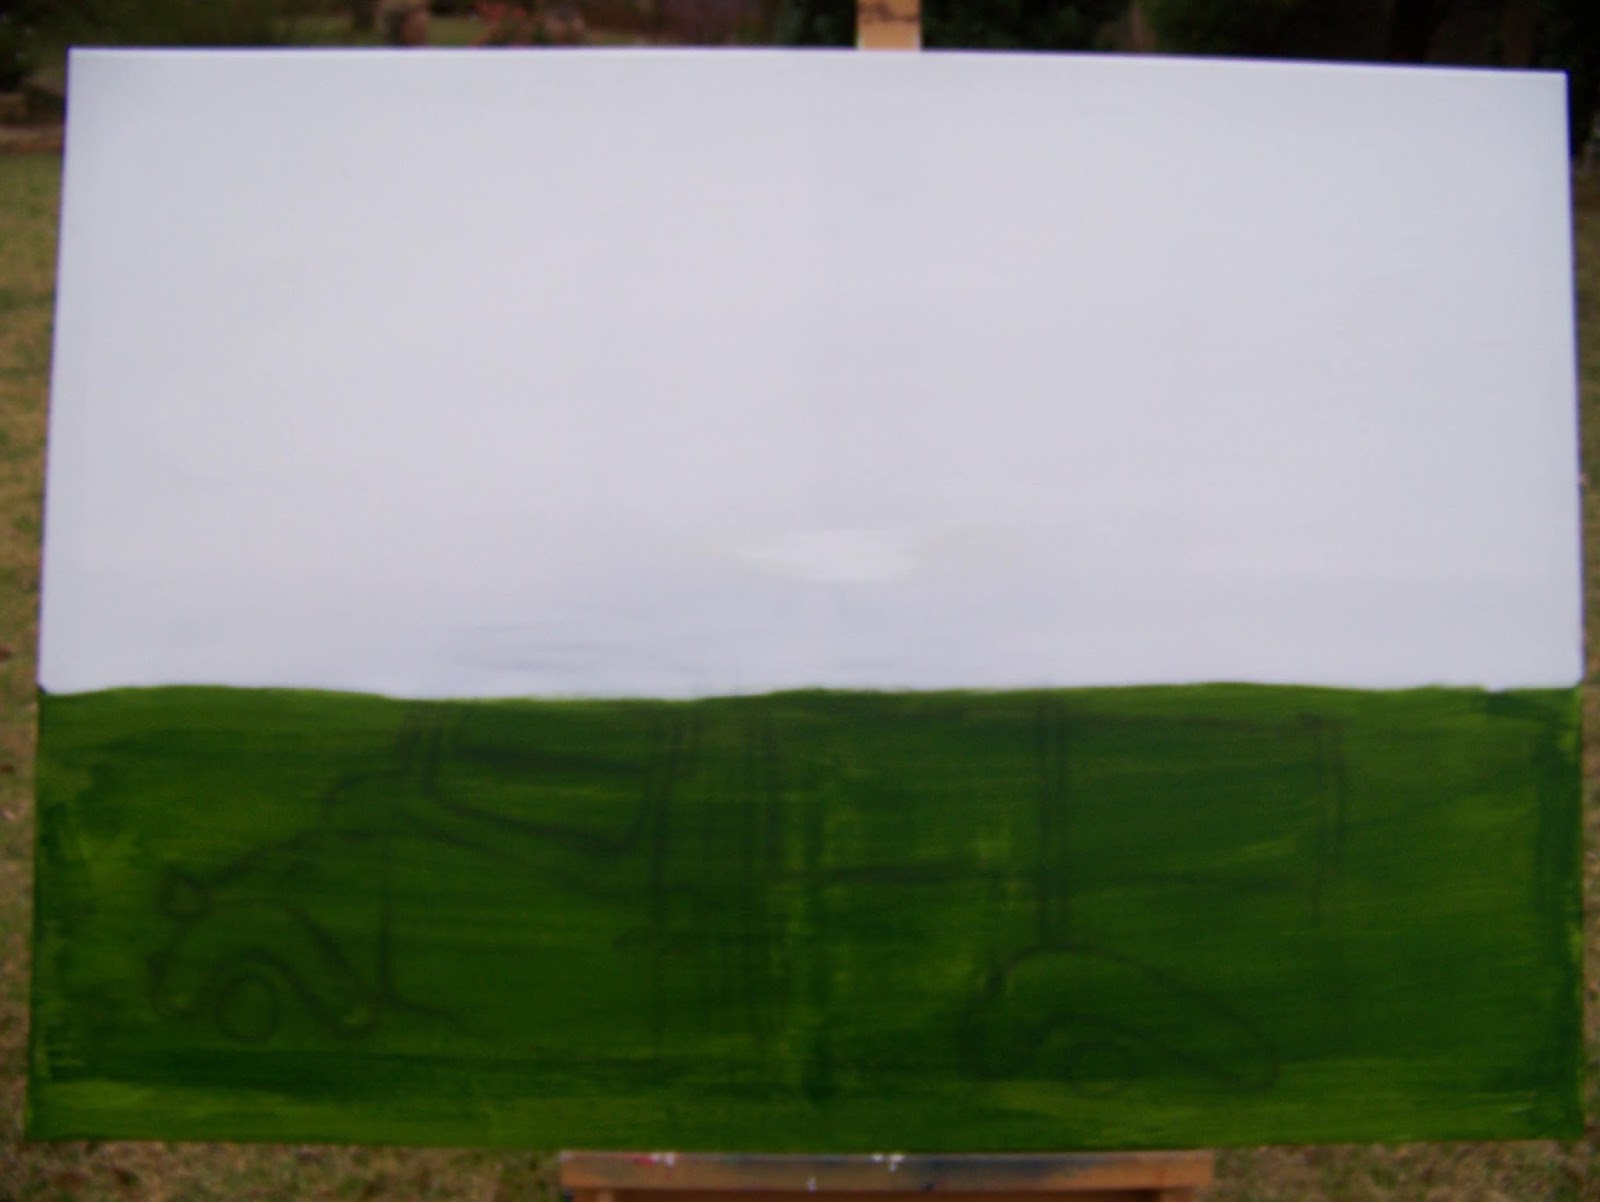
I drop the horizon slightly so that my painting is not cut in half, but is closer to the rule of thirds.

I use charcoal to draw the truck onto the canvas. This is a rather detailed drawing. I start on the front of the truck, focusing on the door that will be the focus point of the painting.

With the focal point in place, I finish the rest of the drawing.

I use a mop brush to brush away the loose charcoal. This will leave smudges, but it does not concern me too much as we will cover this with paint. We will also be able to use these dark marks to create shadows later.

I almost always paint an acrylic base for my oil paintings. It allows the paint to go on smoother as well as to set tonal value for the painting.

I need a pure white background for the sky that will be filled with lots of white clouds.

The top two thirds of the painting is covered in acrylic Titanium White.

Painting the bottom of the canvas Sap Green send the eye an almost subliminal message of life, even though we will be painting dry winter grasses in this area.

The canvas is now ready to start taking oils.
I use the tear-off palette from the previous painting as the colors I use will be the same. I once again keep the double dipper ready with linseed oil and lacquer thinners. This is for cleaning as well as for thinning the paint to allow it to glide on more smoothly. I will be painting with a palette knife,rather than a brush. I use the following blue oil colors to paint the sky (from top to bottom): Prussian Blue, Phthalo Blue, French Ultramarine, Cobalt Blue Hue and Coerulean Blue.

I use the palette knife to paint the blue onto the canvas. I use all of the colors above, except for the Coerulean that I apply very sparsely. I apply the colors over each other, next to each other and every which way. I do not want my sky to be a monotonous single shade of blue.

I lay the palette knife down to mix the blues by hand. If you are squeamish you can use a brush for this step, but I love the feel of oil paints under my hands. Do not over blend the colors. You must try to retain the integrity of each color as well as to create new shades by blending them.

I love what is happening here, but need to make the blue less intense.

I squeeze liberal amounts of Titanium White onto the palette.
I use the palette knife to apply the white to the blues.

I then use my hand to blend the white in, once again taking care not to over blend the colors.

I then use the same Titanium White to paint the white clouds into the painting. The palette knife will pick up the wet blue paint from time to time. This creates a beautiful natural effect of wispy clouds.

I need to add a hint of storminess to the sky. I will use Payne's Grey to achieve this.

I paint the Payne's Grey into the white clouds with a palette knife.

I soften the edges of the clouds with the palette knife as well. I am satisfied for the moment. The client may want me to add more texture to the sky, but I will work on the rest of the painting first before taking this decision to the client.

I now mix Cerulean Blue, Hooker's Green and Titanium White for the color of the truck.


At this stage I use the palette knife to block the colors of the truck in.

I use Raw Umber for the rusted areas and bumpers of the truck.


I use both Naple's Yellow and Buff Titanium to paint the wooden sides on the back of truck.


I now switch to a Filbert brush. I will paint the grass Naple's Yellow.

I turn the brush on its side to make lone strokes to represent the grass.

I am already getting the impression of grassland, but it has a way to go yet.

The grasses in the background will appear lighter in color and I use Buff Titanium to achieve this.

At this stage I allow the paint to dry for a few days before I continue painting, not wanting the colors below to mix with the thicker impasto I will be applying in the following steps.

I use Zelcol's Impasto Medium to mix into my colors for the remainder of the painting.

I start by mixing it into the Raw Umber and the Brown Madder Alizarin.


I also mix the Impasto Medium into the color mix for the truck.

This time I lay the paint on thick with the palette knife.

I mix some Indian Red with the Impasto Medium.

I will use a Buff Titanium mix for the highlights.

I keep dipping into the different colors in succession until I am happy with the truck.

I use the same mixes to paint the wooden top of the truck.

Time to add the highlights. I turn the palette knife on its sharp edge to draw scgraffitto lines in the wood to give it the appearance of boards.

I will now deepen the shadows with Payne's Grey.


With the shadows deepened I still need to add some Titanium White to the brightest highlights.

I keep working the truck with the mixes I have until I am finally satisfied with the results.

It is time to pay attention to the field of grass again. I use a fan brush and dip it into the browns and Indian reds to make quick upward strokes that will create the impression of clumps of grass.


The strokes in the background should get progressively shorter as things in the distance appear smaller.

I use a Rigger/Liner brush to paint the broken windscreen wipers. I use the dark browns, the Indian Red and Titanium White to paint these.

I dip my Rigger brush into the dark browns, the Indian red and the Naple's Yellow in succession to paint the detail in the long grasses in the foreground. Make sure that the grasses lie in all directions as trampled and wind-blown grasses would.


I used the same colors as above to make cross-hatching strokes for the absolute foreground grasses. Do not overdo this. I do not draw the detail of these grasses as it would distract from my focal point, which is the truck. The longer grasses that run into the truck will actually assist in drawing the viewer's eyes into the picture and onto the truck.

It is time to stand back and decide if I need to rework the sky. I decide that I am happy with it as is. The clients were invited for a viewing and expressed their satisfaction. With all parties satisfied, there remained only to sign the painting.

The Rigger brush is once again best to do this with. I use the dark browns to sign my name with.

Now I am all done and the painting can go to its new home as soon as it is dry.

For more crafty ideas and great products, visit APrettyTalent.com.
Remember to keep nurturing your TALENT for making PRETTY things.
You can subscribe to this blog and receive regular updates by email by simply registering your email address at the top of the current blog.
No comments:
Post a Comment