
The first step is always to get the necessary equipment ready and at hand. I used a drawing set from back in the day when I still taught Technology with its tiny component of Technical Drawing. I also pulled up a compass, a clutch pencil and extra leads. Another essential tool turned out to be a soft eraser.

Start by securing your paper to the drawing board with masking tape.

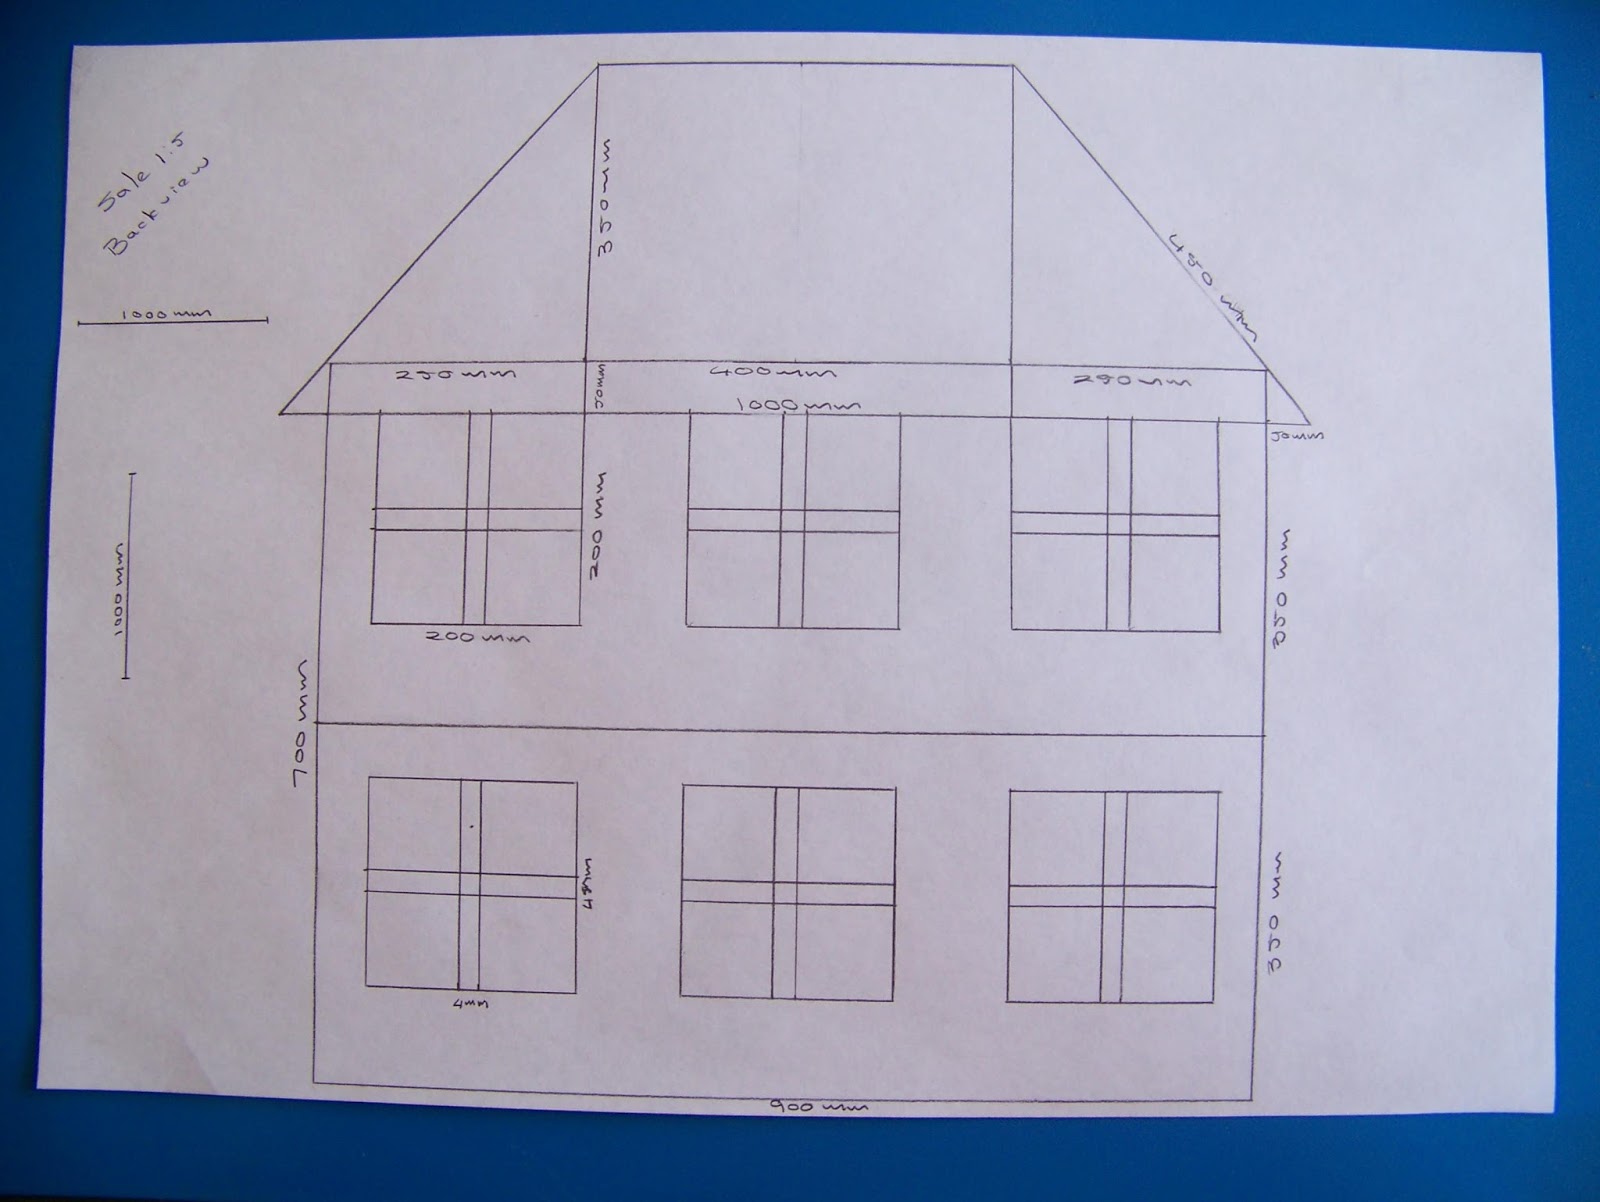
I worked out the scale I wanted to work at (1:5) and proceeded to design the front view of the house. Feel free to print this photo. All the measurements are indicated on the plan and I won't bore you by repeating them here. Note that the roof has a slight overhang.

The back view is basically a duplicate of the front, except that it does not have a front door.
The two side views are similar and as a result only one side view is included in the plans.

At this stage I realized that I had not yet communicated my basic design idea and proceeded to do a very quick loosely sketched design brief where I captured a number of ideas I wanted to include in the house.

I also wanted to make sure that it was understood that the house had to be painted in multiple colors and exaggerated this concept a little. Truth be told, I was simply growing tired of the grey and broke out in color! I used Derwent Coloursoft Pencils for the coloring.

I then started drawing up a cutting list, as well as a list of other materials that would be required from the hardware store. My brother has a program that works out the most economical cutting lists which he sends to the building suppliers. They then cut his order and lets him know when it is ready for collection. You should ask your local suppliers if they deliver the same service.


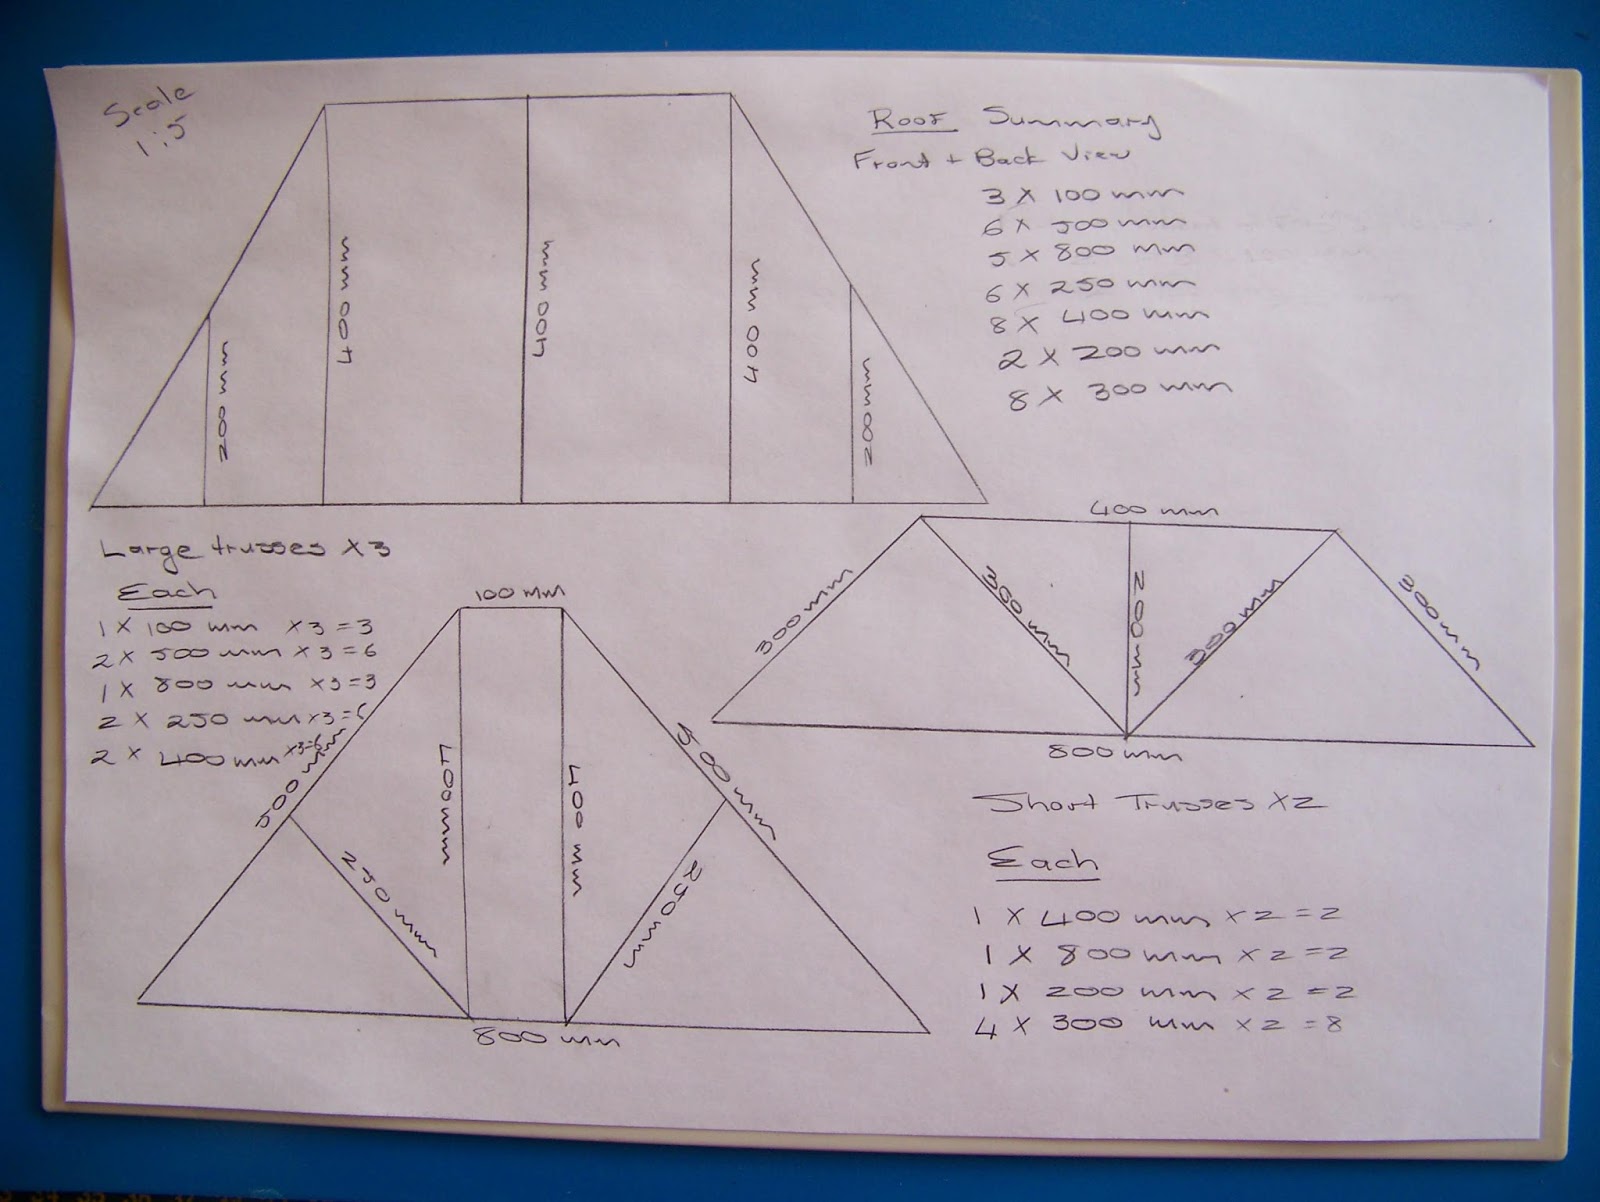
I am a little out of my depth when it comes to designing roof trusses, but managed this plan. I invite you to feel free to share better plans and/or ideas with me and the other readers. Drawing up and designing house plans is very far from my day job and I am by no means professional at it.
For more crafty ideas and great products, visit APrettyTalent.com.
Remember to keep nurturing your TALENT for making PRETTY things.
You can subscribe to this blog and receive regular updates by email by simply registering your email address at the top of the current blog.
No comments:
Post a Comment