This is what the Go Foil & Emboss machine looks like. You need to plug it in and allow it to heat up. The red flickers on and off until it is heated up.

You will then use one of these specially created Cut, Foil & Embossing dies in the machine. All dies will work in the machine, but not all of them will work equally well. Though, it may be worth your while experimenting with your existing dies.

Place the die on the metal plate (my recommendation to spare the cushioned base of the machine).

Cut your heat activated foil, also by Couture Creations, to size.

Lay it face down on the die.

Lay the paper on top of the foil.

Close the lid and allow it to heat up for a few seconds.

While warming up, the light will be red.

Once ready, the light will turn green.

Remove the whole sandwich from the Go Foil & Emboss and run it through the Go Cut & Emboss.

This will damage the lid of your machine, and you need to make your peace with it. It is how the machines work.

It comes out looking like this, but the backing paper still needs to be removed. If this is what you want, then you can simply run golden card stock through your machine. The foil option adds another dimension to the process, as I will show in the next photo.

On the left, is the actual foiled die-cut. On the right is the backing paper that I have removed. Both are beautiful, isn't it? However, before using your backing paper (something I have done with success), I need to warn you that the foil has not been set and it can come away and start to look ugly. Use with caution.

I found that some of the foil was stuck to the plate and would not come off.

Cleaning it with rubbing alcohol proved a simple task.

Here you can see how effectively the rubbing alcohol worked.

I wanted to test some dies that were not meant for foiling and settled on this one by Kaizer Craft.

I repeated the same steps as above.

I again ran it through the machine.

I cut beautifully, as could be expected.

First appearances were encouraging, but I still needed to pull the backing paper away.

Once the backing paper was removed, it proved to be less successful than when I used the die intended for the purpose. However, not a complete failure either.

I decided to return to the dedicated dies by Couture Creations and settled on some nesting dies and words. The one on the left, is a Foil Stamp Die and is not meant to cut, while the one on the right should cut.

I wished to use the two together and placed them accordingly on the machine.

I cut the foil to be smaller than the card stock this time, not wanting to make another mess on my machine.

I layered the sandwich.

I ran it through the machine and it cut beautifully.

This time, I was very impressed with the results when I pulled away the backing paper.

I wished to try one more die which claimed that it could be used in both machines. This one was also by Couture Creations. Note the pictures at the top of the packaging for details about which machines the dies can be used in.

I layered it and heat it up.

Then I ran it through the machine and peeled away the backing paper. I simply love this! Although, I once again love the negative one on the backing paper as well.

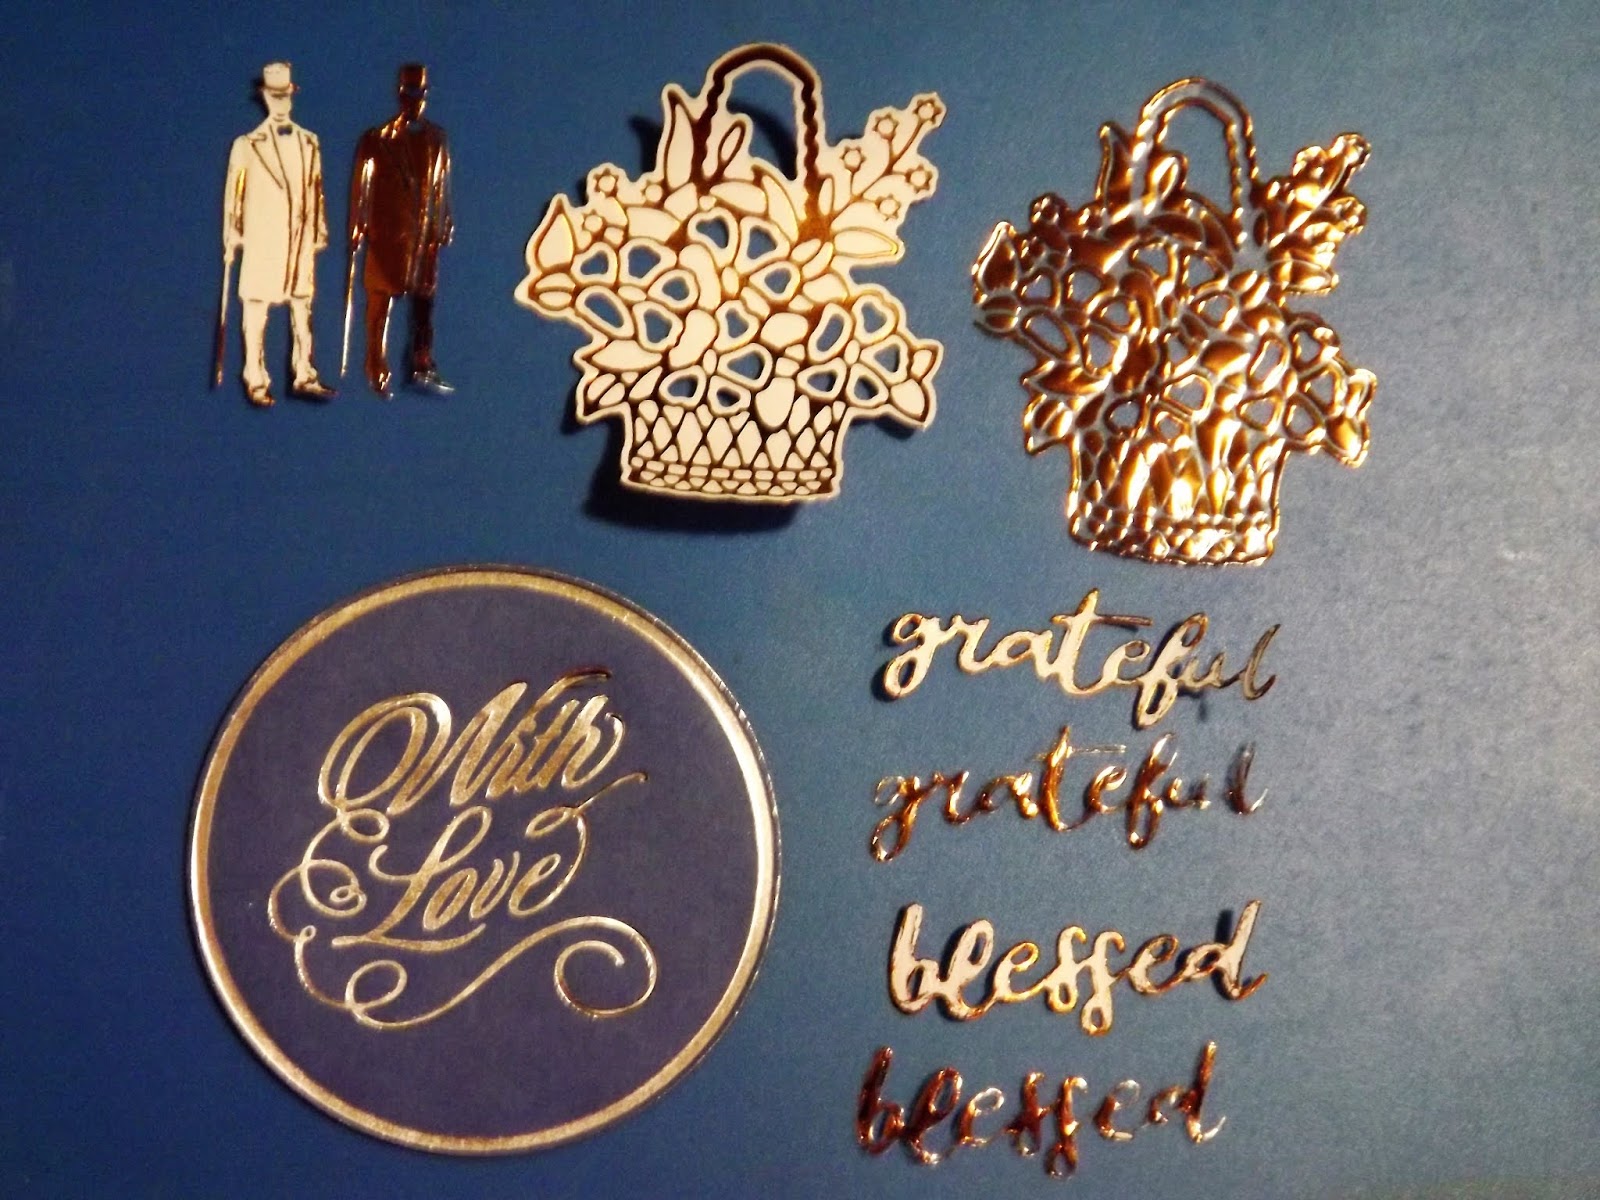
Here are the different die-cuts with their negatives, as an overview. Enjoy your own machines!
You can watch a compilation video of the above steps on YouTube:
https://youtu.be/MGN7pSqJUg0
Marietjie Uys (Miekie) is a published author. You can buy my books here:
You can purchase Designs By Miekie 1 here.
Jy kan Kom Ons Teken en Verf Tuinstories hier koop.
Jy kan Kom Ons Kleur Tuinstories In hier koop.
Jy kan Tuinstories hier koop.
You can follow Miekie's daily Bible Study blog, Bybel Legkaart, here in English & Afrikaans.
You may prefer to follow the traveling blog, A Pretty Tourist.
For more crafty ideas and great product reviews, visit A Pretty Talent on Facebook.
If you are in a literary mood, follow Miekie's musings, stories and poetry on A Pretty Author - Miekie.
Remember to keep nurturing your TALENT for making life PRETTY.
You can subscribe to any of these blogs and receive regular updates by email. Simply register your email address at the top of the applicable blog.
No comments:
Post a Comment