I start the process on one of these index cards.
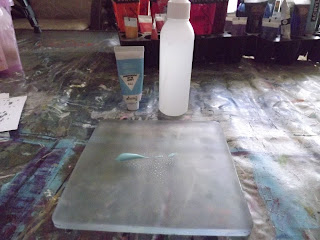
I will be using a Gelli Plate to create the background.
I place a dollop of Bianjo Acrylic Pain on the Gelli Plate and spritz it with water to dilute it.
I then brayed the paint over the Gelli Plate.
I place a warm colour on top of the cool colour.
I brayer only lightly, as I do not wish for the two colours to mix and give me third colour.
I use an ball point tool to lightly draw into the wet paint.
I have an index card that had been slightly smudged in the studio, but this will still work fine on the project.
I brayer the card onto the Gelli Plate.
This is the image that I pull off the Gelli Plate.
I have found a quote I wish to use on the card in a tiny book called Vriendin, jy is die beste.
This is the quote I wish to work with.
I carefully crop the quote to the desired size.
I then mount the quote on 3D tape. This will give the card some dimension.
I use a Crystal Craft Ink Pad to stamp two images onto the card. These clear stamps are some of my oldest in my collection and I have no idea who produced them. I use a Chiswick block to stamp with.
I pour clear embossing powder over the wet stamped images.
Then I torch the embossing powder with a Black & Decker heat gun.
I draw a border of tiny circles around the index card, using an Artline marker.
The index card is now ready to be mounted to a card.
I fold an orange A4 sheet of cardboard in half with a bone folder, to form a card.
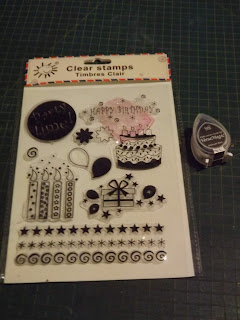
I then find some clear stamps by Timbres Clair to stamp onto the card with VersaMagic ink.
I wish to use only one of the border patterns and I cut it apart from the rest of the stamp.
I need to line up the stamp and in order to avoid the stamp running off the edge of the card, I place a tissue on the card to stamp onto.
I then use double-sided tape to adhere the index card to the orange card base.
The completed card.
You can watch a compilation video of the above steps on YouTube:
https://youtu.be/fTCu_Bjc3Yo
Marietjie Uys (Miekie) is a published author. You can buy my books here:
You can purchase Designs By Miekie 1 here.
Jy kan Kom Ons Teken en Verf Tuinstories hier koop.
Jy kan Kom Ons Kleur Tuinstories In hier koop.
Jy kan Tuinstories hier koop.
You can follow Miekie's daily Bible Study blog, Bybel Legkaart, here in English & Afrikaans.
You may prefer to follow the traveling blog, A Pretty Tourist.
For more crafty ideas and great product reviews, visit A Pretty Talent on Facebook.
If you are in a literary mood, follow Miekie's musings, stories and poetry on A Pretty Author - Miekie.
Remember to keep nurturing your TALENT for making life PRETTY.
You can subscribe to any of these blogs and receive regular updates by email. Simply register your email address at the top of the applicable blog.


No comments:
Post a Comment