You can read Part 2 and Part 3 here.
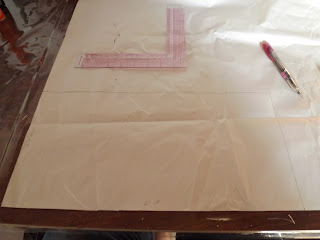
I use paper that was used to wrap some glassware in at the store, to draw my pattern on.
I start by creating some square edges to work with.
I then measure 41 cm in width for my bag and cut the paper accordingly.
I also measure 41 cm in height and mark the pattern accordingly with a line to form the square.
Find the center of the line and construct a line perpendicular to it.
Create a curve that is aesthetically appealing to the eye, for the top of the bag.
Fold the pattern in half.
Cut the top of the bag on the fold so that the two sides will be exactly the same.
I did not have a compass at hand and struggled a bit to cut the hole in the handle just right.
I drew the hole on the fold.
I also cut it on the fold.
I did not like the shape when I opened it.
I adjusted the hole.
I trimmed it on the fold.
This time the opening was much more appealing.
I decided to adjust the top of the handle ever so slightly.
It was once again trimmed on the fold.
I was finally satisfied with the shape of the bag.
I jotted down some cues for myself; cut 2 from the fabric and 2 from the lining.
Next, I drew a rectangle to measure 41 cm by 20 cm.
The flap of the bag measured 17 cm by 6,5 cm. Cut 2 from fabric.
I used a tablet bottle to cut the center of the flowers.
I would need to cut 6 of these.
The petals of the flowers were cut on the fold.
I would need 8 petals per flower and each petal is made from two pieces of fabric. This means that each flower needs 16 pieces of fabric for its petals. There are 6 flowers in total on the bag, meaning that you will need to cut 96 petals to construct the flowers.
In the next blog, I will show you how to sew these flowers.
Marietjie Uys (Miekie) is a published author. You can buy my books here:
You can purchase Designs By Miekie 1 here.
Jy kan Kom Ons Teken en Verf Tuinstories hier koop.
Jy kan Kom Ons Kleur Tuinstories In hier koop.
Jy kan Tuinstories hier koop.
You can follow Miekie's daily Bible Study blog, Bybel Legkaart, here in English & Afrikaans.
You may prefer to follow the traveling blog, A Pretty Tourist.
For more crafty ideas and great product reviews, visit A Pretty Talent on Facebook.
If you are in a literary mood, follow Miekie's musings, stories and poetry on A Pretty Author - Miekie.
Remember to keep nurturing your TALENT for making life PRETTY.
You can subscribe to any of these blogs and receive regular updates by email. Simply register your email address at the top of the applicable blog.


No comments:
Post a Comment