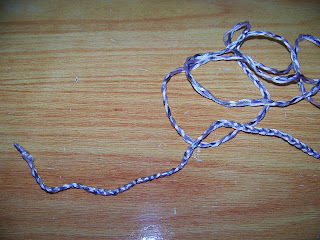
For the first string, I find some beautiful braided chord in my sewing stash.
I measure the length I will need and tie a knot. I tie a second knot to ensure the rest of the chord does not unravel once I cut the measured length from it.
I then cut between the chord. The two knots ensure that both ends remain securely intact.
I also like this Pom-Pom wool that I find in my sewing stash. This does not require me to do anything with it as it is already very pretty. I cut a length of this wool. Rummage through the house to see what interesting things you can come up with that will make a pretty necklace.
I then find these two rolls of jewelry thread. I decide to use both and cut two lengths from these, giving each extra length, as I will be tying knots into these which will cause me to lose some length.
I tie the two strands of thread together at one end with a knot.
I then find two different kinds of beads that compliment my colour scheme. I thread three similar beads onto one of the threads, and three of the other beads onto the other thread.
I then decide on a length that is appealing to me and tie a knot in both threads, binding them together again. The distance between my two knots is roughly 5 cm, but I did not use a ruler, opting to simply judge it by eye.
I repeat this process until the whole length of the two threads has been threaded with groups of three beads, tied off with knots.
I search for some beads I have in my sewing stash, left over from a previous project. These beads have really big holes, making it possible for me to thread them onto the thick braided chord.
I hold the three threads, that braided chord is made up of, together and slip the beads onto the chord.
I space them out a little on the chord. The reason they stay in place, is because the chord is so thick. You have to pull on them to move them up or down the chord.
I slide the ends of all three strings into a bar clamp. I then use my flat-nosed pliers to clamp the bar shut, securing the strings in one clamp. I repeat these steps on the other end as well.
I slip a jump ring onto both bar clamps and a lobster claw clasp onto one of the jump rings.
The final product. Charming, isn't it? Post some photos of your own necklaces in the comments. I would love to see what you made.
Marietjie Uys (Miekie) is a published author. You can buy the books here:
You can purchase Designs By Miekie 1 here.
Jy kan Kom Ons Teken en Verf Tuinstories hier koop.You can purchase Designs By Miekie 1 here.
Jy kan Kom Ons Kleur Tuinstories In hier koop.
Jy kan Tuinstories hier koop.
For more crafty ideas and great products, visit A Pretty Talent on Facebook.
Remember to keep nurturing your TALENT for making PRETTY things.
You can subscribe to this blog and receive regular updates by email by simply registering your email address at the top of the current blog.


No comments:
Post a Comment