The jewelry I want to include in the package is already made.
I've kept these two boxes after receiving a gift as I adored how presentable they were. I have often used re-purposed packaging in my blogs and I saw real potential here. Having shared a number of blogs on folding your own boxes, I am not going to repeat those here, but if you wish to fold your own sliding boxes, you may want to look this blog up:
Turning your Adult Coloring Pages into beautiful Sliding Gift Boxes
If you like the idea of the square-framed boxes, you can combine the blog above with the one below, to fold your own square-framed sliding boxes:
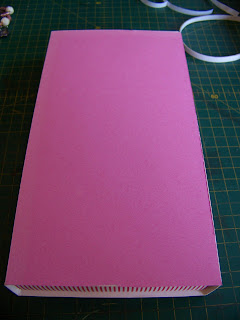
I love the striped edges on the boxes and decide to keep those. I will only cover the bottoms and tops of the lids. I find matching paper and measure the areas I want to cover. I then cut the paper out to match those measurements.
I stick double-sided tape all around the edges of the surfaces that will be covered.
I then lay the covers in place. I do this for both tops and both bottoms of the two boxes.
I then select a number of embellishments to decorate the boxes with. My jewelry is intended for a little girl who is turning 5 and I keep the decor in tune with this. You can make yours as elegant or as playful as seem appropriate for your intended recipient.
I have the option of simply removing this inner partition, but this will work wonderfully for arranging the earrings and I decide to keep it. I measure the inside measurements of the partitions.
I then use the off-cuts from covering the boxes to cut paper squares that will fit inside the partitions.
I then use an awl to make a tiny hole in each of the paper squares.
The earring hook is slipped into the paper square.
The earrings are then laid in place, each in its own partition.
Doesn't this look more presentable than simply slipping the earrings into a bag, or similar object?
I then slide the whole inner case into a cellophane bag.
The ends are neatly folded in and taped down.
I then finally slip the lid back on.
The contents of the second box will be slightly more tricky to package. I am dealing with a variety of necklaces and bangles of different sizes, lengths and shapes. I will deal with each individually.
I start by measuring the inside of the box to determine the ideal size of my packaging. I then use the off-cuts from covering the boxes to cut backings for the jewelry from.
I cut tiny squares for the beads to fit through the paper.
I slide the shortest necklace through these holes and clasp it at the back.
I simply twist it to make it shorter in the front.
The view from the back.
I now slide the whole parcel into a cellophane bag and tape the open end shut. I could also melt it shut with my sealing machine, but I do not wish to make this too tricky to open for a 5-year old.
The packaged necklace is then places inside the box.
The multi-string necklace is treated much the same way, except that I make the holes much larger to accommodate the increased bulk that should fit through it.
As it would look very untidy to fold the extra length back in the front, I pull it through to the back.
It is then neatly tucked away behind the backing paper.
This necklace is also slipped into a cellophane bag and sealed, before being added to the box.
The third necklace is treated much the same way as the second. This time I do not want the excess bulk in front, as the focus is on the pendant in this case, and the bulk will distract from it.
The bulk is once again neatly tucked in, the necklace slid into a cellophane bag and the bag sealed shut with tape.
This necklace is also placed inside the box.
The bulkiest, and least flexible of the bangles, is the one on the memory wire. I cut the backing paper to fit the size of the bangle.
It is slid into a cellophane bag.
You can cut the bag smaller, or simply fold it back and tape it shut.
The charm bracelet is treated the same way as the necklaces. Be sure to make the holes big enough to accommodate the charms. Fasten the clasp at the back, but leave the majority, if not all, the charms at the front of the card as these are the show pieces of this item.
Slide the bracelet into a cellophane bag. Fold and tape shut.
This last item is then added to the box, making this little box a regular treasure trove of jewelry layers waiting to be discovered.
I now have two very presentable boxes that make a very appealing set.
I once again slide the tray of the second box into its own cellophane bag, fold the edges in and tape it down.
It is time slide this lid on.
Doesn't this make an adorable gift even before it is opened?
Time to make a little girl happy.
Marietjie Uys (Miekie) is a published author. You can buy the books here:
You can purchase Designs By Miekie 1 here.
Jy kan Kom Ons Teken en Verf Tuinstories hier koop.You can purchase Designs By Miekie 1 here.
Jy kan Kom Ons Kleur Tuinstories In hier koop.
Jy kan Tuinstories hier koop.
For more crafty ideas and great products, visit A Pretty Talent on Facebook.
Remember to keep nurturing your TALENT for making PRETTY things.
You can subscribe to this blog and receive regular updates by email by simply registering your email address at the top of the current blog.


No comments:
Post a Comment