
I redraw the lawnmower designs that I developed for this purpose on the polystyrene, using a charcoal stick. Charcoal is brilliant for drawing with as it does not leave indentations in the polystyrene, as pencils points would. Incorrect lines can also simply be wiped away with a dry cloth. No need for erasing. My brand new book, Designs by Miekie 1 has all five these designs inside, plus another 45 line designs for use in your art and craft projects. You can purchase Designs By Miekie 1 here.

If you do not feel confident enough to redraw the designs freehand, you can use your digital copy and project it onto the polystyrene via a projector linked to your computer. Simply trace the lines as it is projected onto the surface.

I chose to draw three of the designs onto round surfaces that I bought, already cut out, for the purpose. These will add an interesting element to a room where most of the other objects on the walls are angular. The diameter of my circles are 45 cm.

The main lawnmower, a ride-on preferred by the boy it is intended for, is drawn onto a huge polystyrene rectangle and will become the main focal point in the room.

I then decided to add a fun element to the room and bought 9 smaller polystyrene squares that were arranged into a larger square.

I pushed the squares together and redrew the last design across all of them. These will be separated slightly on the wall, mimicking a puzzle. When I showed this to my nephew, he viewed the collection critically and then asked why I did not do ALL of them as puzzles? It is hard to explain design principles to a five-year old, but I accepted his criticism as a compliment in cloaked in a five-year old's disguise.

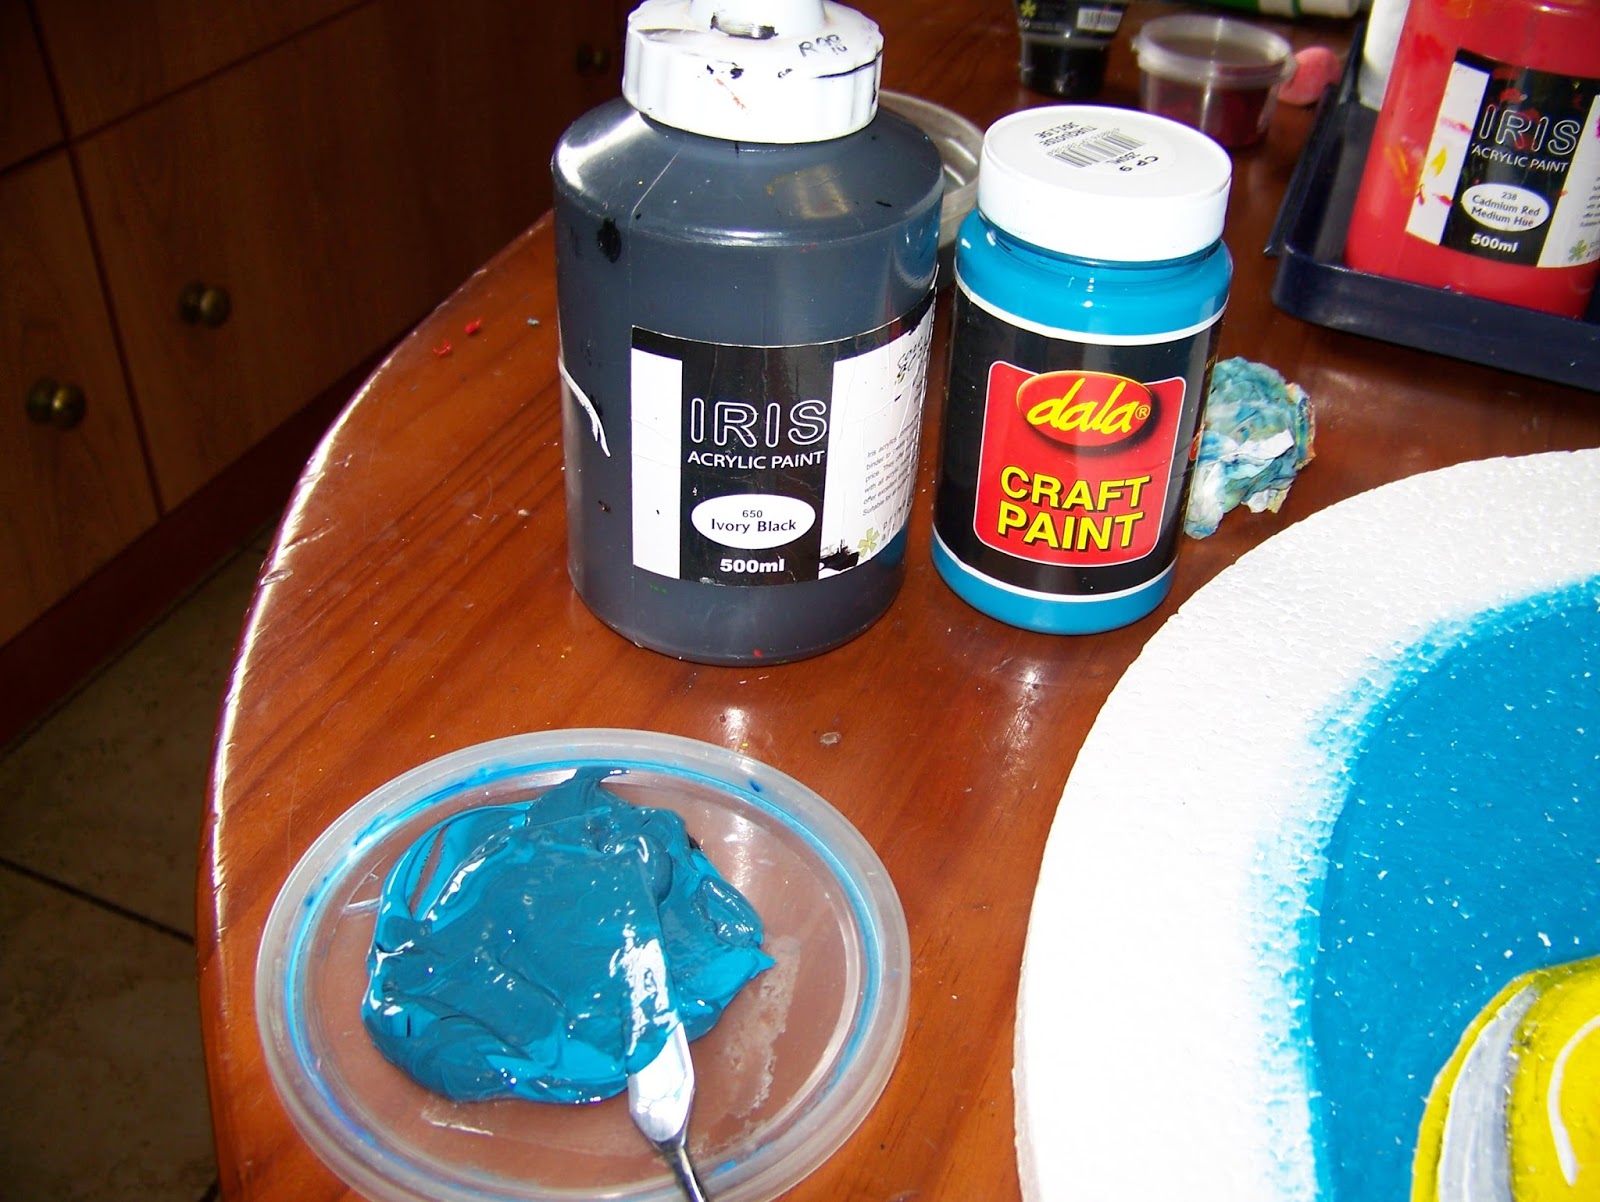
There are three kinds of paint that you can use with great success on polystyrene. Most acrylic paints will work brilliantly. Most fabric paints will also work very well. But my first choice will always be Dala Craft Paint. The colours are simply more vibrant than many of its counterparts. A word of caution: always read the labels on the containers carefully to make sure that the paint is safe to use in polystyrene. I have actually seen my projects melt away before my eyes after simply assuming the paint was 'safe' to use. You should especially check metallic colours and glitter glues. In fact, ALL glues should be checked on an off-cut piece of polystyrene before use. May as well test those paints as well while you're at it.

I did not have a green I liked to paint the first of the lawnmowers in and had to mix it myself from three other colours. Note how well the acrylic colours and craft paint mix.

I used a medium flat brush for most of the painting.

I then used Silver for the metal parts.

Black went onto the tires and the eyes.

Some blue for the eyes.

I then used white on the eyes and teeth. I also added reflections in white all over the lawnmower. Do not forget the light reflection in the pupils as well!

Then I painted yellow on the inside of the background.

I added the tiniest bit of red to the yellow to get a vibrant orange.

I always find it works best to mix the colours with a palette knife.

The orange was painted on the outer circle of the background and all around the edges.

I then went back to the yellow and blended the line where the two colours met.

This one now had to dry before I could continue.

I won't bore you with the step by step for each of the mowers. Instead, I'll simply point out the important factors that need some attention. In the 'puzzle' lawnmower, it is important to push the pieces together when painting them to make sure the lines match up.

To paint the background on the second lawnmower, I used Phthalo Blue straight from the tube on the bottom row. I then mixed it with white to paint the middle row.

I mixed in even more white to paint the top row. This mower was also set aside to dry.

For the third mower. I painted a Light Cadmium Red on the inside. This red has a little yellow mixed into it, making it slightly orange in appearance.

I then used a pure red on the outside of the circle.

I once again painted over the connecting line to obscure it a little. This painting was left to dry.

The weed-eater received a Turquoise inner circle on the background.

This time I mixed the original colour with a tiny bit of black to make it slightly deeper in colour.
This gave me the darker outer rim that I was looking for.

All the while that I was painting the four smaller lawnmowers, my mom had been working on the large one.

Once the paint was dry, it was time to outline the paintings with black markers. I used three different sized points, chisel, bullet and fine, to do the outlines with.

The completed puzzle mower.

The completed push mower.

The completed buggy mower.

The completed weed-eater.

And my mom's version of the completed ride-on mower. Our little man was thrilled when we brought him his new room decorations. Want to know the trick for sticking them to a wall? Use toothpaste! It dries strong enough to keep them in place without damage to the wall.

You can purchase Designs By Miekie 1 here.
Jy kan Kom Ons Teken en Verf Tuinstories hier koop.
Jy kan Kom Ons Kleur Tuinstories In hier koop.
Jy kan Tuinstories hier koop.
For more crafty ideas and great products, visit A Pretty Talent on Facebook.
Remember to keep nurturing your TALENT for making PRETTY things.
You can subscribe to this blog and receive regular updates by email by simply registering your email address at the top of the current blog.
No comments:
Post a Comment