Drawing the Head
Start by drawing an egg shaped oval with the smaller end at the bottom.
Draw a center line through the head. We will be drawing the face facing us at a direct angle.
Draw a horizontal line, dividing the head in half. Now divide the bottom half into 5 equal sections. Credit to Jack Hamm for these directions.
Divide the head into vertical quarters.
The balls of the eyes are place right above the horizontal center line and with the vertical quarter lined running through the eyes. The point of the nose is placed right above the 2/5 line.
Where the lips meet, is placed on the 4/5 line.
The tops of the ears are in line with the tops of the eyes. The bottoms of the ears line up with the nose tip.
The corners of the mouth reach to the quarter lines running down from the eyes.
A quarter into the top of the head is the usual hair line or hat line.
These are the basic rules for drawing faces. What makes people's features unique and interesting is how they vary and deviate from these rules. This is why it is extremely important to pay close attention to the subject you are drawing when doing portraits.
In the following steps, I will add a little shadow to develop the face only a little bit further.
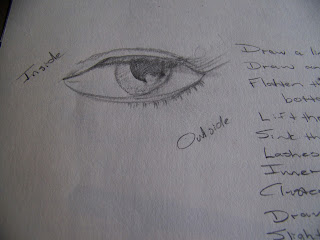
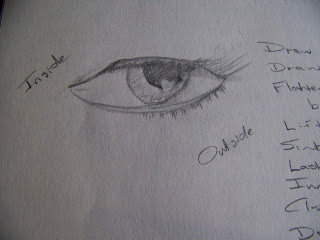
Drawing the Eye
Start with a horizontal line determining the width of the eye. Draw an elongated ellipse around this line.
Flatten the inside top of the eye, as well as the outside bottom of the eye.
Lift the outside corner of the eye slightly.
Drop the top inside corner of the eye.
Flick a couple of eyelashes on the outside top lid of the eye.
Draw the bottom lid by drawing a second parallel line along the bottom lid.
Draw clumps of short eyebrows on the outside of the bottom lid.
Draw the outline for the iris and the pupil.
Color the iris slightly by shading it.
Shade the pupil much darker.
For an eye to appear alive, it needs to reflect light. Erase some of the shading in the pupil and iris to give it the appearance of light reflecting from the eye.
Shade the shadow of the top eyelid falling over the top of the eye.
Character is given to a face by paying close attention to the folds and wrinkles surrounding the eye, something we are not pursuing here, but which you should take note of.
The head and eye summarized on one page.
Drawing the Mouth
Mouths vary so widely in shape, size and width that it is very difficult to break it down to a few general rules, but I will try to do so. When the mouth is in a relaxed state, the lips will have a natural curve, which can be upward, downward or straight. Pay attention to this when starting your drawing of the mouth.
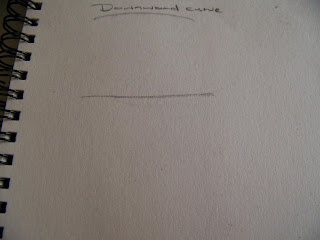
We will start with a straight line.
This line between the lips is often shaped very interestingly and again differs widely from one person to the next, a fact which is greatly influenced by the activity of the muscles surrounding the mouth.
The shape of the upper lip can be fuller, thinner, rounded or flattened.
The lower lip is usually fuller than the upper lip, but beware of deviations to this rule.
There is usually an indentation above the center of the upper lip where the mouth runs to the nose. This area will need highlights and shadows, dependant upon the direction of the light source.
The chin also usually creates a deeper indentation below the bottom lip which needs to be paid attention to when adding light and shadow.
Lips have a multitude of fine lines running through it, which can be deeper or shallower, depending on age, but also activity. A rounded mouth will have more visible lines.
When forming the rounded shape of the lips, you will need to have highlights where the lips are at their fullest and shadows in the crevices.
Pay attention to the corners of the mouth as well, as there are often interesting lines there that help establish character.
Drawing the Nose
When drawing the nose it could be a good idea to start with the tip of the nose. Make sure you get the shape right. Some are very fine, some are sharp, etc.
Then move on to the nostrils. Some are very widely spaced apart, others are bog in size, some are hardly visible. The differences are huge.
The sides of the nose also need defining. Once again you will find very fleshy noses, while other are bony.
The light source will determine how deep/dark the nostrils appear.
It will also determine which areas of the nose should be shaded and which should be highlighted.
Here I gave you yet another example of a completely differently shaped nose.
Some noses resemble that of a pig, with the tip of the nose pointing upward, leaving the nostrils flayed wide open.
The source of light may give the nose the appearance of being off-center. The tip of the nose will reflect that.
In such a case one nostril will appear larger than the other.
With the second nostril in place, it is easier to complete the first one.
The indentation between the upper lip and the tip of the nose should be considered when drawing the nose as it will also influence the play of light and shadow on the face.
Drawing the Ear
The ear can be very tricky to master and it is subject to a lot of influences when it comes to light and shadow. It's own nooks and crannies will affect light, but so will the hair, the turn of the head, any head gear, etc.
Once again I will refer to Jack Hamm's breakdown for drawing the ear. It makes it super easy for anyone to draw an ear. Take note though, that the shapes of ears differ as widely as any other features on the face and head and as obscure as ears appear to be, the image will not ring true if you get them wrong. Jack Hamm suggests we start with a top heavy C shape to draw an ear.
This is followed by a backward facing C.
This in turn is followed by a small C.
We then get a curvaceous Y.
Then we get a U to connect the Y and the small C.
Lastly, we draw the backline/rim of the ear in the form of a lazy C.
All that is now left to do is to add shading to the areas in the shadow.
For more crafty ideas and great products, visit APrettyTalent.com.
Remember to keep nurturing your TALENT for making PRETTY things.
You can subscribe to this blog and receive regular updates by email by simply registering your email address at the top of the current blog.


No comments:
Post a Comment