Fabric Layout
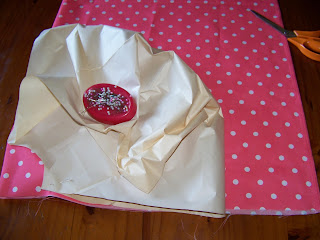
I use the same basic pattern that I have been using for the past couple of blogs. I once again cut a full flair skirt, but I make it a whole lot shorter than the Elsa dress I cut from the same pattern.
Cut the skirt out twice on the fold. The second time round, I use the first skirt as a pattern to make sure I maintain the same length.
The doll's dress is cut using the same pattern. It is simply smaller along the waist and much shorter.
Normally I would cut the front and the back on the fold, but I want to save fabric and cut it from leftover pieces of fabric. Cut an extra 1,5 cm seam allowance at the centers (where it would have rested on the fold) so you can sew the separate pieces together without losing space in the bodice.
Fold the bodices smaller for the doll and cut out.
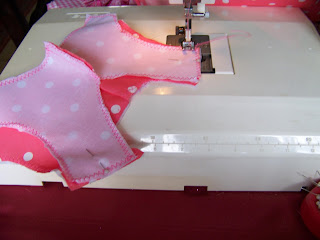
There is not a lot of space for facings, I therefore cut a duplicate of the top halves of the bodices to use as facings. Do this for both dresses.
Strengthen the facings with iron-on vilene.
Sewing the Girl's Dress
Since I did not cut the front and back bodices on the fold as the instructions specified, I now need to pin and sew these center seams first.
Pin and sew the center seams for the bodices as well.
Pin the sides seams for the skirt and sew them together.
Pin a rolled hem for the skirt.
Sew the hem, either by hand or with the machine.
I did not like the center seam on the front bodice and decided to sew a length of ribbon on top of it. I was going to use the ribbon anyway, but not vertically, only horizontally. In the end, this looked so good that it became a pretty feature.
I then sew the first of three horizontal ribbons onto the front bodice of the top.
The second ribbon in pinned in place and sewed on. Keep it parallel to the first.
The last ribbon is added. It needs to be spaced equally, or in some other way that is visually appealing.
Pin the front bodice to the back at the shoulders. Sew.
Do the same to the facings, sewing the front to the back at the shoulders.
Pin and sew the sides seams of the facings.
Pin and sew the side seams of the bodices.
I pinned a ribbon just above the hemline of the skirt and sewed it on.
Lay the facings on top of the bodices and line them up at the shoulders. Pin all the way around the neckline. Sew.
Cut away the extra fabric so the facing will fold over neatly. Iron it flat.
Fold the seams in at the arms. Pin them in place.
Sew the arms by hand.
Pin the skirt to the bodice. Line the side seams up and pin all the way around. Sew to attach the skirt to the bodice.
This completes the dress for the little girl and leaves me with only the dress for the doll to make.
Sewing the Dress for the Doll
A number of the steps will repeat, but there are some differences between the two dresses. Lay the skirts on top of each other and pin the side seams.
Sew the side seams.
Pin and sew the hem of the skirt.
Pin and sew the center front bodice (unless you cut this on the fold).
Pin and sew the facing for the front bodice.
Pin and sew the center back bodice.
Pin and sew the back facing.
Lay the front and back bodeces on top of each other. Pin and sew the shoulder seams.
Lay the facings on top of each other. Pin and sew the shoulder seams.
Pin the facings to the bodices and the neckline.
Sew the neckline.
Trim away the excess fabric so you can fold the facings back neatly.
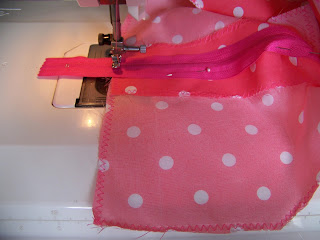
At this stage, I realized that I would not be able to fit this dress over the doll's head. No problem. I pinned a zipper to the center back seam, folding the facing out of the way.
I sewed the zipper in. As the zipper was too long, I simply sewed across the zipper as far down as I could go. The excess zipper can be cut away, or left as is, depending on where it is used.
Open the seam, where the zipper is, with your unpick tool.
Unpick the center seam in the facing. Fold the facings back and pin them in place.
Neatly sew on top of the zipper stitching to attach the facing.
The zipper from the outside.
The zipper from the inside.
Pin and sew the side seams of the facings.
Pin and sew the side seams of the bodices.
Fold the seams in at the arms and pin in place.
Sew the arms by hand.
Tack the waist of the skirt and pin it to the bodice.
Sew the skirt to the bodice.
A pretty little dress to match the other!
Two of a kind!
For more crafty ideas and great products, visit APrettyTalent.com.
Remember to keep nurturing your TALENT for making PRETTY things.
You can subscribe to this blog and receive regular updates by email by simply registering your email address at the top of the current blog.


No comments:
Post a Comment