Designing the pattern and laying out the fabric
I use a dress of my niece's to get the basic shapes and sizes in place. I love the way this dress sits on her and it is very similar to the pattern I have in mind.
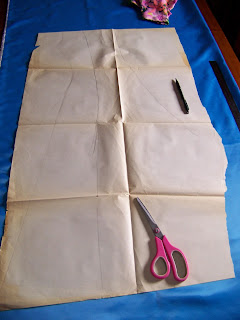
I draw the basic shape of the pattern I want on paper, using the dress as a guideline.
Once I am satisfied with the pattern, I cut it out.
I fit it back on the dress to make sure the sizes correlate. I will have to add a little extra width to my pattern as I am not working with a stretch fabric, such as the example dress is made of. I also need to add 1,5 cm seam allowance to each seam.
I take time to write all of the necessary information on the pattern pieces. I may have to use this pattern again and what is obvious to me right now, may no longer be so obvious the next time round. Little girls have pretty much the same shape in the back as in the front and I won't bother designing special pattern pieces for the back of the dress. Instead, I will cut the front pieces double to serve as back pieces as well.
I trace the bodice of the dress in much the same way as I did the skirt.
I will fold the bodice in half, matching the shoulder seams, before I cut the pattern out. The two sides have to be exactly alike.
I trace the back of the bodice to get the basic outline of the front.
I drop the neckline in the front to make room for the head to fit through and then cut the pattern piece while it is still folded double.
The neckline is really the only place where the front and back bodice differs when designing for prepubescent girls.
I measure the armhole and design a sleeve to fit inside it. I want the sleeve to have slightly more room at the bottom, almost like a frill, and that accounts for the odd shape of the sleeve.
As my fabric does not have a pattern, I can maximise the layout by laying the pattern pieces in opposite directions. Note that I have added extra length to the hemline after negotiating with my niece. It is always a good idea to allow children a say in the design of their own clothes.
I need only two center pieces, but I need four side pieces and therefore these pieces need to be cut a second time.
The bodice and sleeves are cut from stretch netting. Make sure that the stretch takes place in the width and not the length of the pattern pieces when you lay them out. This is very important.
The train is cut the same length as the dress and the full width of the fabric. It does not have a shape.
Sewing the dress
Lay the center front on the side piece, right sides facing, and sew from top to bottom. Repeat this for the other front side as well.
This is what the dress should look like by now.
Repeat the same steps to sew the back together as well. Iron open the seams.
Lay the front on top of the back, pin the sides seams and sew. At this stage you should do the first fitting to make sure the dress fits over the head and shoulders of the child. (You should not be able to pull it up from the feet).
Sew it on three sides. Only the top remains unsewn.
Tack the top of the train, either by hand, or with your machine if it has such a setting.
Leaving space open under the arm, pin the train to the back of the dress. Sew it in place with a stay stitch.
Progress photo: this is what the dress should look like now.
Pin the back bodice to the dress.
Sew the back bodice to the dress.
Pin and sew the front bodice to the dress.
Sew the shoulders seams of the front and back bodice together.
As the netting and train is a little scratchy at the seams, I now tucked these under a length of bias binding that I sewed on by hand to avoid ugly sewing marks on the dress.
The inside of the dress looks much better and all the scratchy bits are now safely tucked away. The bias binding addition has the added advantage of strengthening the seam where the fragile netting was affixed.
Fold the sleeves over and pin.
Sew the underarm seam of the sleeve.
Pin the sleeve to the dress and sew.
Hem the neckline and the sleeves of the dress.
Fold and pin a rolled hem at the bottom of the dress.
Sew the hem of the dress. You may prefer to do this by hand.
It took me about four hours to design and sew this dress, but it has been worth the effort to see the expression and appreciation on this little girls' face. Here you have a view of the back of the dress.
A side view of the dress.
And finally a front view of the dress.
For more crafty ideas and great products, visit APrettyTalent.com.
Remember to keep nurturing your TALENT for making PRETTY things.
You can subscribe to this blog and receive regular updates by email by simply registering your email address at the top of the current blog.


No comments:
Post a Comment