My mom was looking for a container to store her coffee creamer in, and not finding anything suitable, she wanted to pour it into a re-purposed glass bottle. I stopped her and begged for a little time to turn it into something decorative as well as practical. Let me show you how I used glue and chalk paint to turn an ordinary glass bottle into something special.
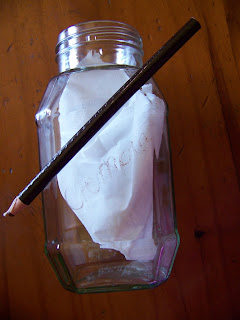
I started my preparations by letting the bottle soak in hot water to remove the stickers. If you find that you have stubborn stickers or glue residue, smear some cooking oil on the paper and let it sit for a while. Oil will dissolve glue. Afterwards you can simply wash the bottle in hot soapy water to clean off the oil. With the bottle clean and dry, I used a China Marker to write the word on the bottle. I stuffed a tissue inside the bottle to make it a little easier for you to read as the brown disappeared into the table's background when I tried to photograph it.
I turned the bottle around and drew the face of a cow on this side, again using the China Marker. I used only the face from the Cute Cow designs available as Digital Downloads in APrettyTalent.com. Check it out if you've missed it.
I then allow the hot glue gun to warm up before I rewrite the word in hot glue, right on top of the China Marker.
Once the glue has set, I turn the bottle over and trace the outline of the cow's face in hot glue.
I find a good paint brush and VanDanique Chalk Paint in Tuscany.
I paint the first layer of chalk paint straight onto the bottle.
It coats the glue as well as it does the bottle.
I put the bottle aside to dry. What I love about chalk paint is that it cleans up beautifully in water!
I have never used chalk paint on plastic, but decided to test it on the lid of the glass bottle as well.
Both the bottle and the lid is left to dry thoroughly before I continue.
With the first layer of paint dry, I apply a second layer to both the bottle and the lid.
Once again it is left to dry. Once dry, I find VanDanique's Dark Wax.
I barely touch the wax and apply it to all the corners and raised edges with my finger.
You may want to apply more wax, but I was satisfied with the project as is. After about 24 hours have elapsed, I will add some Washi Tape trim to link it to the colors in my mom's kitchen, if she prefers.
My mom can now decide which side she likes best, but it is certainly better than a plain old glass bottle!
The designs used in this project are available from APrettyTalent.com. Go to Digital Downloads and select Cute Cows. Add it your cart and proceed to checkout. The link to your downloads will appear in your inbox as soon as the transaction has cleared.
For more crafty ideas and great products, visit APrettyTalent.com.
Remember to keep nurturing your TALENT for making PRETTY things.
You can subscribe to this blog and receive regular updates by email by simply registering your email address at the top of the current blog.


No comments:
Post a Comment