Christmas in the pipeline and I am having great fun gathering together everything that will contribute towards making it a fun and exciting time for friends and family alike. As I planned some designs with Christmas crafts in mind, I thought that there may be a number of you who might be equally interested in getting your hands on some designs. I will walk you through the steps for drawing these pictures of a Santa Clause and a Snowman step by step. I have also made the designs available for download in the shop at minimal cost if you are not interested in drawing the designs yourself. Buy, download, save, enlarge, print and craft! Download the designs here.
Santa Clause:
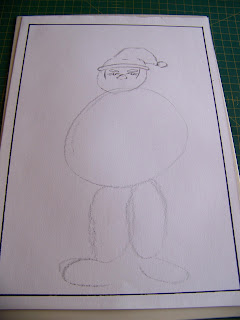
Start by drawing two circles, a large one for the upper torso and a smaller one for the head.
Draw oblong circles for the legs and feet.
Develop the hat.
Some bushy eyebrows and wrinkled eyes are added.
A stubby nose is in order. Heavy sideburns mark the space for the beard.
A bushy mustache suits Santa fine.
Two semicircles barely visible under the mustache is all that is needed to form a mouth.
Time to draw a very full beard. Start by getting the shape in place.
Now make the beard 'hairy.'
It is time to start on the upper body. It takes shape really quick when I start on the arms.
Hands can be daunting, but when they are in thick mittens it becomes a cinch.
Add meaning to Santa's existence by handing him a bag filled with prezzies.
Santa has a signature belt that should not be neglected.
Now we draw his coat with the fur trimmings.
When moving towards the lower body I first get the cuffs of the boots in place.
With the boot cuffs in place, I have somewhere to tuck his baggy pants into.
The only thing remaining is to finish Santa's boots.
I decide to add a little extra by drawing a string of holly into the top right corner. This can be used in cards and can easily be separated from Santa's design, if you so choose. The first step is to merely draw the stem of the string.
Give the stem a little thickness.
Decide where the leaves should go.
The leaves are drawn by drawing connected scallops. Do not forget the veins!
Progress!
Add some berries.
I now use a black Posca marker to outline the drawing.
All that is left to do is to erase the pencil marks and we are done with Santa.
Snowman:
Any traditional snowman consists of three circles to start off with. They should get progressively smaller to the top.
Get the hat in place.
I do like very friendly snowman and therefore this one gets large eyes and a wide smiling mouth. Do not forget the carrot nose! Dimples are always a great idea in a friendly face, as are round cheeks. Why not shape the chin a bit?
Anyone who remains outside in the snow deserves a scarf. Tie it around his neck and then draw the arms in.
We can now trail the ends of the scarf over one of the arms.
I decide the bottom of the snowman is boring and decide to add a picket fence in front as if he has stopped to chat to his neighbor across the fence.
There has to be snow and icicles hanging from the fence!
With the top bar of the fence in place, I develop the poles and the bottom bar.
It is time to start outlining the drawing with a black Posca marker.
Do not forget to erase the pencil lines!
Download these designs from APrettyTalent.com here if you do not wish to draw them yourself.
Download these designs from APrettyTalent.com here.
For more crafty ideas and great products, visit APrettyTalent.com.
Remember to keep nurturing your TALENT for making PRETTY things.
You can subscribe to this blog and receive regular updates by email by simply registering your email address at the top of the current blog.


No comments:
Post a Comment