Last night my niece stormed in here in a huff and a puff. She needed a birthday card for a friend for the very next day! However, it had to be a card of Rafaello of the Teenage Mutant Ninja Turtles - for a girl! Okay then. Not being a fan of the Turtles, I had to do a quick Google search to make sure I got everything in place. It turned out so cute that I decided to redo the card in daylight and to photograph the steps so you could also benefit from what I learned. I show you how to draw the turtle step by step.
I use an A4 cardboard in bright yellow to fold the card from.
Fold the cardboard in half as shown to form an A5 card.
I use a pencil to draw a curved line with a tearing ruler.
Since I want a clean cut line rather than a torn line, I cut the curve out with a pair of sharp-nosed scissors.
I re-position the tearing ruler on the curve, a little bit away from the edge and draw a line in metallic green with a marker.
I am ready to start drawing the head of the turtle. I use a piece of green off-cut paper to do this on. Shape the top of the head.
Draw the bridge of the nose.
Draw the tops of the slits in the mask for the eyes.
Draw the top folds of the mask.
Connect the top of the head with the mask on both sides.
Draw the bottom folds of the mask.
Draw the line of the nose/mouth area.
Connect the bottom of the mask with this line on both sides.
Draw the chin.
Draw both cheeks to connect the mask with the chin.
Draw the corners of the mouth on both sides.
Draw the upper lip.
Draw the bottom lip.
Draw the tongue.
Draw the eyes.
Draw the pupils of the eyes.
Draw a speech bubble on another piece of off-cut green paper. It should be about the same size as the head.
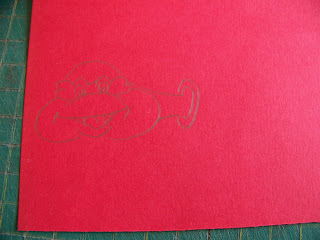
Find an off-cut piece of red paper. Draw the head again on a smaller scale on this paper.
Draw the neck of the turtle.
Draw the circles for the neck opening in the shell.
Draw the shell of the turtle.
Draw the tail of the turtle.
Finish the bottom of the shell with a double line.
Draw the feet.
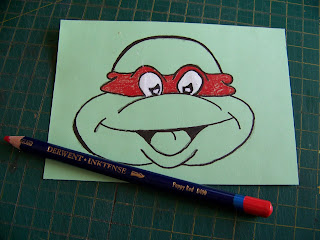
I use an artist's pen to redraw all of the lines in black, but any marker or felt tipped pen can be used for this purpose as well.
What the drawings look like with the lines accentuated in black. Note that I have also colored the pupils and dark recesses of the mouths.
I use a white marker to color the whites of the eyes.
I use Derwent Inktense pencils to color the drawings since these pencils will retain their brilliant vibrancy, even when used on other bright colors. I use Poppy Red for the mask.
I color the tongue with Fuchsia and then tone it down by coloring over it with Antique White.
On the red turtle, the green areas are done in Apple Green.
The shell openings are colored in Ink Black.
I use the black marker from before to add hearts to the shell. This card was intended for a girl after all! You may use any shape you prefer.
I randomly color the hearts in four different colors; Iris Blue, Tangerine, Sherbet Lemon and Violet.
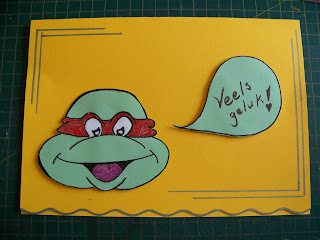
Cut the turtle, the head and the speech bubble out.
Write your message in the speech bubble.
I wanted to raise the head and speech bubble and mounted them on 3D double sided tape.
I used the same metallic green marker from before to add frames to the card. This adds a nice finish.
The red turtle is stuck to the inside of the card. This is much more tame turtle and it is a bit tongue in the cheek, adding a comic element to the card.
I draw the stem and leaves of a flower in Teal Green.
The center of the flower is drawn in Sherbet Lemon.
The petals are drawn in Poppy Red. Remember to add a few half eaten petals. This adds to the comedic element.
The card is now ready for a personal message to be added.
For more crafty ideas and great products, visit APrettyTalent.com.
Remember to keep nurturing your TALENT for making PRETTY things.
You can subscribe to this blog and receive regular updates by email by simply registering your email address at the top of the current blog.


No comments:
Post a Comment