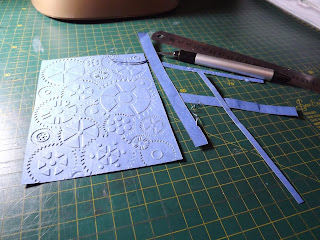
I emboss a sheet of blue paper with an embossing folder from Kaizer Crafts, featuring gears.
I crop the edges of the embossed sheet.
I then ink the raised embossed images with Distress Ink.
I fold a blue A4 sheet of cardboard in half to form a card.
I then use masking tape to tape a die cut of a label, by Sizzix to another sheet of blue cardboard. I also use a 'P' and an 'A' from X Cut Mini Dies to cut the word 'PA' into the label.
I put the sandwich through my Sizzix.
I then use the embossing floder that accompanied the die already used and sandwiched the die cut in the folder, before putting it through the machine once again.
Make sure to position the die cut properly in the emobossing folder.
My embellishment now looks like this.
I ink the embossed surface with Distress Ink.
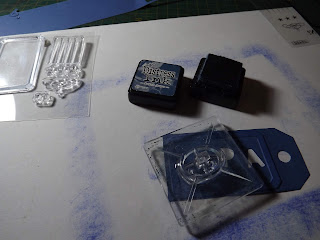
I then use the stamps that accompanied the die and embossing folder to add a pointing finger to the label, drawing the attention to the word 'PA.'
Now the embellishment looks like this.
I find a sheet of shiny silver paper in my paper stash and cut matting for my embossed sheet.
I then cut a small piece of the same silver paper to fit under my label die.
I cut another label with my die cutter.
I then emboss this label as well.
I use double-sided tape to secure the embossed sheet to the matting.
The matting is similarly secured to the card. Notice how I work off-centre.
I use a hammer and eyelet setter to set an eyelet, securing the two labels together.
I then stick the two labels securely together when I put double-sided tape behind them.
The labals are fixed to the card. Note how the word 'PA' is now written in silver because of the backing label showing through the openings left by the die.
I use a glue pen to glue a heavy metal embellishment.
This embellishment is secured to the card.
My card is finally done.
You can watch a compilation video of the above steps on YouTube:
https://youtu.be/fMLuo6yMZyg
Marietjie Uys (Miekie) is a published author. You can buy my books here:
You can purchase Designs By Miekie 1 here.
Jy kan Kom Ons Teken en Verf Tuinstories hier koop.
Jy kan Kom Ons Kleur Tuinstories In hier koop.
Jy kan Tuinstories hier koop.
You can follow Miekie's daily Bible Study blog, Bybel Legkaart, here in English & Afrikaans.
You may prefer to follow the traveling blog, A Pretty Tourist.
For more crafty ideas and great product reviews, visit A Pretty Talent on Facebook.
If you are in a literary mood, follow Miekie's musings, stories and poetry on A Pretty Author - Miekie.
Remember to keep nurturing your TALENT for making life PRETTY.
You can subscribe to any of these blogs and receive regular updates by email. Simply register your email address at the top of the applicable blog.


No comments:
Post a Comment