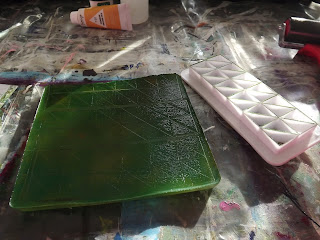
You will need gelatine, glycerine and rubbing alcohol. I could only get the kind that had wintergreen in it. I sure hope this does not affect my project negatively.
I wished to make a couple of really big Gelli Plates and therefore I increased the amounts drastically. Feel free to reduce yours proportionally. I started by adding 4 cups of cold water to a bowl.
I started off measuring off the gelatine, but then decided to simply add the whole container gelatine to the water. The container holds about 250 ml.
I sprinkled the gelatine on the cold water and let sit, while I prepared the containers.
I went in search of dedicated plastic trays to use for my gelli plates. I settled on this cat's litter tray (brand new!) and planter trays. I discovered that there were very few plastic trays available that did not have some sort of blemish on their surface. I sprayed the tray with a non-stick spray.
I also cut a sheet of wax paper to line the tray with.
In the meantime the gelatine had become frothy and was ready to be mixed.
I added half a cup of boiling water to the gelatine as well as 3 cups of Rubbing Alcohol.
I also added 2 full containers of glycerine, which is about 500 ml of glycerine.
I placed the whole bowl inside another bowl and filled the second bowl with boiling water. I then placed it on slow on the stove top and stirred slowly to dissolve the gelatine.
When the gelatine had melted, I removed the bowl from the stove.
I filled the largest container. I made the gelli plate substantially thicker than my bought one, as I was afraid that a gelli plate of this size might otherwise simply tear when handled.
The container was placed in the fridge to set overnight.
I had prepared yet a smaller tray as well and I had enough mixture left over to fill this one as well. It also went to the fridge when I was done.
The gelli plates set in an hour or two, but I only had time to continue the next day.
I found that they were very easy to remove from the tray, but that the wax paper backing proved to be more difficult to remove from the gelli plates.
The biggest of the two cracked in the process. I had suspected that these two were too big to be removed from their containers and this proved it.
I turned the left over one out on a cutting board to remove the wax paper.
The paper had made a mess of the back of the gelli plate. I should never have lines the containers with wax paper.
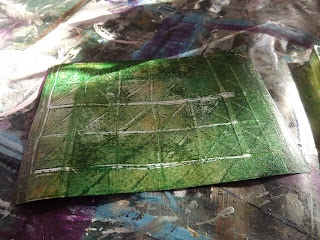
Returning the gelli plate to the container, you can still see the creases and indents left by the wax paper.
I decided to melt the plates again and start over. I turned the first one into a glass bowl and mocrowaved it for roughly three minutes.
It melted very quickly and very well.
I then poured it into the container.
As I knew I had no intention of removing it from the container again, I poured some of the mixture into a smaller container I had bought for this purpose.
The gelli plates went back into the fridge and in an hour or so, I was able to use them. The small one proved easy to handle and I risked removing it from its container.
Here is a side by side comparison of my homemade gelli plate, next to the original Gelli Plate on the right.
I put my plate to the test by making my next seven index cards for the ICAD 2019 challenge that I have taken on. It worked very well, aside from the fact that, unlike the original Gelli Plate, this one did not stick to the work surface and kept moving about whenever I used the brayer on it.
My first print pulled from the gelli plate.
Preparing the homemade gelli plate for the second print.
The second print.
I then wondered how easy it would be to clean the gelli plate. I spritzed water on it and wiped it with a (dried out) wet wipe. It cleaned off without a hassle.
Preparing the homemade gelli plate for the third print.
The third print.
Preparing the homemade gelli plate for the fourth print.
The fourth print.
Preparing the homemade gelli plate for the fifth print.
The fifth print.
Preparing the homemade gelli plate for the sixth print.
The sixth print.
By now the homemade gelli plate was starting to show signs of wear and tear, unlike the original Gelli Plate which still looked brand new after I had used it to make 14 of these cards in succession.
Preparing the homemade gelli plate for the seventh print.
The seventh print.
As far as the quality of the prints were concerned, I had no complains. The homemade version delivered results as outstanding as the original Gelli plate did. Here are the seven plates side by side.
Unlike the original plate, this homemade one did have markings of the tools left on it. I had used these same tools on the original one without suffering the same fate. But perhaps I should have left it in the fridge for longer before I used it. This is also a possibility.
More signs of wear and tear.
And even more signs of wear and tear.
I cleaned the gelli plate up as well as I could and returned it to the glass bowl to melt it again.
It melted well, but it was obvious that I had not managed to get all of the paint off of the gelli plate.
I did not wish for the paint to dry on my bowl and I quickly soaked it in scalding hot soapy water.
This is after I poured the mixture back into its container, of course.
So, what is my conclusion then? I managed to make all four of these gelli plates for about R228. That is one of 29x42 cm, one of 24x 34 cm and two of 12x14 cm. The containers cost me about R75, the gelatine was R42, the glycerine was R46 and the rubbing alcohol was R65. By comparison, the original Gelli Plate measures 6"x6" or 15x15 cm and cost me R455. I dearly wished to buy the bigger plates, but their prices increased exponentially with their sizes. You have seen the results. Judge for yourselves. Do I regret my purchase of the smaller Gelli Plate? No, it is decidedly a marvelous tool. Will I buy the bigger ones? No, they are simply too expensive. I would much rather use my homemade ones and melt them down when needed, before resetting them again.
You can watch a compilation video of the above steps on YouTube:
https://youtu.be/STIDmUUbgXw
Marietjie Uys (Miekie) is a published author. You can buy my books here:
You can purchase Designs By Miekie 1 here.
Jy kan Kom Ons Teken en Verf Tuinstories hier koop.
Jy kan Kom Ons Kleur Tuinstories In hier koop.
Jy kan Tuinstories hier koop.
You can follow Miekie's daily Bible Study blog, Bybel Legkaart, here in English & Afrikaans.
You may prefer to follow the traveling blog, A Pretty Tourist.
For more crafty ideas and great product reviews, visit A Pretty Talent on Facebook.
If you are in a literary mood, follow Miekie's musings, stories and poetry on A Pretty Author - Miekie.
Remember to keep nurturing your TALENT for making life PRETTY.
You can subscribe to any of these blogs and receive regular updates by email. Simply register your email address at the top of the applicable blog.


No comments:
Post a Comment