
I was gifted these A6 index cards by a good friend who was gling to join me in this year's ICAD initiarive. The index cards have a lined side and a blank side, making them ideal for the project. They are produced by 8 Star.

DAY 1
The inspirations for Week 1 read as follows: Typography, symbols, words, graffiti, found texts & poetry. The prompt for Day 1 was Mailbox. I started by painting a card roughly with Medium Magenta Acrylic paint by Bianyo.

I then mixed Dala Acrylic Texture Paste to Light Blue Permanent acrylic paint by Bianyo.

I found a stencil with text on it, which I laid down on my index card. The text would link to the theme for the week.

I used a palette knife to apply a thick layer of paste onto the stencil.

This is the result I got when I pulled the stencil away.

I found a stamp with a mail stamp to link to the prompt. I also found a couple more stamps to use on the project. I stamped these images onto the card using Archival Ink by Ranger.

My first index card was now done.

DAY 2
For the next card, the prompt was Pepperment. I laid down three strips of Gelatos in Pepperment colours diagonally across an index card, linking the card to the colour prompt.

I blended the Gelatos with a wet wipe.

I then found some acrylic stamps with music notation to use as 'symbols', linking to the theme for the week.

I used Adirondeck Earthtones ink by Ranger to stamp the images onto the card. The colour I opted for was Wild Plum.

I then used my Croxley metallic gel pens to write some ideas on the index card.

I used Tombow glue to add some golden embellishments to the card before I was done with it.

DAY 3
For the next card, i found a stencil to decoupae onto the card. The prompt was Magenta and the serviette would link nicely to this colour.

I coat the card with Dala Acrylic Gel Medium. Then I lay the serviette over the wet card and lastly I coat the serviette with the Acrylic Gel Medium.

Once the card is dry, I carefully cut the excess serviette away with a pair of scissors.

I once again find some stamps to use on the serviette. This time I use the words stamp, to link to the theme for the week.

I stamped as I did on a previous card.

I then spray some of Dala Fabric Spray on the serviette, creating bigger and smaller blobs of paint.
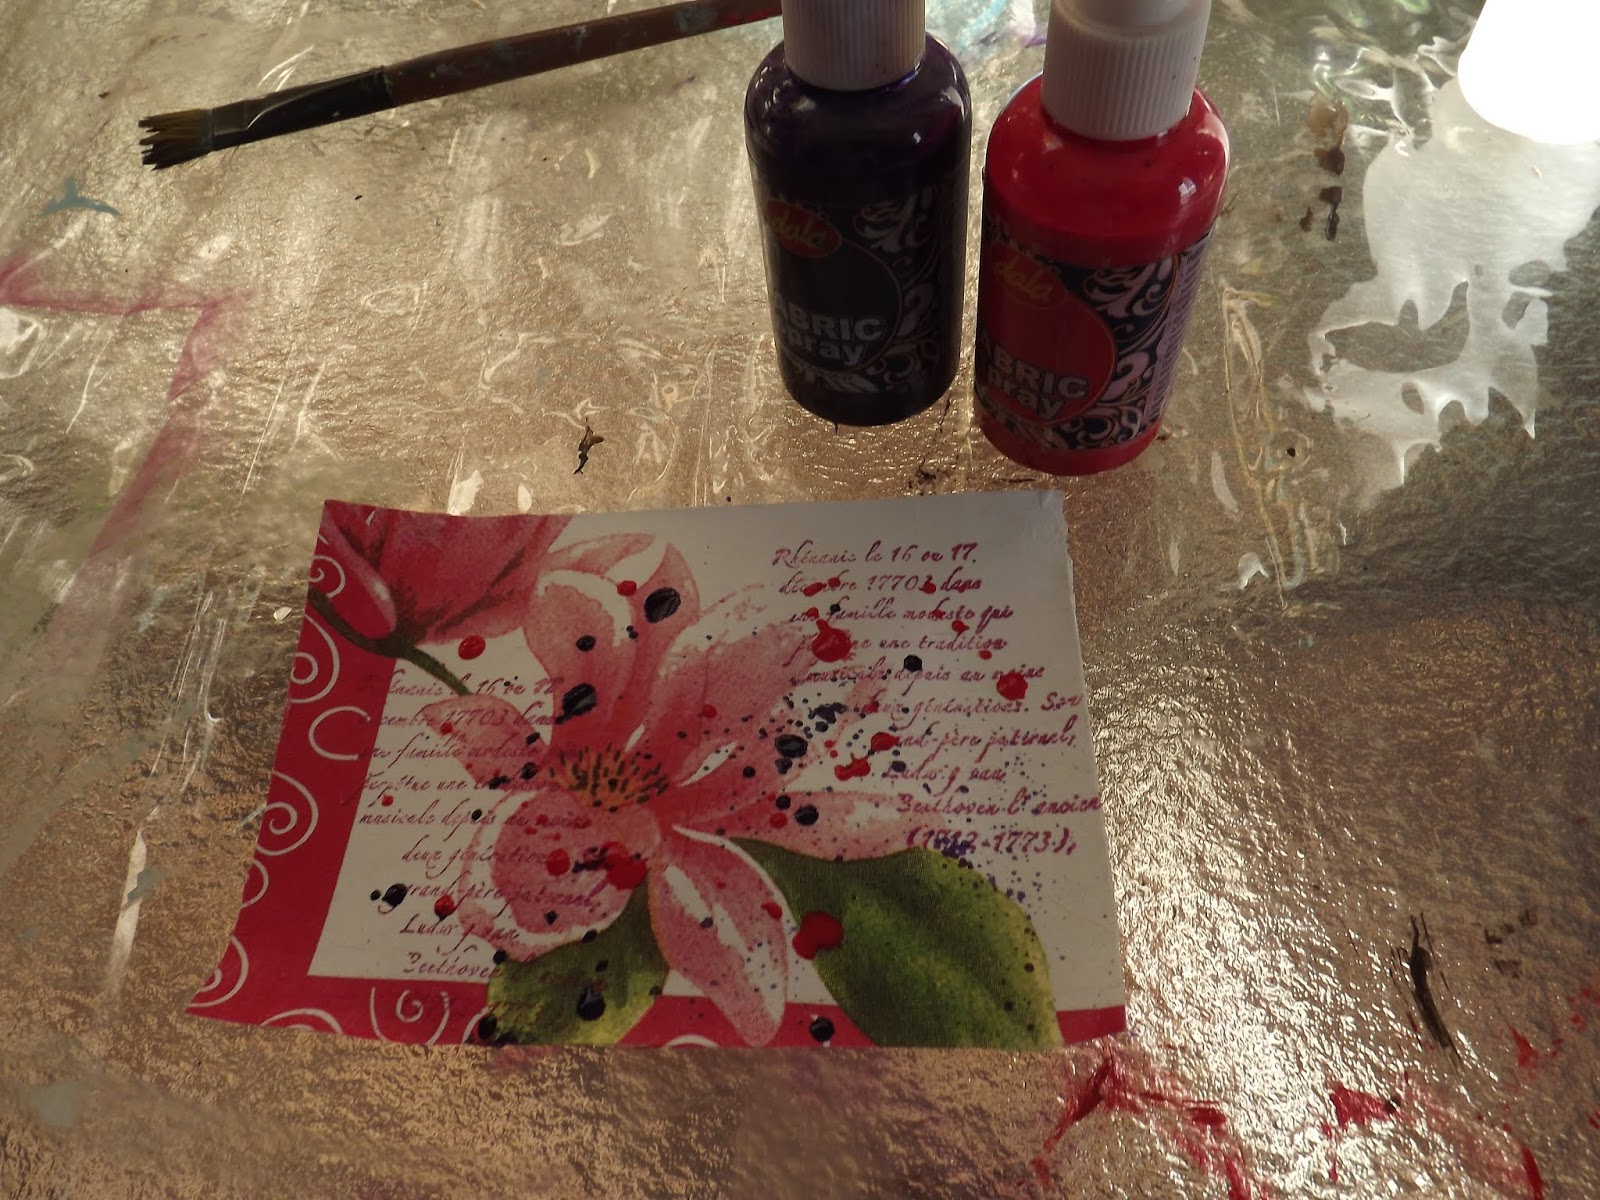
The completed card.

DAY 4
For the next card, the theme is Reflection, and I like to reflect with a cup of coffee, so I opt to use coffee staining techniques on this card. I make a strong amount of coffee for this.

I paint the card with the coffee.

I wait for the coffee to dry. Then I deliberately spill some black cofee on my work surface.

I place my coffee mug on the spilled coffee.

I then use the bottom of my cup to stamp some coffee circles onto the card.

This is what I wished to achieve.

I also use a toothbrush to make bigger and smaller splatters of coffee on the card.

I find a stamp with an image of an open book. This will represent my time reflecting on the Bible. I stamp this image onto the card with Tim Holtz Distress Ink in Ground Espresso.

I cover the wet stamped image in clear embossing powder by Impressions.

I set the powder with heat.

I use a brown Pigma pen with a brush tip to mimick writing in the Bible, linking it to the theme for the week.

I also draw a rough border free hand style.

Then I write the words 'The Lord is my Shepherd - fear not! Ps. 23' on the card.

I glue some coffee beans to the card to add the finishing touches.

The completed card.

DAY 5
The prompt for day 5 is Tourist Map. I decide to decoupage some tea bags to the card. I have dried and emptied these bags a while ago already and keep them ready in a handy tin.

I layer the card in Dala Acrylic Gel Medium.

I lay the teabags on the card, one at a time, covering each bag with the Acrylic Gel Medium, as I go along.

The bags overlap each other on the card. I leave the project to dry.

Once dry, I trim away any bits that stick over the edges of the card.

I draw a map by hand on the card, using the Pigma pen from earlier. My starting point is Wallow in Pity. I then travel past the Mt. of Obstacles and the Lake of Sorrows, before finally reaching the destination called Place of Joy. This is meant to illustrate that we are all tourists in this life with its obstacles and sorrows, but that we need to keep moving past it to find our place of true happiness. Do not get stuck in a place that is not your destination, but just a tourist stop.

I stamp some images onto the card of things that can help us move past the stops along the way.

I stamped a piano to represent music, butterflies to represent nature, flowers to represent the beauty of life, a figure to represent friends and family, and a cat to represent pets and animals. I also stamped some words onto the card, as I find that learning more about what we are suffering, often has the ability to help us come to terms with it, as it gives us the vocabulary to express ourselves. I use a gel pen to create a frame around the card.

I colour the stamped images with Giotto Markers.

The completed card is a visual mess, but it was the most satisfying one to date.

DAY 6
The prompt for day 6 is leaf or petal.

I cover a card with Dala Acrylic Ink.

I then find this kitchen utensil which I will stamp onto the card, as I like the design on it. I love using found objects for odd puposes in my projects.

I use Distress Ink to stamp onto the card.

I then find some stamps with images of leaves which I stamp over the previous stamps.

One of the stamps needed some assistance with a pen to add detail.

I colour the stamps with a ProMarker.

I use a Pitt Pen to journal on the card, linking it to the theme of the week.

I then find more stamps to stamp around the journaling.

I add some hearts to 'frame' the card, which I draw by hand.

The completed card.

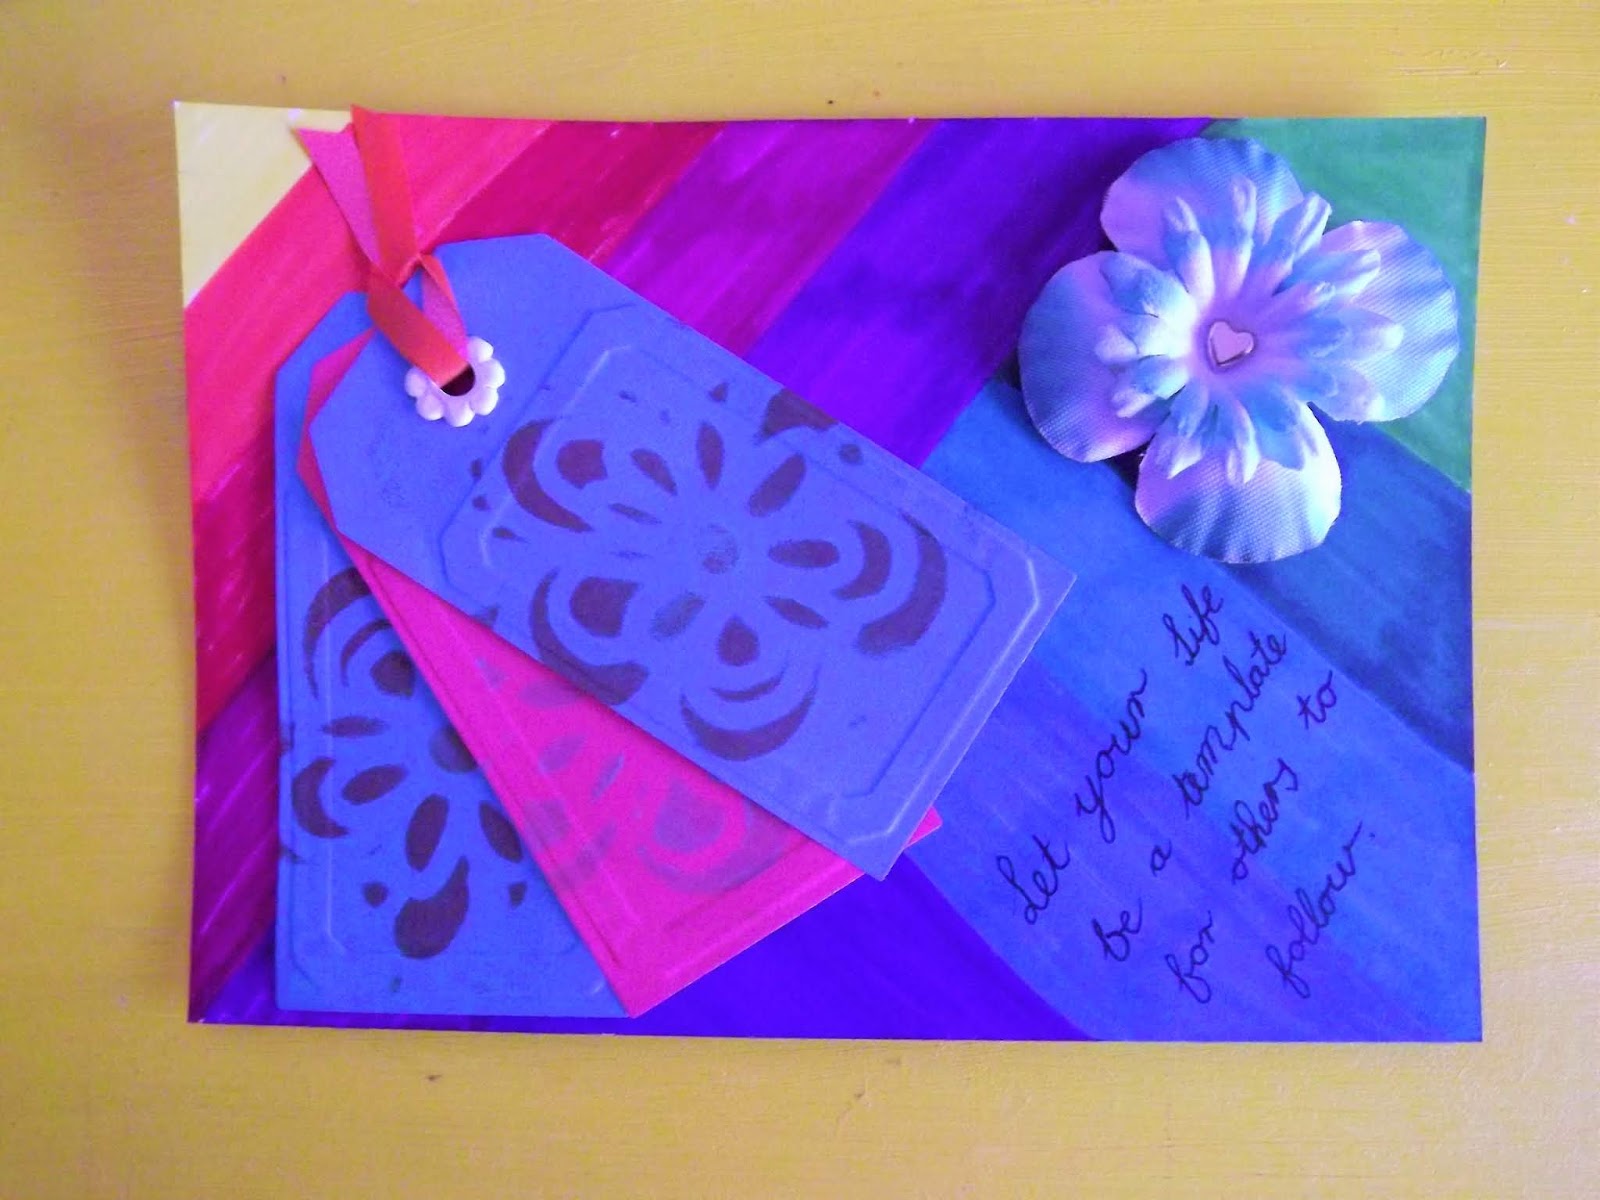
DAY 7
For day 7 the theme is stencils. I colour the card with Sharpies.

When I get halfway with my colouring, I change direction.

What my coloured card looked like.

I then cut three sheets of paper to fit in my Sizzix.

I sandwich the papers with a die of a label between my cutting plates.

I crank it through my Sizzix.

I then place die cuts inside an embossing sheet, before cranking it through the Sizzix again.

The result of this effort.

I then find a stencil of a flower to stencil onto the labels, using sponge daubers.

This stencilling ties into the prompt for the day.

I use different colours on the die cuts.

I am going for variety in this endeavour.

I use double-sided tape to secure the labels together.

I then slip a brad into the tops of the labels.

I use a hammer and brad setter to set the brad.

Work on the back of the brad.

I tie a small piece of ribbon into the brad.

More tape on the back to secure the labels to the card.

I use a Faber Castell gel pen to write some words on the card, tieing it in with the theme of the week.

I then buid a flower from some fabric petals, securing them together with a spit pin.

I secure the ribbon in place with glue.

The completed card.
Week 1 is done and dusted!
You can watch a compilation video of the above steps on YouTube:
https://youtu.be/iFQXwHGo5D0
Marietjie Uys (Miekie) is a published author. You can buy my books here:
You can purchase Designs By Miekie 1 here.
Jy kan Kom Ons Teken en Verf Tuinstories hier koop.
Jy kan Kom Ons Kleur Tuinstories In hier koop.
Jy kan Tuinstories hier koop.
You can follow Miekie's daily Bible Study blog, Bybel Legkaart, here in English & Afrikaans.
You may prefer to follow the traveling blog, A Pretty Tourist.
For more crafty ideas and great product reviews, visit A Pretty Talent on Facebook.
If you are in a literary mood, follow Miekie's musings, stories and poetry on A Pretty Author - Miekie.
Remember to keep nurturing your TALENT for making life PRETTY.
You can subscribe to any of these blogs and receive regular updates by email. Simply register your email address at the top of the applicable blog.
No comments:
Post a Comment