Who of us do not love to play with a fun interactive shaker box? So, instead of simply making another card, why not transform it into a fun plaything while you're at it? In today's blog I show you how to make a shaker box. Burt first, we use one of the designs from my book, Designs By Miekie 1, to colour and set the theme for our card.
Find a suitable piece of sturdy craft paper, measuring 6" x 12".
Fold the paper in half to form a card measuring 6" x 6".
Cut a piece white printer paper to measure 4,5" x 4,5".
We are going to redraw the design onto this paper and need to make sure that it will fit neatly on our card, leaving us enough space to play with.
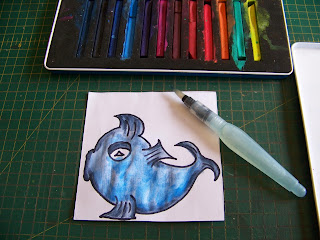
I use this fish design from my book Designs By Miekie 1. The design is simply redrawn by hand onto the smaller paper. You may opt to print it to size.
I then use a Sharpie marker to define the outline better.
I will now paint the design in Derwent Inktense.
I start with a dark blue on the edge of the fish. I pick the Inktense up with a Pentel Aquash brush and transfer it to the paper in this manner.
The inside of the fish is painted a paler blue.
The eye is painted purple. The fish is then set aside to dry.
Now I cut a piece of blue paper to measure 4,5" x 4,5".
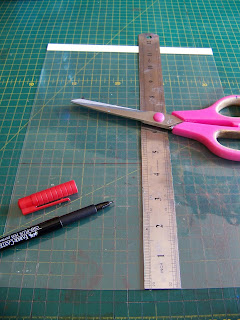
I also cut a sturdy piece of transparency to measure 4,5" x 4,5 ".
I put double-sided tape all around the edges of the wrong side of the blue paper.
The paper is then secured to the card.
Now I punch the wording for the card from the same blue paper.
I use double-sided 3D squares which I cut in half, to mount the punched-out letters on.
Here you can see clearly why I need to half the squares.
I secure my lettering to the card.
Now, I carefully cut out the painted fish design.
I use Tombow glue to secure the fish to the blue paper.
I then cut 3D double-sided tape in half and stick this down all along the edges of the blue paper.
I fill my design with a couple of seed beads.
I then carefully lay the transparency on the double-sided tape, trapping the beads inside.
A foam rubber octopus is glued onto the card in a warm colour to provide and accent point.
I now cut a paper frame with a width of 1 cm from the blue paper. The frame measures 4,5" x 4,5".
The frame is given double-sided tape on the wrong side.
The frame is then secured to the transparency, effectively hiding the unsightly white double-sided 3D tape.
And that is as easy as it is to make a shaker box card!
Marietjie Uys (Miekie) is a published author. You can buy my books here:
You can purchase Designs By Miekie 1 here.
Jy kan Kom Ons Teken en Verf Tuinstories hier koop.
Jy kan Kom Ons Kleur Tuinstories In hier koop.
Jy kan Tuinstories hier koop.
You can follow Miekie's daily Bible Study blog, Bybel Legkaart, here in English & Afrikaans.
You may prefer to follow the traveling blog, A Pretty Tourist.
For more crafty ideas and great product reviews, visit A Pretty Talent on Facebook.
If you are in a literary mood, follow Miekie's musings, stories and poetry on A Pretty Author - Miekie.
Remember to keep nurturing your TALENT for making life PRETTY.
You can subscribe to any of these blogs and receive regular updates by email. Simply register your email address at the top of the applicable blog.


No comments:
Post a Comment