Nobody who has been
following my posts and blogs can be in any doubt that I am a staunch Derwent
supporter, absolutely loving the quality of the products they have to offer. I
have also been a long time admirer of their soluble waxbar, the Derwent Artbar. This is
like an oil pastel in consistency, able to stick to a great many surfaces, e.g.
glass, wet surfaces, plastic, oil paintings, etc. However, it is also
water-soluble, which gives it the added benefit that you can paint it, similar
to water-soluble pencils. Recently I came across a similar product by Reeves, the Reeves Wax Pastel. I
have not been able to find a set with more than 12 colours (Derwent offers 72 –
though it’s hard to find sets larger than 24). It wasn’t too badly priced and I
bought a set to compare. I worked on sky blue Fabriano Elle Erre 220 gsm paper
(the smooth side). Let me share my findings.

Mark Making
Let’s start with the
Artbar. It has a rather unique triangular shape which I love.

When you turn the
Artbar on its sharp edge, you can make wonderfully fine lines. If you use a
long bar, instead of a small piece as I am demonstrating with, you will find it
easy to construct longish straight lines with the Artbar.

My set of Artbars has
been in use for a couple of years already and you’ll note that quite a few of
them are broken. This sometimes happens accidentally when the bar warms up in
your hand and then simply snaps off. Most often times it is done on purpose,
though. I break small pieces off so that I can draw thick lines by turning it
on its broad side.

The design of the
Artbar therefore makes it easy to vary the application with a simply twist of
the bar, resulting in a range of marks, without changing products. Very handy.

Reeves’s product comes
in a traditional crayon form. As long as you have the crayon point, you will be
able to make thin lines, although I have to point out that the line was not as
thin as the one achieved by the Artbar. Since I was working with a brand new
set of Reeves bars, none of the points were worked down. I did manage to accidentally
break a few of them during the demonstration. This is something worth
considering. They break as easily as the Artbar and I would put them on equal
footing there. The problem is that once they’ve broken, the only sharp edge you
are left with is the one at the flat end, which is circular and certainly much
trickier to work with.

I turned the point
flat (as when holding a pencil flat) to achieve the broad strokes.

I then turned it upright
to see what kind of marks I could get out of the bottom end.

Layering & Scgraffito
I laid down a very
thick layer of one colour in the Artbar. Note the wax crumbs that are created
in the process. Reeves produced much less of these.

I then laid down
another thick layer of Artbar in a contrasting colour on top of the first. I
noticed that the colours did not mix to create a third colour, but each
retained its own integrity. I also noticed that it was difficult to cover the
bottom colour completely, although I have achieved this successfully in the
past by simply going back over it again and again. The point is that it
requires effort and the use of a lot of product.

I shook the wax crumbs
off onto a plastic lid, which doubles as a convenient palette. I will use these
later for another comparison.

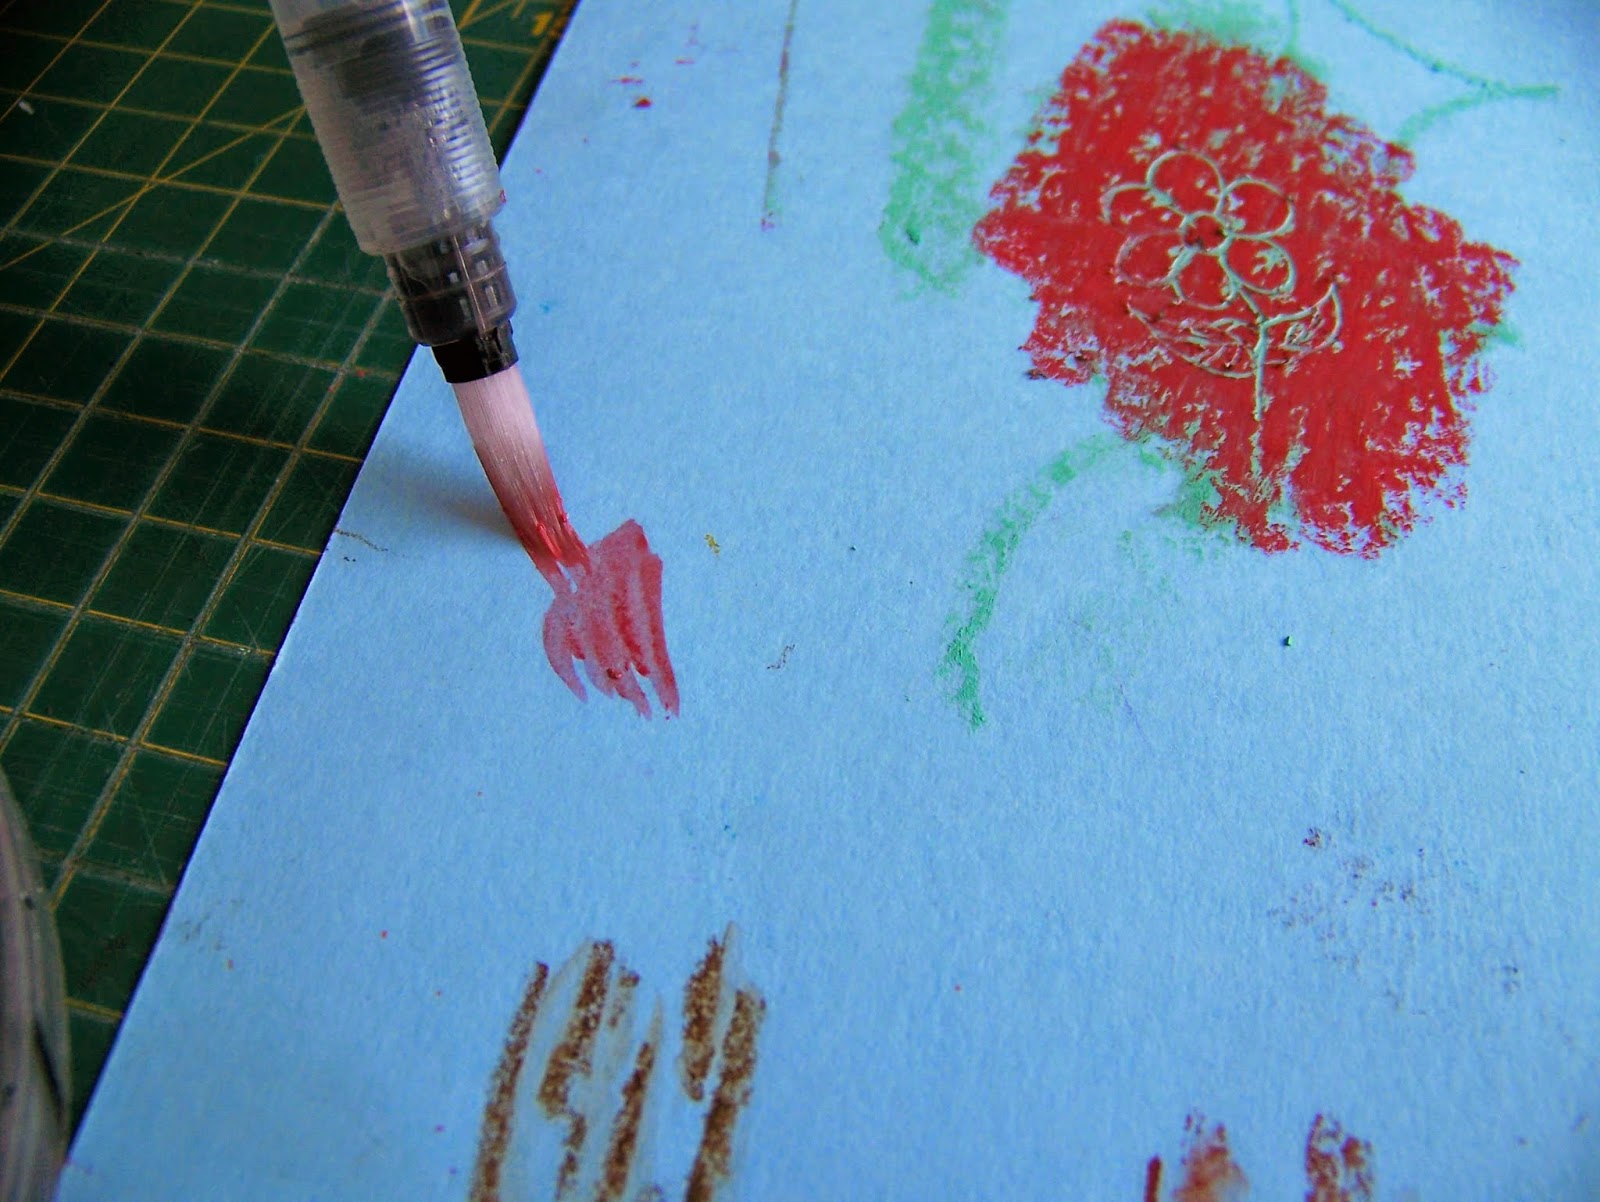
I then took an
embossing tool and drew a very simply design in the layers – this is called
scgraffito.


It came time to do the
same thing with the Reeves bar. I laid down a thick layer of dark blue.

I then laid a thick
layer of dark red on top of the blue and immediately two very important
differences from the Artbar. The first is that the two colours mixed to create
a third colour, loosing their own identity in the process. The second was that
the two colours mixed completely. I could not find a single spot where I could
see the bottom colour peeking through, unlike the Artbars. A third observation
was that I was left with almost no residue to shake off onto a palette.

With the two colours
mixing so completely, would it still be possible to do scgraffito? Would I see
the colour of the sky blue page, or would I see the dark blue of the bottom
colour? It would seem that I did have some of the original dark blue left at
the bottom and I managed to recover this with the scgraffito. I did manage to
scrape the residue off the embossing tool and transfer this to the palette for
another comparison later.


Here is a side by
side comparison of the two.

Combination Wet/Dry
One of the attributes
I love about water-soluble products is the fact that you can work partially wet
(or partially dry), not having to paint the whole picture. I was now going to
test how the two products stood up to this test. I once again started with
Derwent Artbar drawing some broken lines to represent a tree stump.

Using the PentelAquash brush with a water reservoir in the handle, I painted very thin lines of
water to the side of each line. The intention is to blur the line on one side
so that it appears softer and lighter, as if the light source comes from that
side.


I drew similar lines
with the Reeves bar.

I used the Pentel
Aquash brush again in the same fashion as before. I was surprised to see that I
had much less control over the effect here. The Reeves bar seemed to dissolve
much more quickly at the merest suggestion of water. This could work to your
advantage if you had a different outcome in mind than the one I had. As it was,
I was a left feeling a little disappointed. I did not manage to retain enough
dry effect, rendering the technique rather useless. What could I do to change
this next time? I would not use the Pentel Aquash brush. Knowing how soluble
the Reeves bar is, I would use a normal brush, dip it in water, squeeze the
water from the bristles (or dry it on a paper towel) and then paint the lines
with an almost dry brush.

Here is a side by side
comparison.

Watercolor Painting
For the next test I would
use the bars as watercolors. I drew a simply design on the Elle Erre paper with
an HB pencil and selected similar colour from both products.

Starting with the
Derwent Artbar, I used the Pentel Aquash brush to pick paint up from the bar,
dissolving the paint on the brush. I painted the sail of the boat with the
loaded brush.


I then coloured the
boat itself with the dry Artbar before painting it with water, dissolving the
paint on the paper.


I repeated the same
exercise using the Reeves bars. I started with the sail, picking the paint up
from the bar.


I then coloured the
boat with the dry bar and painted it with water.


Here is a side by side
comparison. What is my conclusion? Both products performed equally well in this
test and I would be hard pressed to conclude that one was in any way better or
worse than the other. Both were absolutely brilliant.

Splatter
There is another
technique watercolorists often use, and that is splattering. It was time to
test this possibility. Most people use old toothbrushes for this, but I have
discovered that the Pentel Aquash brush is really rather brilliant at this. I
hold the bar over the paper and then sweep the brush over it, causing the colour
to splatter over the page. I started with Derwent Artbar.


I then repeated the
exercise with the Reeves bar.


I once again had to
conclude that both products stood up to this test equally well. Here is a side
by side comparison.

Painting with the Scgraffito Residue
Remember those
scrapings we kept aside on the plastic lid/palette? I turned my attention to
this now. I picked the Derwent Artbar residue up with my Pentel Aquash brush
and painted it on the page. There was so much colour that I had to clean the
brush before I could put it on the paper. This could save a lot of money if you
could keep the scrapings in a dedicated palette. Can you see how much colour I
had left on my brush after putting down the strokes I needed for the
demonstration?


I struggled to pick
the Reeves residue up from the palette, but the only reason for this is that
there was not much residue to start with. Once I did manage to pick it up, it
delivered much the same results as Derwent and I was left to conclude that the
two products compared very well once again.


Mixing Wet Colours on Paper
I had one more test to
put the products through. How well could I mix wet colours on paper? We have
already put them to the dry test when we layered the two colours on top of each
other. I laid down two colours of Artbar and then wet it with water, using my
Pentel Aquash brush. They mixed beautifully and the blue and yellow gave me a
fabulous green.


I did the same thing
with the Reeves bar and once again got a great green from the blue and yellow
that I started with.


Here is another side
by side comparison.

I keep these tests as
reference sources for future projects and so was left to mark it accordingly. I
gave it an appropriate title.

I then marked each
test result so that I would know in future which product gave me the results
I’m looking at.

What is the conclusion
I reached after all this? Both products were absolutely brilliant. Derwent won
hands down for the best design, allowing a wider range of mark making. Reeves
would blend when dry, which Derwent would not. This is not a win or loose for
either product. Sometimes blending is great and sometimes it is the last thing
you want to achieve. It is best to take note of this and bear it in mind in a
project. What am I going to do? Add the new Reeves bars to my older Artbars and
work with both! I loved the colours it brought to my palette, even though there
are only 12 colours to add. I had not been able to do a single demonstration
using the same colour from either set. That means that my palette for waxbars
had just grown exponentially, which is always a good thing.
In the next blog I use
the two products jointly in a project. Be sure not to miss that.
For more crafty ideas and great products, visit APrettyTalent.com.
Remember to
keep nurturing your TALENT for making PRETTY things.
You can
subscribe to this blog and receive regular updates by email by simply
registering your email address at the top of the current blog.
No comments:
Post a Comment