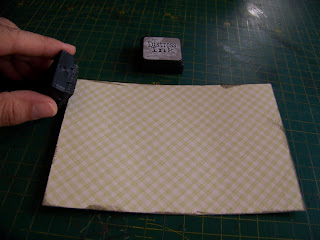
I start by selecting 2 coordinating sheets of paper. The plain one should measure at least 12" x 6", unless you want to create a differently sized card.
I needed to cut my plain paper in half for it to be the desired size.
I then folded it in half to measure 6" x 6".
I measured and cut a piece of paper from the coordinating paper to fill 1/3 of the front of my card, allowing for a small border around the edges. Mine measured 4" x 5,5".
I then used a distress ink pad to ink the edges of the coordinating paper.
The colour I used for my inking throughout this project is Tim Holtz' Distress Ink in Pumice Stone. However, I suggest you use whatever you have available that will work with your colour scheme. Never get hung up on someone else's choice of colours.
I then find an A4 sheet of paper in a very pale yellow, almost cream colour. This will coordinate very well with my existing colour scheme.
I measure and cut a piece from this paper to fill the top 1/3 of my card. Mine measured 2" x 5,5".
I gather some paper crimps to emboss my project with.
The piece of paper that I cut for the top of my card is embossed.
I then ink the edges.
I also rub the ink pad lightly over the embossed paper to give slight colour to the embossed surface.
I stick this paper in place with double-sided tape.
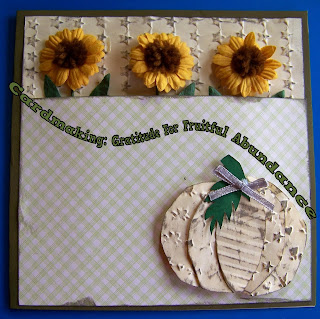
I then use Tombow glue to glue some sunflowers onto the card.
I once again use double-sided tape to place the bottom paper over the flower stems and to keep it in place.
I then draw a very rough outline of a pumpkin on the coordinating paper I used. I need five segments on the pumpkin, but draw a 6th to make the pumpkin slightly wider than makes sense. This is to accommodate the overlap later on.
When I cut the segments apart, I cut only the 5 segments I need. Be sure to number them on the back so your pumpkin can be reassembled correctly. This is also shy my numbering reads from the back.
Each piece of the pumpkin is embossed differently from the other pieces.
Each piece is then inked around the edges and lightly on top of the embossing.
I use 3-D double-sided squares to attach the pieces to the card.
Make sure the center piece ends up on top of the other pieces when you overlap them.
I draw a stem and leave for the pumpkin on green cardboard.
This is inked on the right side. I then use a 3-D square on the stem and double-sided tape on the leave.
I attach it to the pumpkin.
The final touch is to glue a ribbon to the pumpkin.
You can now add any appropriate wording of your choice. This is a brilliant card for employers to give to their employees who worked hard throughout the year to help bring in the 'harvest' for the company.
A close-up view of the completed card.
Marietjie Uys (Miekie) is a published author. You can buy the books here:
You can purchase Designs By Miekie 1 here.
Jy kan Kom Ons Teken en Verf Tuinstories hier koop.You can purchase Designs By Miekie 1 here.
Jy kan Kom Ons Kleur Tuinstories In hier koop.
Jy kan Tuinstories hier koop.
For more crafty ideas and great products, visit A Pretty Talent on Facebook.
Remember to keep nurturing your TALENT for making PRETTY things.
You can subscribe to this blog and receive regular updates by email by simply registering your email address at the top of the current blog.


No comments:
Post a Comment