
I do the index cards on this set of cards that has a blank side and lines on the reverse.

I have already prepped the surface of the cards in the previous blog and I now continue working on a set of cards that look like this.

Day 50
The theme for day 50 was escape. I used this prepared background for this day's theme.

I tear a page from Phil Bosman's book 'n Tuin van Vriendskap to use on my index card.

I crop the page with an artist's knife and steel ruler.

Then I use 3D foam tape to raise it slightly off the card.

I use a Rolfes Metallic Marker to draw a stitched frame around the card.

I shape some faces in my fondant mold, using my hot glue gun.

I also shape a heart in another mold.

Once set, the molds simply pop out of the silicone molds.

I color the silicone molds with the marker by Rolfes.

I use Tombow glue to attach the embellishments to the card.

My completed index card for day 50.

Day 51
The theme for day 51 was numbers. I continue working on this card.

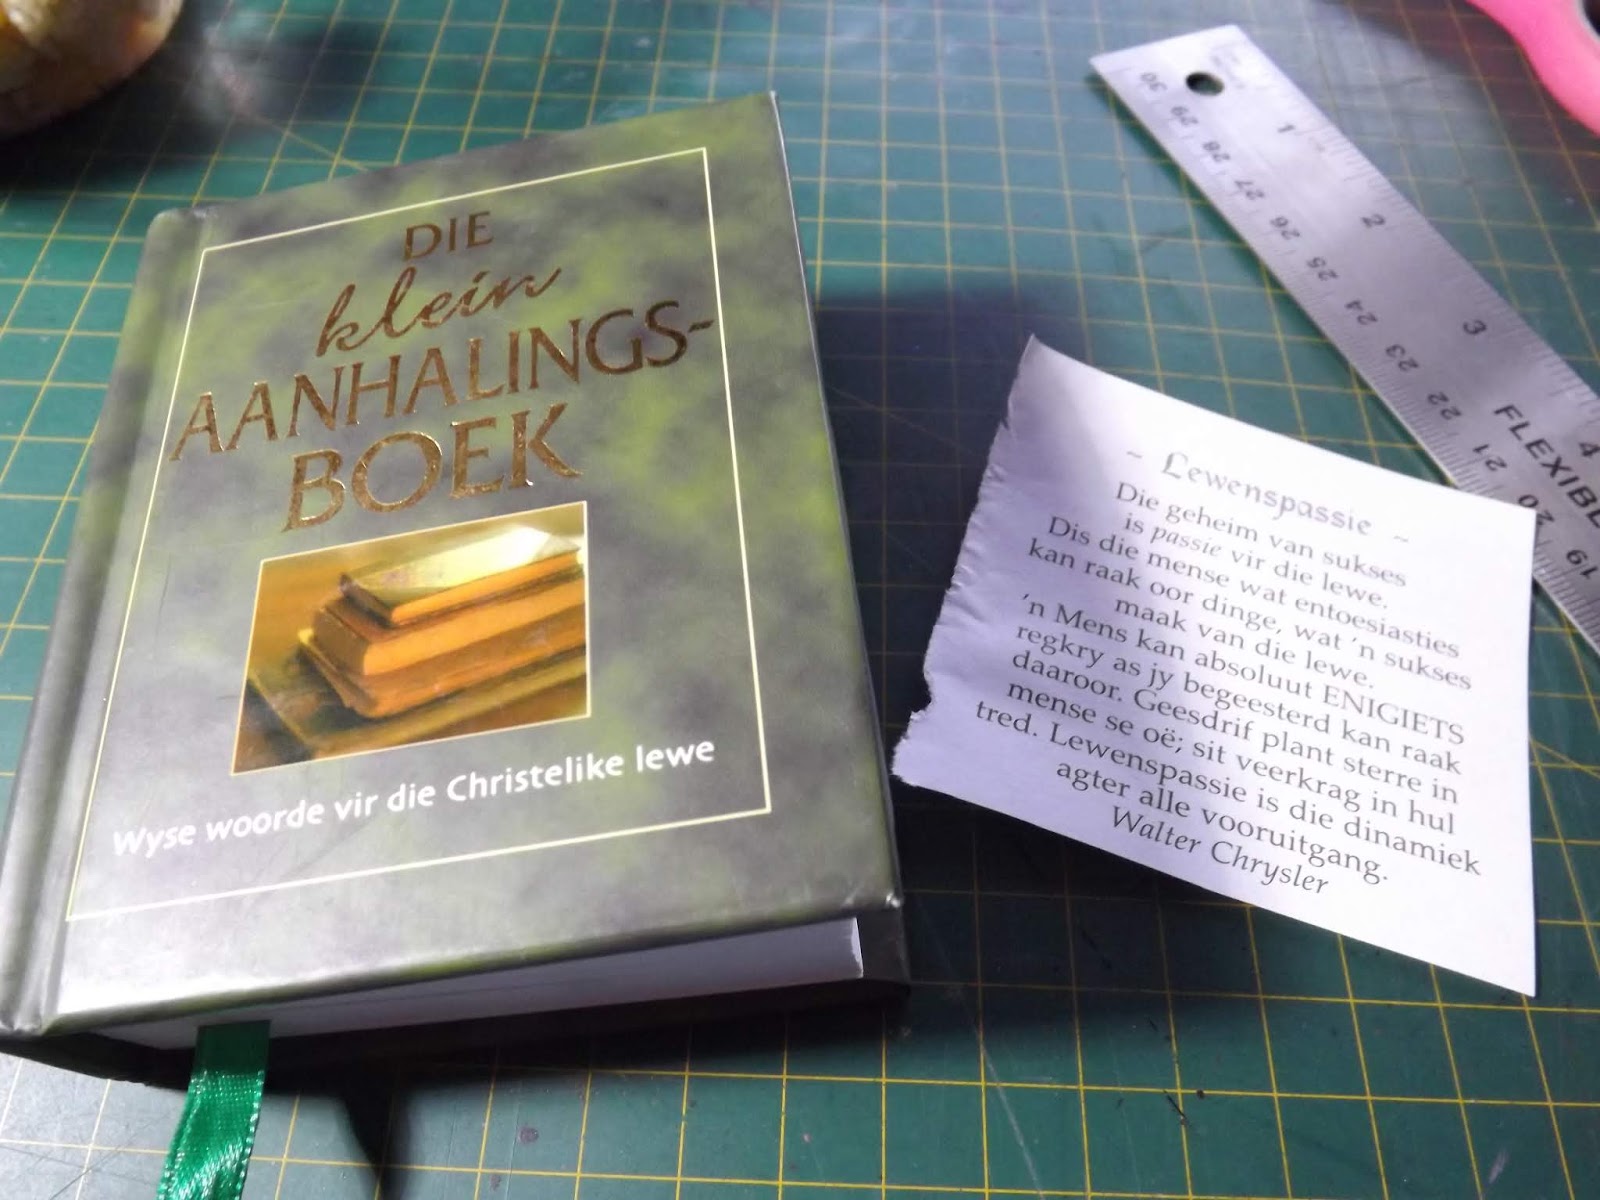
I take a qoute from a tiny book titled Die Klein Aanhalingsboek.

This is the page I favour.

I crop the page with a scalpel and steel ruler.

I then decide to mount the sentiment on an embossed background.

I slip some paper into the KaizerCraft embossing folder.

Then I stack my sandwich.

This is what my paper looks like when I take it from my Go Cut & Emboss machine.

I used this embossed paper on a number of projects and cropped it to size.

I mounted my sentiment with double-sided tape.

I had made some figurines with my hot glue gun in a fondant mold. I pop these out.

I colour the figurines with a Rolfes Metallic Marker.

I glue them to the card with Tombow glue.

My completed index card for day 51.

Day 52
The theme for day 52 was friendship. I continue working on this prepared background.

I take a quote from a book by Phil Bosman, titled 'n Tuin van Vriendskap.

This is the sentiment I favour for this card.

I crop it with a scalpel and metal ruler.

I ink the edges with Tim Holtz Distress Ink.

I lighlty rub over the embossed image to stain it.

I then layer my elements on my card with double-sided tape.

I make some molds in my silicone molds with my hot glue gun.

I also make a heart-shaped mold.

Once set, I pop the molds out.

I colour them with a Rolfes Metallic Marker.

I glue them to the card with Tombow Glue.

I draw a frame around the card with the Rolfes marker.

My completed index card for day 52.

Day 53
The theme for day 53 was note to self.

I want to do some layering on this card and decide to use these embossing sheets by Fiskars.

They are not meant to be used in my Go Cut & Emboss, but I have found that I can emboss with them if I use Fun Foam in my machine as embossing plates.

I layer my sandwich like this.

The embossed page.

This will layer nicely on my prepared card.

I also have this old diary/Thuisagenda from PIP Studio which I wish to use.

I find an image I like in the adverts inside the diary.

I crop it to size.

I use Ranger Archival Ink to rub over the embossed image on my paper.

I layer the elements with double-sided tape.

I draw a frame using a Rolfes Metallic Marker.

I then look for a sentiment to add in a book titled Put On Your Dancing Shoes.

I cut my sentiment from the book.

I crop it to size with a scalpel and steel ruler.

I ink the edges and mount it with double-sided tape.

I make a hot glue mold in my silicone mold.

I colour the mold with a Rolfes Metallic Marker.

I glue the mold on the card with Tombow glue.

My completed index card for day 53.

Day 54
The theme for day 54 was shadow. This background did not turn out as I had hoped, but it could still be used.

I used a Rolfes Metallic Marker to draw a frame around the card. Then I drew a thin line inside the thicker line with an Artline Marker.

I tore a page from this tiny little book titled Om te Inspireer.

I cropped it.

I wished to add an embossed border pattern and used this embossing folder meant for fondant.

I slipped a sheet of paper inside the embossing folder.

I layered my sandwich and put it through my Go Cut & Emboss machine.

The results were spectacular.


Then I rubbed Magic touch over the embossed image.
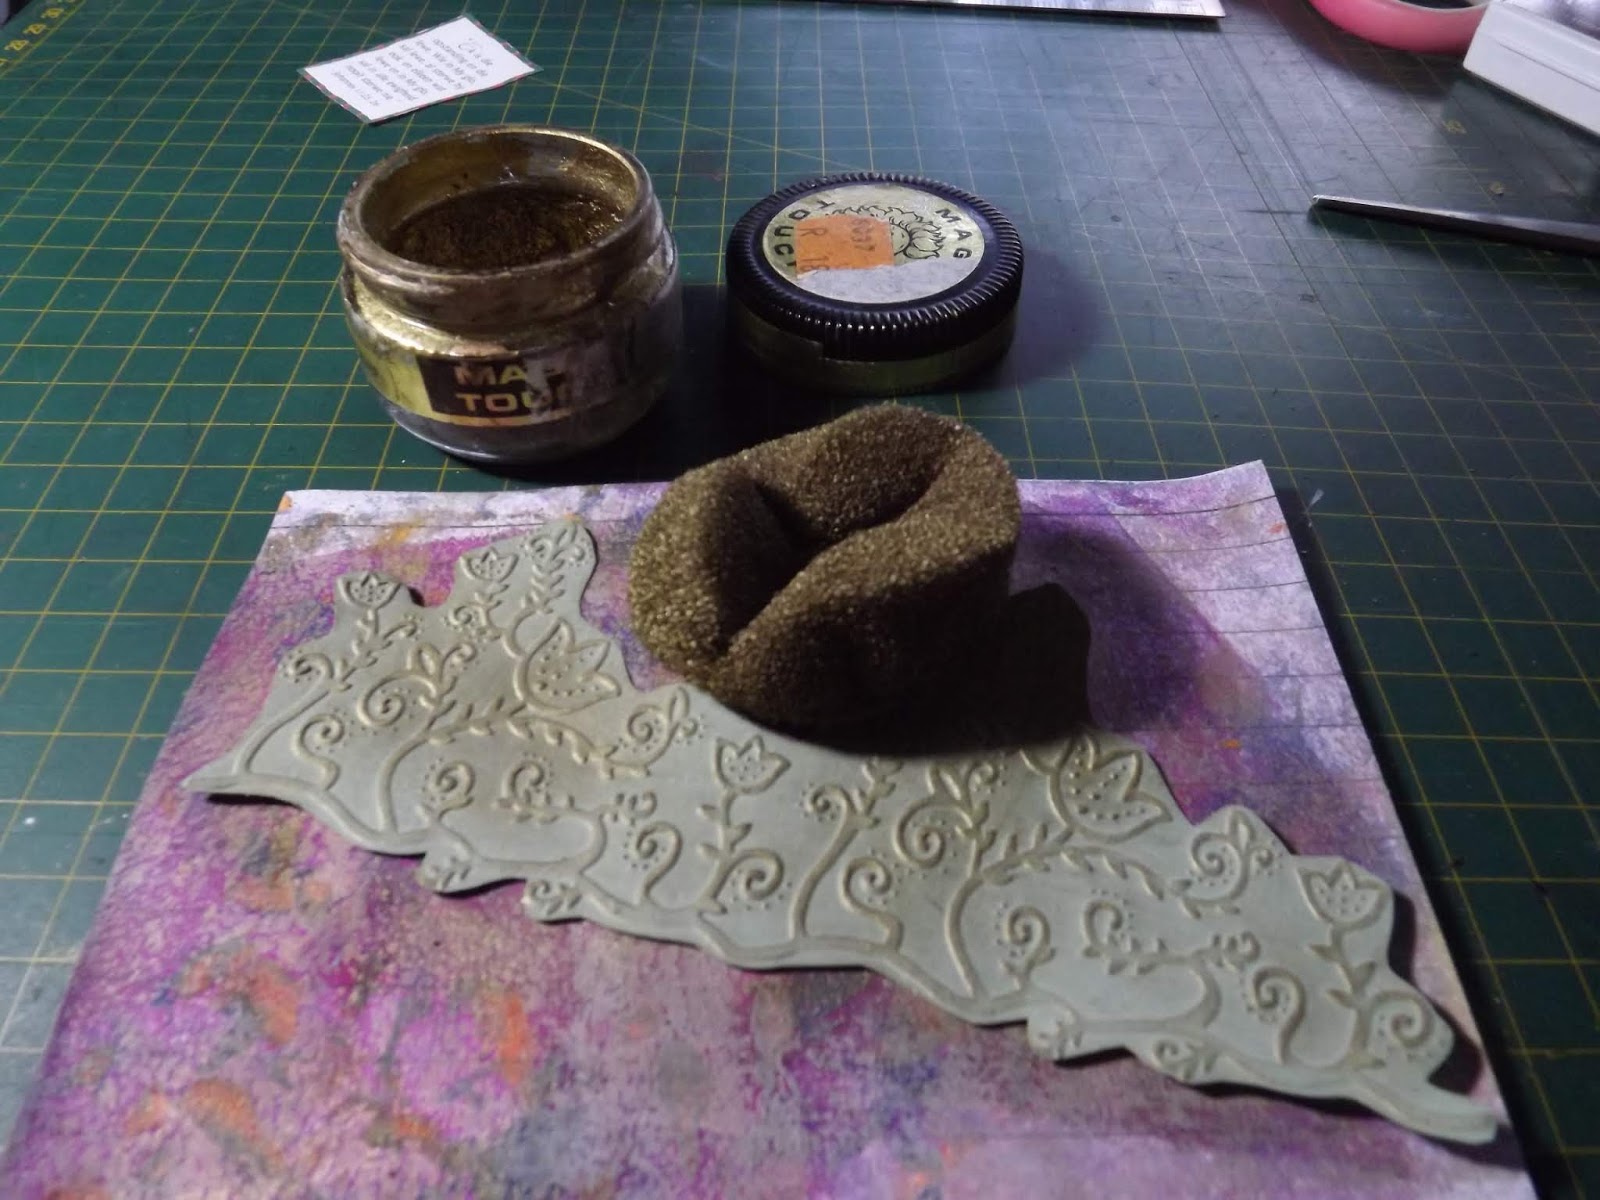
I glued it to the card with Tombow glue.

I used hot glue to make some molds in a silicone mold.

I coloured the mold with a Rolfes marker and glued it to the card with Tombow glue.

I used 3D foam to raise the sentiment off the card.

My completed index card for day 54.

Day 55
The theme for day 55 was pendulum. I used this prepared background for this day's index card.

I made some hot glue embellishments in a silicone mold.

I coloured the embellishments with a Rolfes Metallic Marker.

I decided to use a quote from a book titled Put On Your Dancing Shoes.

I liked the image that went with the quote and decided to use this as well.

I cropped both elements using a scalper and steel ruler.

I inked the edges using a VersaMagic inkpad.

I used 3D Squares to mount the elements to the card.

I cropped some black cardstock, left over from a previous project to mount the key on.

I inked the edges with a white Brilliance inkpad.

I used Tombow glue and double-sided tape to adhere these elements to the card.

My completed index card for day 55.

Day 56
The theme for day 56 was spin. I used this prepared index card for this day's theme.

The white was a little too stark for my liking and I rubbed the index card with Ranger's Archival Ink to soften the bright white into a pale blue.

I took a sentiment from a book titled Die Klein Aanhalingsboek.
I cropped it with a scalpel and steel ruler.

I inked the edges with the Archival Ink and mounted it to the card with double-sided tape.

I then found some pretty die-cut embellishments in my stash, that I could use on this card.

I decided to mount these embellishments on an embossed background. I used this embossing folder, from my cake decorating tools (intended for use with fondant).

The folder looks like this on the inside.

I built the sandwich for my Go Cut & Emboss machine, having slipped the paper into the embossing folder.

The embossed paper looked like this.

I rub the embossed image with Ranger's Archival Ink.

I use double-sided tape and 3D squares to mount the embellishments on the card.

My completed index card for day 56.

My complete set of index card for week 8.
You can watch a compilation video of the above steps on YouTube:
https://youtu.be/6TTW_mqFq9M
Marietjie Uys (Miekie) is a published author. You can buy my books here:
You can purchase Designs By Miekie 1 here.
Jy kan Kom Ons Teken en Verf Tuinstories hier koop.
Jy kan Kom Ons Kleur Tuinstories In hier koop.
Jy kan Tuinstories hier koop.
You can follow Miekie's daily Bible Study blog, Bybel Legkaart, here in English & Afrikaans.
You may prefer to follow the traveling blog, A Pretty Tourist.
For more crafty ideas and great product reviews, visit A Pretty Talent on Facebook.
If you are in a literary mood, follow Miekie's musings, stories and poetry on A Pretty Author - Miekie.
Remember to keep nurturing your TALENT for making life PRETTY.
You can subscribe to any of these blogs and receive regular updates by email. Simply register your email address at the top of the applicable blog.
No comments:
Post a Comment