I start the project on these index cards.
I will be using my Gelli Plate for the surface preparations.
I used a warm coloured acrylic paint from Bianjo and spritzed it with water to thin it. I had some paint left over on the Gelli Plate from a previous project, but I did not bother to clean this up before starting with this project.
It was brayered onto the plate.
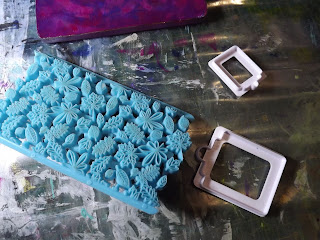
I found some tools in my cake decorating stash to use.
I placed the images on the wet paint.
The tags were also placed on the wet paint. The fondant cutting tools left only a very feint outline in the paint.
I brayered an index card onto the images.
I lifted a feint image away, but this was enough for a decent background.
I wanted to do some layering on this card and decide to use one of these embossing sheets by Fiskars.
They are not meant to be used in my Go Cut & Emboss, but I have found that I can emboss with them if I use Fun Foam in my machine as embossing plates.
I layer my sandwich like this.
The embossed page.
This will layer nicely on my prepared card.
I also have this old diary/Thuisagenda from PIP Studio which I wish to use.
I find an image I like in the adverts inside the diary.
I crop it to size.
I use Ranger Archival Ink to rub over the embossed image on my paper.
I layer the elements with double-sided tape.
I draw a frame using a Rolfes Metallic Marker.
I then look for a sentiment to add in a book titled Put On Your Dancing Shoes.
I cut my sentiment from the book.
I crop it to size with a scalpel and steel ruler.
I ink the edges and mount it with double-sided tape.
I make a hot glue embellishment with my silicone mould.
I colour the mould with a Rolfes Metallic Marker.
I glue the mould on the card with Tombow glue.
My completed index card looked like this.
I folded an A4 sheet of cardboard in half to form a card.
I used double-sided tape to mount the index card to the card.
I used a clear stamp by Little Birdie and Ranger Adorondade ink to stamp a sentiment onto the card.
I stamped the sentiment in the top right corner of the card.
I then painted the card with Glitter Glue to lend it some sparkle.
I made shiny accents with Liquid Drops 3D Pearls.
The completed card.
You can watch a compilation video of the above steps on YouTube:
https://youtu.be/TkP0uzxEr34
Marietjie Uys (Miekie) is a published author. You can buy my books here:
You can purchase Designs By Miekie 1 here.
Jy kan Kom Ons Teken en Verf Tuinstories hier koop.
Jy kan Kom Ons Kleur Tuinstories In hier koop.
Jy kan Tuinstories hier koop.
You can follow Miekie's daily Bible Study blog, Bybel Legkaart, here in English & Afrikaans.
You may prefer to follow the traveling blog, A Pretty Tourist.
For more crafty ideas and great product reviews, visit A Pretty Talent on Facebook.
If you are in a literary mood, follow Miekie's musings, stories and poetry on A Pretty Author - Miekie.
Remember to keep nurturing your TALENT for making life PRETTY.
You can subscribe to any of these blogs and receive regular updates by email. Simply register your email address at the top of the applicable blog.


No comments:
Post a Comment