The book I took the recipe from.
The recipe we settled on to bake.
You will need 1 lemon, 2 eggs and 6 tablespoons (75 ml) sugar.
Separate the eggs and beat the egg whites to form soft points.
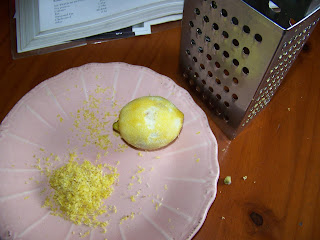
Grate the rind of the lemon.
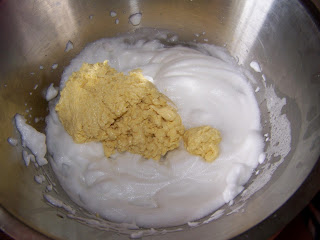
Add the sugar and the lemon rind to the egg yolks.
Beat until it is white and creamy.
Add 1/2 cup (125 ml) cake flour and 1/2 teaspoon (2,5 ml) baking powder to the egg yolk mixture and mix.
Add the mixture to the egg whites.
Mix everything together.
Pour the batter into a prepared cake tin.
Bake for roughly 15 minutes at 180 °C.
Remove from tin and allow to cool on a wire rack.
For the mousse: Separate two more eggs.
Add 6 tablespoons (75 ml) sugar and the rind of a lemon to the egg yolks.
Sprinkle 1 tablespoon (12,5 ml) gelatine over 1/2 cup (125 ml) boiling water.
Bring more water to the boil in a bowl.
Dissolve the gelatine over the boiling water.
This is what it looks like when completely dissolved.
Allow the gelatine to cool down.
Whip your egg whites to soft peaks.
Beat the egg yolks, sugar and lemon rind to a creamy texture.
Add the juice of 1 lemon and continue mixing. Now add the gelatine solution and mix well.
Whip up 1/2 cup (125 ml) fresh cream.
Fold the cream into the batter. Allow to chill.
When the batter starts to set, fold in the egg whites.
The mixture should look like this when ready.
Place the cake back in the tin that it was baked in. Line the sides with wax paper.
Pour the mousse onto the cake and put in the fridge for roughly 4 hours to set.
Once the cake has set, remove it from the tin.
Carefully peel away the paper.
Slide it onto a plate.
The cake is now ready to be decorated.
And now the cake is ready to eat!
Marietjie Uys (Miekie) is a published author. You can buy the books here:
You can purchase Designs By Miekie 1 here.
Jy kan Kom Ons Teken en Verf Tuinstories hier koop.You can purchase Designs By Miekie 1 here.
Jy kan Kom Ons Kleur Tuinstories In hier koop.
Jy kan Tuinstories hier koop.
You can follow Miekie's daily Bible Study blog, Bybel Legkaart, here in English & Afrikaans.
For more crafty ideas and great products, visit A Pretty Talent on Facebook.
Remember to keep nurturing your TALENT for making PRETTY things.
You can subscribe to this blog and receive regular updates by email by simply registering your email address at the top of the current blog.


No comments:
Post a Comment