It is time we learned to draw the creepy crawlies. These have always fascinated me, but even more so after I wrote and illustrated my first children's novel. In today's blog I am going to show you how to draw a centipede, paying close attention to getting the detail right that makes this creature so creepy. We then use a combination of media to colour our picture, namely pens and colouring pencils. This is more fun than it would appear at first glance.
You will need a sheet of paper and a pencil to start your drawing with.
Start by drawing two curved parallel lines on the page with rounded 'caps' on each end.
Draw in the two feelers and the two extra long legs at the back of the centipede.
Divide the body into segments.
Draw a pair of legs on each segment.
Draw dimensional depth on one side of the centipede.
Divide the legs into segments. I started this is pencil for demonstrations purposes only, but it is unnecessary to do this. It is much simpler to do this directly in pen, as it saves a lot of time and repetition.
The feelers also need to be segmented.
When redrawing in pen, make sure to form each segment separately, or it will not look real.
I used a Faber Castell Artist's Pitt Pen with a Fine point to draw the centipede with.
Erase all the pencil markings.
I switched to a brush point and coloured the legs 'belly' and feelers.
Then I coloured the body darker, leaving a white line where the light reflects off the centipede.
This reflection was coloured with a very pale yellow.
I then made it a little less obvious.
The setting, or background, was done in colouring pencils.
Start with a dark shadow under the centipede.
Give it a neutral surface to walk over. Do not colour this surface too uniform. Leaving light and dark patches make it seem uneven and more natural.
A couple of colour patches in three different colours create the illusion of foliage.
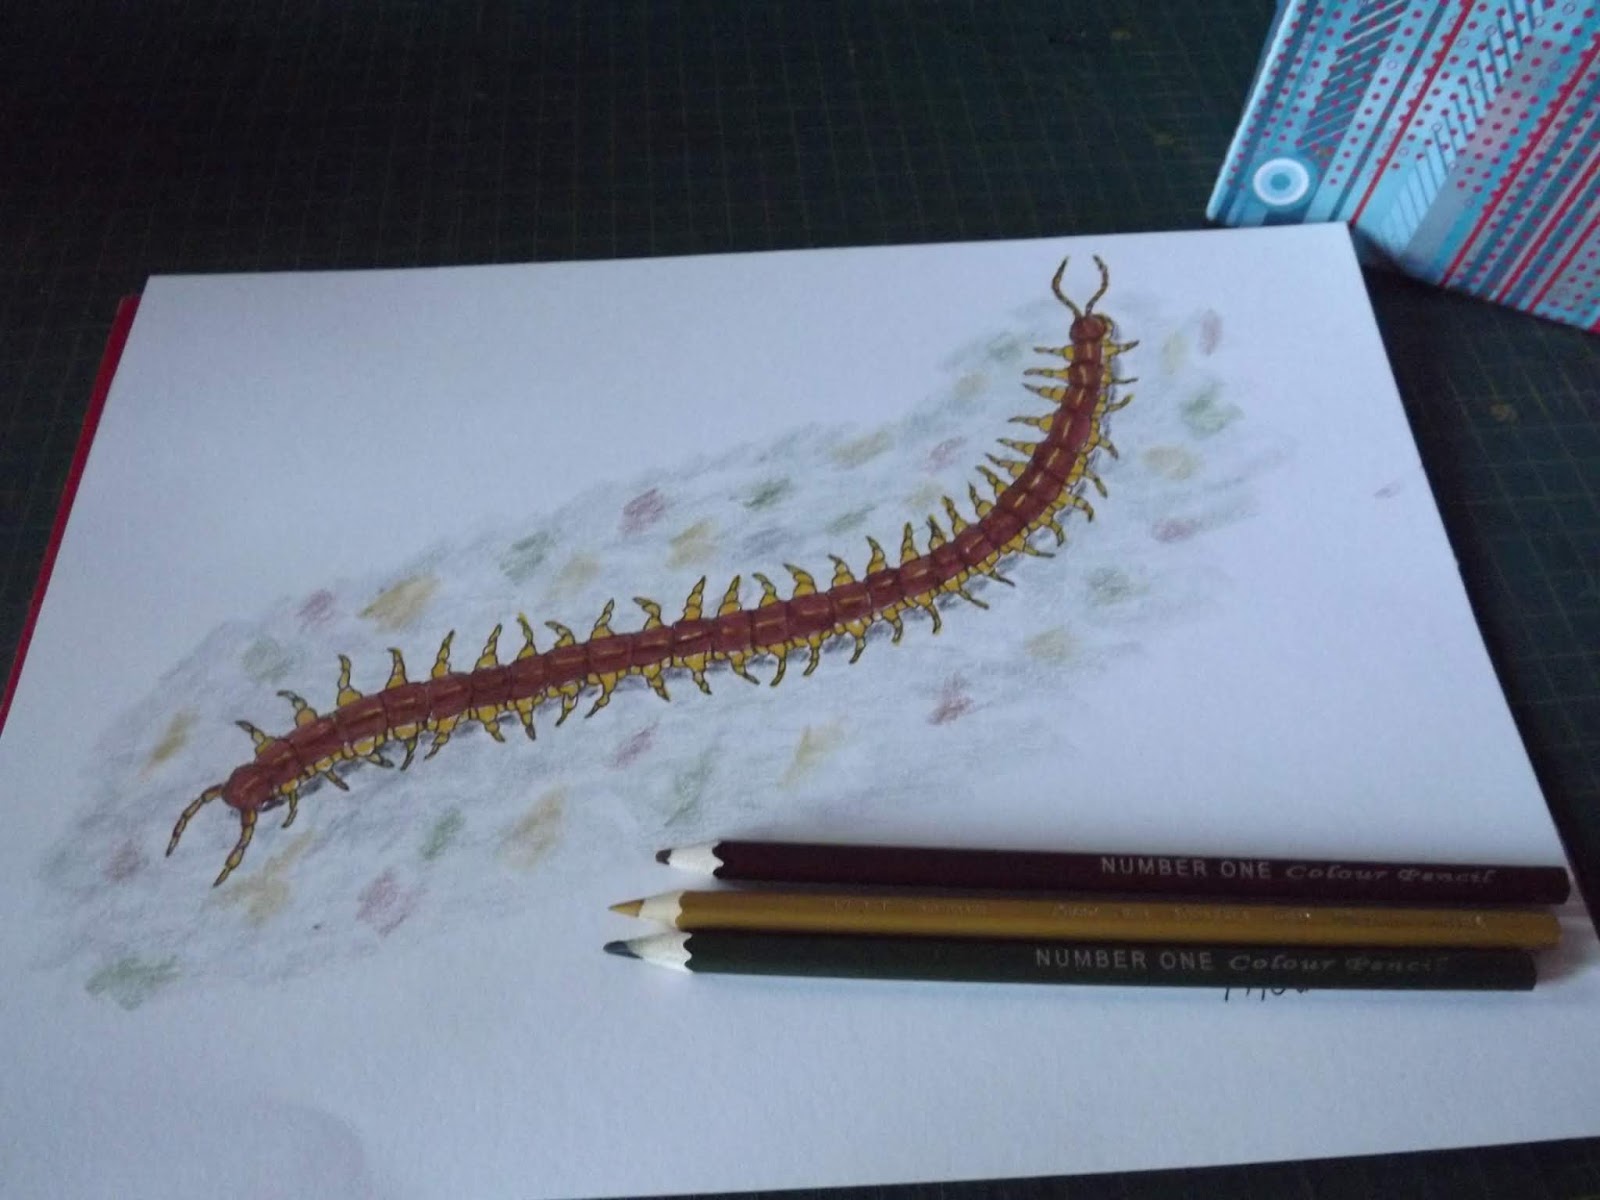
The final drawing.
Marietjie Uys (Miekie) is a published author. You can buy my books here:
You can purchase Designs By Miekie 1 here.
Jy kan Kom Ons Teken en Verf Tuinstories hier koop.
Jy kan Kom Ons Kleur Tuinstories In hier koop.
Jy kan Tuinstories hier koop.
You can follow Miekie's daily Bible Study blog, Bybel Legkaart, here in English & Afrikaans.
You may prefer to follow the traveling blog, A Pretty Tourist.
For more crafty ideas and great product reviews, visit A Pretty Talent on Facebook.
If you are in a literary mood, follow Miekie's musings, stories and poetry on A Pretty Author - Miekie.
Remember to keep nurturing your TALENT for making life PRETTY.
You can subscribe to any of these blogs and receive regular updates by email. Simply register your email address at the top of the applicable blog.
This blog is about empowering everyone who has a talent for making pretty things, be it a latent or developed one. I bring you practical tips and tricks to make and do the things you've always wanted to.
Search This Blog
Thursday, 6 September 2018
Tuesday, 4 September 2018
How to draw: A Boxer
In today's drawing lesson, we are going to be drawing a boxer, step by step. When the drawing is in place, I will introduce you to tinted graphite pencils. This is the same stuff that is used to make normal grey pencils. They simply add a tint to it. The result is something widely different from normal colouring pencils. It gets even more interesting when we discover that these pencils are also water-soluble - and that the painted colour is different from the dry one! I will show you more in this blog.
You will need a sheet of paper and a pencil to start today's drawing.
Start with a crooked rectangle that is smaller at the bottom than the top. Add a small circle on top, overlapping it, for the head.
Two wide lines mark the spaces for the legs.
Mark where the arms will go.
Develop the gloved hands and the legs. Mark where the pants will go.
Develop the upper body.
Develop the lower body.
Develop the facial features and head.
Add a setting for the boxer.
Redraw the boxer in pen. I used a blue felt tip pen.
Erase the pencil lines.
These are the pencils I told you about in the opening paragraph. They are once again developed by Derwent.
Colour the gloves and shorts.
Colour the body.
Colour the hair. I added a moustache and beard while I was at it.
I added light grey to the white areas.
Colour the background.
Dip your brush in clean water and pain the coloured areas with the wet brush.
Notice how vastly the colour changes once you apply water to it.
Here you can see similar results in the shorts.
The final picture.
Marietjie Uys (Miekie) is a published author. You can buy my books here:
You can purchase Designs By Miekie 1 here.
Jy kan Kom Ons Teken en Verf Tuinstories hier koop.
Jy kan Kom Ons Kleur Tuinstories In hier koop.
Jy kan Tuinstories hier koop.
You can follow Miekie's daily Bible Study blog, Bybel Legkaart, here in English & Afrikaans.
You may prefer to follow the traveling blog, A Pretty Tourist.
For more crafty ideas and great product reviews, visit A Pretty Talent on Facebook.
If you are in a literary mood, follow Miekie's musings, stories and poetry on A Pretty Author - Miekie.
Remember to keep nurturing your TALENT for making life PRETTY.
You can subscribe to any of these blogs and receive regular updates by email. Simply register your email address at the top of the applicable blog.
You will need a sheet of paper and a pencil to start today's drawing.
Start with a crooked rectangle that is smaller at the bottom than the top. Add a small circle on top, overlapping it, for the head.
Two wide lines mark the spaces for the legs.
Mark where the arms will go.
Develop the gloved hands and the legs. Mark where the pants will go.
Develop the upper body.
Develop the lower body.
Develop the facial features and head.
Add a setting for the boxer.
Redraw the boxer in pen. I used a blue felt tip pen.
Erase the pencil lines.
These are the pencils I told you about in the opening paragraph. They are once again developed by Derwent.
Colour the gloves and shorts.
Colour the body.
Colour the hair. I added a moustache and beard while I was at it.
I added light grey to the white areas.
Colour the background.
Dip your brush in clean water and pain the coloured areas with the wet brush.
Notice how vastly the colour changes once you apply water to it.
Here you can see similar results in the shorts.
The final picture.
Marietjie Uys (Miekie) is a published author. You can buy my books here:
You can purchase Designs By Miekie 1 here.
Jy kan Kom Ons Teken en Verf Tuinstories hier koop.
Jy kan Kom Ons Kleur Tuinstories In hier koop.
Jy kan Tuinstories hier koop.
You can follow Miekie's daily Bible Study blog, Bybel Legkaart, here in English & Afrikaans.
You may prefer to follow the traveling blog, A Pretty Tourist.
For more crafty ideas and great product reviews, visit A Pretty Talent on Facebook.
If you are in a literary mood, follow Miekie's musings, stories and poetry on A Pretty Author - Miekie.
Remember to keep nurturing your TALENT for making life PRETTY.
You can subscribe to any of these blogs and receive regular updates by email. Simply register your email address at the top of the applicable blog.
Sunday, 2 September 2018
How to draw: A Mustang Aeroplane
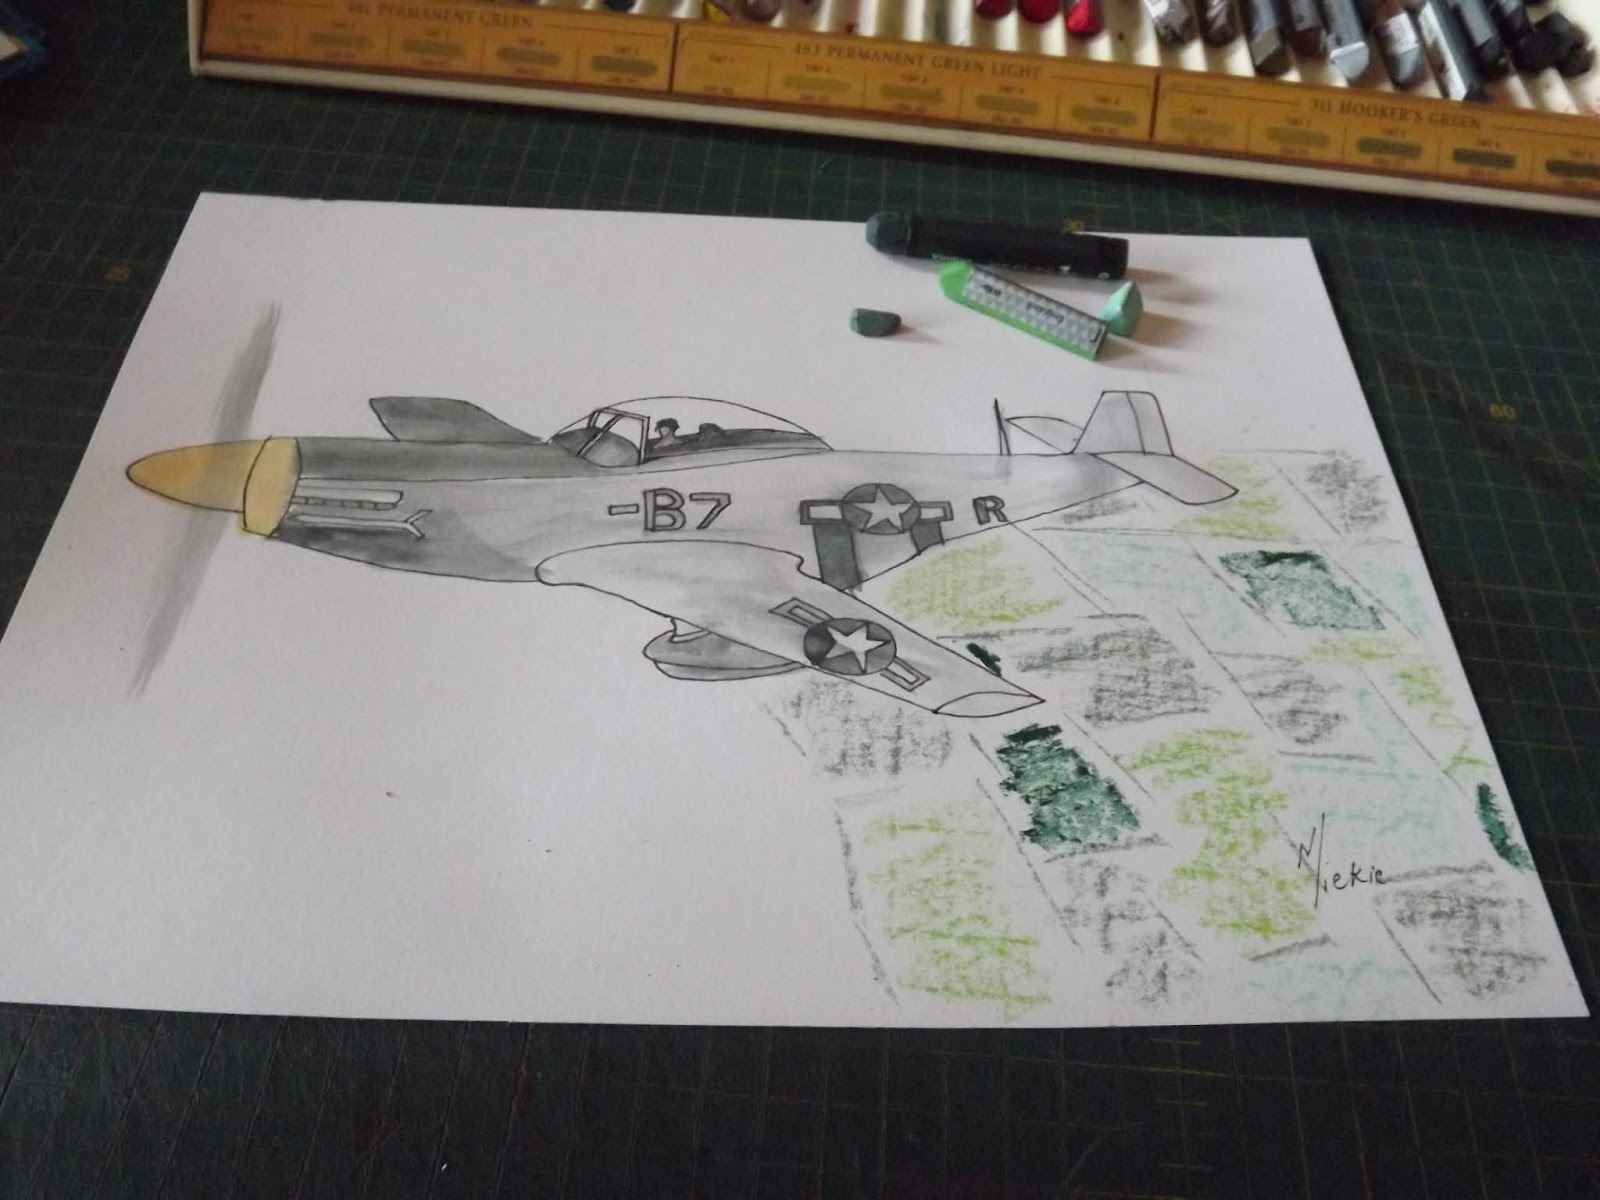
I am really pushing my luck this week by attempting yet a second technical drawing! This time we are going to draw and paint a Second World War favourite bomber plane, named the Mustang. You guessed it - it was developed in America. We paint this drawing with water-soluble wax crayons. Sounds incredible, doesn't it? Well, it exists! Prepare to have fun!
You will need a sheet of paper, a pencil and a ruler to start today's drawing.
Start with the body of the plane and a triangle for the tail.
Add the lines to mark the spaces for the wings.
Add the nose and the fuel tank under the wing. Square off the tail as well.
Develop the body and add detail to the tail.
Add the cockpit.
Continue working on the cockpit, the nose and the closest wing.
Add the military insignia and other detail.
Redraw the plane in ink.
Erase the pencil lines.
Various manufacturers have water-soluble wax crayons on the market and some are much cheaper than others. I prefer Derwent's Artbar, but do not shirk from using the others as well.
I will show you two ways of using the crayons. In the first method, I wet my brush with water, take colour directly off the bar, and pain the drawing. This is similar to traditional watercolours.
I start with the darkest areas. Note how I simply make a paint line where the propeller would go. When the plane is in motion, one would only be able to see a blur, and no detail on the propeller.
Then I colour the bright nose of the plane.
I then finish with the lighter shades.
I then use the sharp end of an Artbar to draw the patchwork landscape below the plane.
I colour the landscape in shades of green, the same way I would with normal wax crayons.
Then I paint over the coloured areas with clean water.
I add clouds in the sky with a dry bar.
This too, is painted over with water.
The completed picture.
Marietjie Uys (Miekie) is a published author. You can buy my books here:
You can purchase Designs By Miekie 1 here.
Jy kan Kom Ons Teken en Verf Tuinstories hier koop.
Jy kan Kom Ons Kleur Tuinstories In hier koop.
Jy kan Tuinstories hier koop.
You can follow Miekie's daily Bible Study blog, Bybel Legkaart, here in English & Afrikaans.
You may prefer to follow the traveling blog, A Pretty Tourist.
For more crafty ideas and great product reviews, visit A Pretty Talent on Facebook.
If you are in a literary mood, follow Miekie's musings, stories and poetry on A Pretty Author - Miekie.
Remember to keep nurturing your TALENT for making life PRETTY.
You can subscribe to any of these blogs and receive regular updates by email. Simply register your email address at the top of the applicable blog.
You will need a sheet of paper, a pencil and a ruler to start today's drawing.
Start with the body of the plane and a triangle for the tail.
Add the lines to mark the spaces for the wings.
Add the nose and the fuel tank under the wing. Square off the tail as well.
Develop the body and add detail to the tail.
Add the cockpit.
Continue working on the cockpit, the nose and the closest wing.
Add the military insignia and other detail.
Redraw the plane in ink.
Erase the pencil lines.
Various manufacturers have water-soluble wax crayons on the market and some are much cheaper than others. I prefer Derwent's Artbar, but do not shirk from using the others as well.
I will show you two ways of using the crayons. In the first method, I wet my brush with water, take colour directly off the bar, and pain the drawing. This is similar to traditional watercolours.
I start with the darkest areas. Note how I simply make a paint line where the propeller would go. When the plane is in motion, one would only be able to see a blur, and no detail on the propeller.
Then I colour the bright nose of the plane.
I then finish with the lighter shades.
I then use the sharp end of an Artbar to draw the patchwork landscape below the plane.
I colour the landscape in shades of green, the same way I would with normal wax crayons.
Then I paint over the coloured areas with clean water.
I add clouds in the sky with a dry bar.
This too, is painted over with water.
The completed picture.
Marietjie Uys (Miekie) is a published author. You can buy my books here:
You can purchase Designs By Miekie 1 here.
Jy kan Kom Ons Teken en Verf Tuinstories hier koop.
Jy kan Kom Ons Kleur Tuinstories In hier koop.
Jy kan Tuinstories hier koop.
You can follow Miekie's daily Bible Study blog, Bybel Legkaart, here in English & Afrikaans.
You may prefer to follow the traveling blog, A Pretty Tourist.
For more crafty ideas and great product reviews, visit A Pretty Talent on Facebook.
If you are in a literary mood, follow Miekie's musings, stories and poetry on A Pretty Author - Miekie.
Remember to keep nurturing your TALENT for making life PRETTY.
You can subscribe to any of these blogs and receive regular updates by email. Simply register your email address at the top of the applicable blog.
Subscribe to:
Posts (Atom)