Most often when we decide to braai (barbecue), it is a spur of the moment event and there is no time to marinade the meat. However, every so often, we actually plan the meal ahead of time and then we go all out on the marinades. I share three different marinades with you in today's blog, that can be made from ingredients most kitchens will have readily available. I also share a secret for cooking pumpkin on the braai. Don't miss this one, especially if you are a true braai fanatic, as I am.
Marinade 1
Start by adding roughly half a cup of soy sauce to a small mixing bowl.
Add some fresh coriander leaves (mine are frozen), a dash of wasabi, pickled ginger, Chinese 5 Spice and a little ground ginger to the soy sauce.
Now add a good spurt of honey to sweeten the mixture a little.
Mix everything well.
I used this marinade on to pork loins, but it will go well with any pork or poultry cuts.
Lather the meat in the marinade and let it sit in the fridge for a few hours.
After a few hours, turn the meat over and leave to sit for a few more hours.
I used a kettle braai to cook my loins in. I coated a deep oven dish with non-stick spray.
The meat and the marinade went into the dish.
Put the lid on and place in the kettle braai for 2-3 hours, or until juicy and tender. You can remove it from the dish once cooked, and give it a quick swizz on the open fire to add some crackle, if you like.
Not the best photo, but here is the cooked meat in a clean dish.
Marinade 2
My next marinade has a chutney base. You can use chutney of your choice, or a combination if you like. Add roughly half a cup to a small mixing bowl.
Add a dash of lemon juice, a healthy squirt of honey and some mustard seeds.
Mix well.
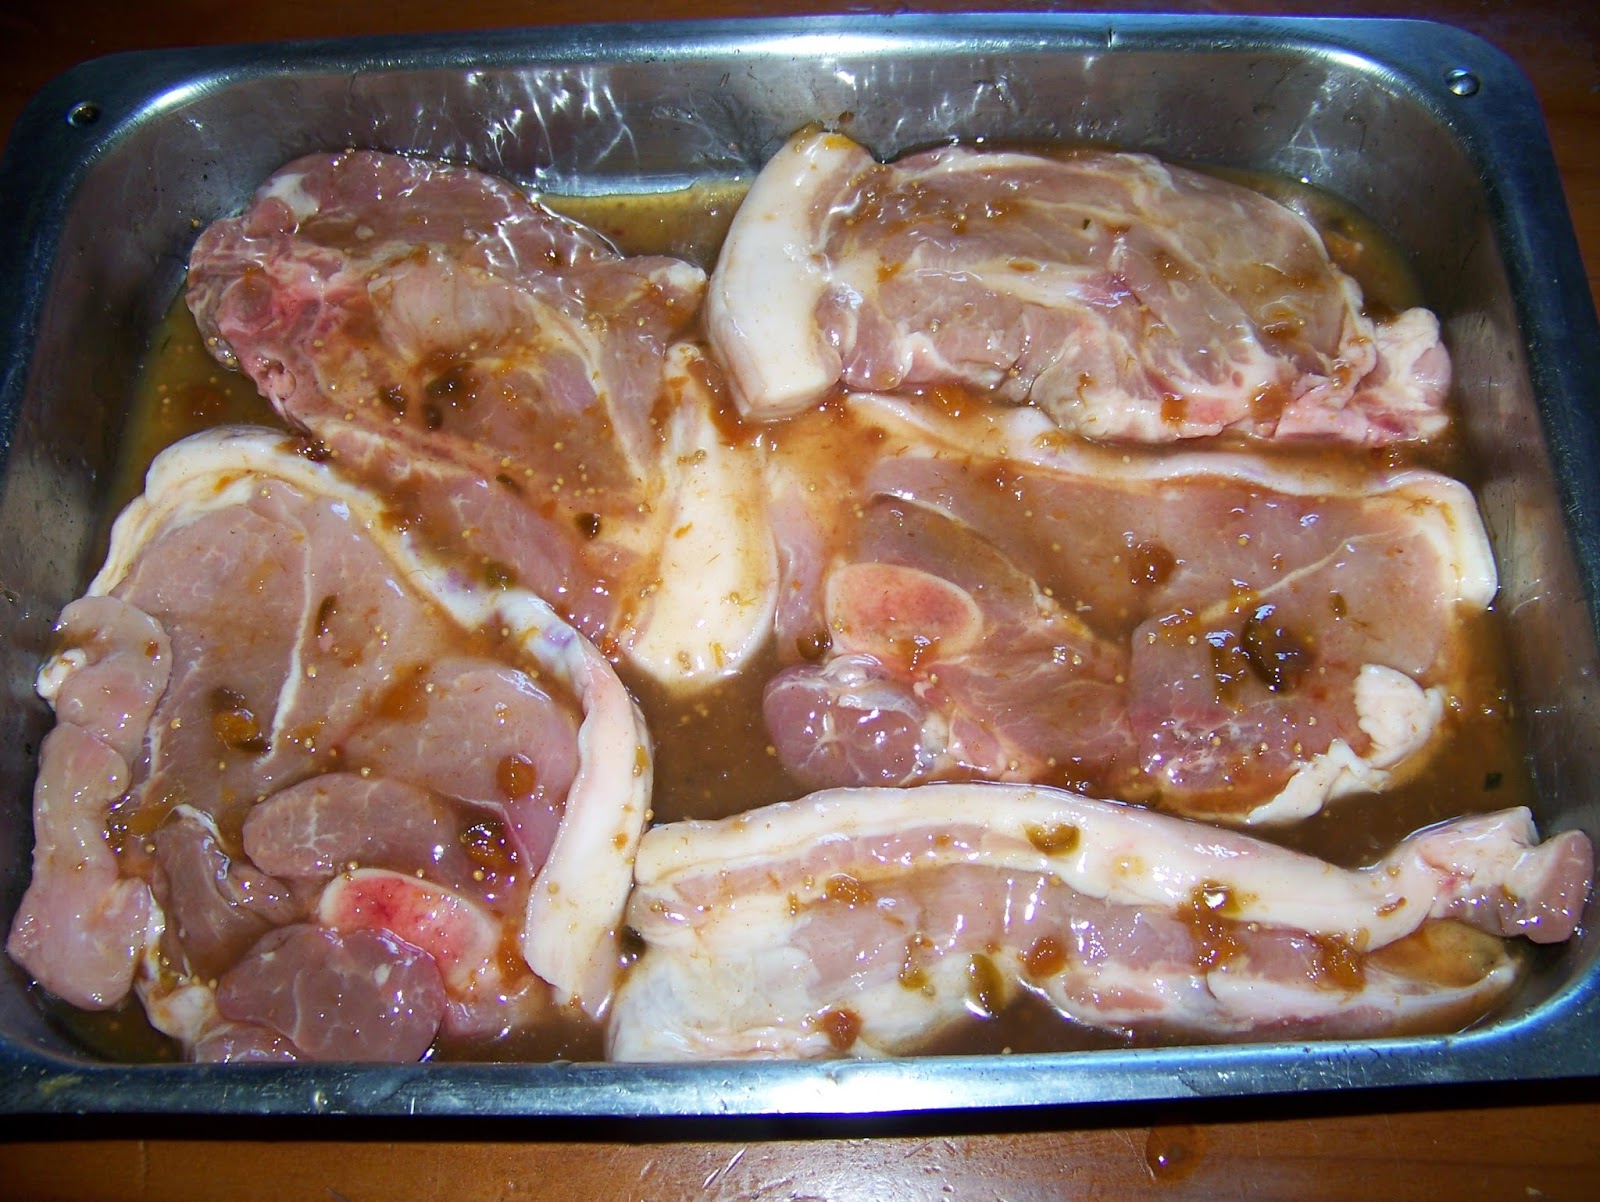
I used this marinade on pork chops, but it will go well with pork, poultry, or even mutton.
Lather the meat in the marinade. Leave it in the fridge to soak up the goodness for a few hours. Turn over and leave for a few more hours. These pork chops were cooked straight on the grill in the kettle braai (Weber).
Marinade 3
The third marinade recipe I want to share with you uses a balsamic vinegar base. Add roughly half a cup to a small mixing bowl. Now add a healthy dose of crushed garlic, parsley, oregano, sweet basil, and parsley. You will note this has a distinct Italian character.
Add a dash of olive oil and a good squirt of honey to sweeten it.
Mix well.
My marinade went onto rump steaks, but it will go well with just about any meat dish!
Lather the meat in the marinade. Leave it in the fridge to soak up the goodness for a few hours. Turn over and leave for a few more hours. These pork chops were cooked straight on the grill in the kettle braai (Weber).
Ideas for pumpkin on the braai
I started off with half a Crown Prince pumpkin, but you can do this with any old pumpkin you prefer.
Wash the skin and pit the pumpkin.
Soften some butter in a bowl.
Add loads of sugar, and roughly a teaspoonful each of ground cinnamon and nutmeg.
Mix into a paste.
Lather the paste onto the inside of the pumpkin.
Wrap the pumpkin in foil.
The pumkin was placed directly on the grill of the Weber, with the skin facing the fire. It was left there for roughly 2 hours with the rest of the meat (photo to follow).
When you open it, the pumpkin will be soft and moist. Discard the water and scoop the pumpkin out (or cut the skin in strips and serve as is).
A lovely side dish without any extra effort or dishes in the kitchen. In this photo you can see how tender the pumpkin has become.
Arranging the braai
I want to show you how to maximize your braai on the Weber. First off, I also had a chicken flatty that I wanted to put on the fire.
The chicken and its marinade went into an ovenproof dish. Tip: You may prefer to use discard-able aluminium dishes, as these dishes are rather tough to clean afterwards.
As always, I made a wood wire. I made sure to add some large logs. I arrange my pork loins, flattiy and pumkin to fit on the grill. The I close the lid on them. My fire is very hot at this stage.
The temperature in the Weber will range between 170 and 220 over the next two hours. That is when I finally check on my food to see if it is done. I removed the three dishes and then had enough warm coals left to cook the pork chops as well as the rum steaks. My brother heard that I had a fire going and showed up just as I was removing the last meat. He had bought two trays of meat; pork chops and stewing beef! Both these trays fitted on the fire and was cooked, and we still managed to do a string of wors (sausages) as well. Having run out of meat, not fire, we turned to the eating part of the meal.
After everyone had had their fill, and some more vultures dropped by (sic), we divided the spoils and these are the leftovers. Enough to last the three of us for the remainder of the week, including the odd guests that will inevitably show up.
Marietjie Uys (Miekie) is a published author. You can buy my books here:
You can purchase Designs By Miekie 1 here.
Jy kan Kom Ons Teken en Verf Tuinstories hier koop.
Jy kan Kom Ons Kleur Tuinstories In hier koop.
Jy kan Tuinstories hier koop.
You can follow Miekie's daily Bible Study blog, Bybel Legkaart, here in English & Afrikaans.
You may prefer to follow the traveling blog, A Pretty Tourist.
For more crafty ideas and great products, visit A Pretty Talent on Facebook.
Remember to keep nurturing your TALENT for making PRETTY things.
You can subscribe to any of these blogs to receive regular updates by email, by simply registering your email address at the top of the applicable blog.
This blog is about empowering everyone who has a talent for making pretty things, be it a latent or developed one. I bring you practical tips and tricks to make and do the things you've always wanted to.
Search This Blog
Saturday, 3 June 2017
Friday, 2 June 2017
Art Journaling: Getting Closure Through Journaling
I recently had to come to terms with the fact that a very close and dear friendship had run its course in my life. This was a difficult thing to accept and I kept wondering if there was something I could do to recover this lost relationship. It was only when I finally drew a picture and wrote a poem about it, that I realized it was all over. This act of creating from the ashes of a ruined friendship also gave me the closure I was lacking. I show you how to go about this in today's blog.
The end of this friendship has been a few years in the making if I think back on it, but I have been refusing to accept facts for what they were. It was after yet another verbal altercation that I went to bed one night. As usual, I spent some time in prayer over the events of the day, and a large portion of this particular evening's prayer was devoted to this friend. Finally I turned in and fell asleep. I awoke with the image of a witch in my head. The friendly kinds that are used to illustrate children's story books. I was puzzled by this image and wanted to shirk it off to go back to sleep. Yet, the image persisted so that I finally got up to draw it very quickly and roughly, hoping this would put an end to it and get me back to sleep. While I was drawing the little witch, a poem started to loosen itself from my insides and jotted it down in the same pencil that I was drawing with. With this done, I returned to blissful sleep. It was only a few days later, when I returned to this poem that I realized that this was my subconscious' way of making sense of the friendship that had ended.
The image was drawn on the paper I had at hand.
Realizing the significance of the drawing and poem, I decided to include this in my art journal. I decided to use Derwent Aquatone pencils to paint the figure in.
First, I would have to crop the image to fit in my journal.
I then redrew the very sloppily made midnight drawing. I used a Sharpie fiber tipped pen to do this.
This left the pencil lines to be erased.
I started shading the clothes.
Light reflections would also have to be included in the shading.
The broom was coloured.
The shoes, skin and hair was coloured.
I then used a brush dipped in water to paint the coloured areas.
I decided to mount the drawing on a pink background and cropped the matting paper to size.
Both the picture as well as the matting received double-sided tape pieces at the back to stick them down with.
I matted the picture onto the backing paper.
This was then stuck inside the journal.
The journal is one I received from another friend when I was visiting her the year before.
I then rewrote the poem into the journal.
The final step was to fill the empty spaces with some stickers with flower motifs. I loved the idea of doing this. The ending of a friendship always leaves similar empty spaces in our lives. It is important that we fill these with beautiful things or the rot of bad memories may stink up our lives. Avoid this at all cost!
Melette Els (Clinical Social Work) can be contacted via the webpage www.m-e.co.za, or by email at melette.els@gmail.com, or by phone at 082 776 1536.
Melette Els B.A. (SocSc) M. (Th)
BHF Pr Nr.: 089 000 00 28754 SACSSP Reg.Nr.: 10-17310
Marietjie Uys (Miekie) is a published author. You can buy my books here:
You can purchase Designs By Miekie 1 here.
Jy kan Kom Ons Teken en Verf Tuinstories hier koop.
Jy kan Kom Ons Kleur Tuinstories In hier koop.
Jy kan Tuinstories hier koop.
You can follow Miekie's daily Bible Study blog, Bybel Legkaart, here in English & Afrikaans.
You may prefer to follow the traveling blog, A Pretty Tourist.
For more crafty ideas and great products, visit A Pretty Talent on Facebook.
Remember to keep nurturing your TALENT for making PRETTY things.
You can subscribe to any of these blogs to receive regular updates by email, by simply registering your email address at the top of the applicable blog.
The end of this friendship has been a few years in the making if I think back on it, but I have been refusing to accept facts for what they were. It was after yet another verbal altercation that I went to bed one night. As usual, I spent some time in prayer over the events of the day, and a large portion of this particular evening's prayer was devoted to this friend. Finally I turned in and fell asleep. I awoke with the image of a witch in my head. The friendly kinds that are used to illustrate children's story books. I was puzzled by this image and wanted to shirk it off to go back to sleep. Yet, the image persisted so that I finally got up to draw it very quickly and roughly, hoping this would put an end to it and get me back to sleep. While I was drawing the little witch, a poem started to loosen itself from my insides and jotted it down in the same pencil that I was drawing with. With this done, I returned to blissful sleep. It was only a few days later, when I returned to this poem that I realized that this was my subconscious' way of making sense of the friendship that had ended.
The image was drawn on the paper I had at hand.
Realizing the significance of the drawing and poem, I decided to include this in my art journal. I decided to use Derwent Aquatone pencils to paint the figure in.
First, I would have to crop the image to fit in my journal.
I then redrew the very sloppily made midnight drawing. I used a Sharpie fiber tipped pen to do this.
This left the pencil lines to be erased.
I started shading the clothes.
Light reflections would also have to be included in the shading.
The broom was coloured.
The shoes, skin and hair was coloured.
I then used a brush dipped in water to paint the coloured areas.
I decided to mount the drawing on a pink background and cropped the matting paper to size.
Both the picture as well as the matting received double-sided tape pieces at the back to stick them down with.
I matted the picture onto the backing paper.
This was then stuck inside the journal.
The journal is one I received from another friend when I was visiting her the year before.
I then rewrote the poem into the journal.
The final step was to fill the empty spaces with some stickers with flower motifs. I loved the idea of doing this. The ending of a friendship always leaves similar empty spaces in our lives. It is important that we fill these with beautiful things or the rot of bad memories may stink up our lives. Avoid this at all cost!
Melette Els (Clinical Social Work) can be contacted via the webpage www.m-e.co.za, or by email at melette.els@gmail.com, or by phone at 082 776 1536.
Melette Els B.A. (SocSc) M. (Th)
BHF Pr Nr.: 089 000 00 28754 SACSSP Reg.Nr.: 10-17310
Marietjie Uys (Miekie) is a published author. You can buy my books here:
You can purchase Designs By Miekie 1 here.
Jy kan Kom Ons Teken en Verf Tuinstories hier koop.
Jy kan Kom Ons Kleur Tuinstories In hier koop.
Jy kan Tuinstories hier koop.
You can follow Miekie's daily Bible Study blog, Bybel Legkaart, here in English & Afrikaans.
You may prefer to follow the traveling blog, A Pretty Tourist.
For more crafty ideas and great products, visit A Pretty Talent on Facebook.
Remember to keep nurturing your TALENT for making PRETTY things.
You can subscribe to any of these blogs to receive regular updates by email, by simply registering your email address at the top of the applicable blog.
Thursday, 1 June 2017
Cardmaking: Using An Old Almanac For Inspiration
Sometimes you get almanacs that have the sweetest or prettiest pictures and seems a shame to simply discard them by the end of the year. In today's blog I show you how to incorporate the pictures from your old almanacs and calendars in the cards that you make, giving them a new leash on life.
This is the almanac I am working from in today's project. I have cut out the dates and discarded them so that I am only left with the pictures. I am not going to be put off by the fact that one of my pictures were torn at some stage during the course of the year, but will work around this.
I go in search of a 12" x 12" sheet of paper that matches the colours and pictures of my almanac.
Now I carefully cut all around the edges of the pictures to cut them out.
In some areas it makes more sense to make use of a craft knife, rather than a pair of scissors.
I fold my 'card' in half.
The picture that will go on the inside of the card, needs to lie flat and is glued at the back.
It is then carefully stuck inside the card.
The pictures on the outside of the card can be raised. I use 3D double-sided tape at the backs of these pictures.
I try to keep as much of the original design of the card exposed when I stick my pictures down. It is already looking good and need only a few finishing touches.
A little bit of bling has never done any card any harm.
I use Dala's Junior range, namely Teddy Acrylic Glitter Paint to decorate the card a little more and to enhance some of the features of the pictures.
The dots on the ladybugs bodies are painted with silver glitter paint.
The flowers are painted with gold glitter paint. It is then left to dry.
In no time at all I have made a cute card from those cute designs on my outdated almanac and I have managed to up-cycle something that would otherwise have ended up in the junk pile.
Marietjie Uys (Miekie) is a published author. You can buy my books here:
You can purchase Designs By Miekie 1 here.
Jy kan Kom Ons Teken en Verf Tuinstories hier koop.
Jy kan Kom Ons Kleur Tuinstories In hier koop.
Jy kan Tuinstories hier koop.
You can follow Miekie's daily Bible Study blog, Bybel Legkaart, here in English & Afrikaans.
You may prefer to follow the traveling blog, A Pretty Tourist.
For more crafty ideas and great products, visit A Pretty Talent on Facebook.
Remember to keep nurturing your TALENT for making PRETTY things.
You can subscribe to any of these blogs to receive regular updates by email, by simply registering your email address at the top of the applicable blog.
This is the almanac I am working from in today's project. I have cut out the dates and discarded them so that I am only left with the pictures. I am not going to be put off by the fact that one of my pictures were torn at some stage during the course of the year, but will work around this.
I go in search of a 12" x 12" sheet of paper that matches the colours and pictures of my almanac.
Now I carefully cut all around the edges of the pictures to cut them out.
In some areas it makes more sense to make use of a craft knife, rather than a pair of scissors.
I fold my 'card' in half.
The picture that will go on the inside of the card, needs to lie flat and is glued at the back.
It is then carefully stuck inside the card.
The pictures on the outside of the card can be raised. I use 3D double-sided tape at the backs of these pictures.
I try to keep as much of the original design of the card exposed when I stick my pictures down. It is already looking good and need only a few finishing touches.
A little bit of bling has never done any card any harm.
I use Dala's Junior range, namely Teddy Acrylic Glitter Paint to decorate the card a little more and to enhance some of the features of the pictures.
The dots on the ladybugs bodies are painted with silver glitter paint.
The flowers are painted with gold glitter paint. It is then left to dry.
In no time at all I have made a cute card from those cute designs on my outdated almanac and I have managed to up-cycle something that would otherwise have ended up in the junk pile.
Marietjie Uys (Miekie) is a published author. You can buy my books here:
You can purchase Designs By Miekie 1 here.
Jy kan Kom Ons Teken en Verf Tuinstories hier koop.
Jy kan Kom Ons Kleur Tuinstories In hier koop.
Jy kan Tuinstories hier koop.
You can follow Miekie's daily Bible Study blog, Bybel Legkaart, here in English & Afrikaans.
You may prefer to follow the traveling blog, A Pretty Tourist.
For more crafty ideas and great products, visit A Pretty Talent on Facebook.
Remember to keep nurturing your TALENT for making PRETTY things.
You can subscribe to any of these blogs to receive regular updates by email, by simply registering your email address at the top of the applicable blog.
Subscribe to:
Posts (Atom)


