
You will need a sturdy cardboard of A4 (or even A3) size for each child. Allow them to choose their own colours. Both of the kids I worked with chose blue. I opted for a sedate green.

The first of the simple flower designs. The little one struggled to copy this, even though I illustrated it step by step. The older one took one look at my flowers and drew her own, more elaborate flowers. Good girl! It is important to meet children at their different developmental levels, and to not expect similar results from them - not even when they are in the same age category!

The second flower was easier to copy.

These were a blast!

This one they had fun with, although I was subjected to loads of comments until I reminded them of dandelions!

This flower is a great exercise in skill and knowledge as it forces a child to deal with ever increasing (or decreasing) sizes.

These are slightly difficult for younger kids, so be sure to work slowly when drawing those loops. The leaves are a challenge all their own.

Here I illustrated a wavy flower stem.

We added a very simple bee.

It is also possible for flowers to come from the side of the page! Those twirls are a real challenge for younger kids. Be patient.

They then insisted on adding a butterfly as well. I did not feel the need to add a sun, but closer inspection of the kids' work showed me that, quite independently of each other, they had both added a sun to their gardens.

Once the flower was drawn in pencil, so as to allow for erasing incorrect lines, we traced the picture with black felt tipped pens.

I then showed them to cut very rough shapes from tissue paper to paste onto the flowers. This is challenging for kids, who are still taught that everything has to be precise and exact. This is true for most things in life, but in art we also want to develop a sense of freedom of expression that does not adhere to constraints. This exercise helps with that, even at a young age.

Glue the spot where the tissue paper will be stuck down.

Note how the edges of the tissue paper lifts away from the page. We will leave it like that as this creates a sense of dimension to an otherwise flat page. It also creates movement when a slight breeze passes over the paper.

We continue doing this with more colours and designs of tissue paper.

When all the flowers and insects are covered, we leave the page to dry.

We then use felt tip pens to colour the stems and leaves of the flowers. There is no rule that says you have to use green here.

We then once again trace the outlines of the flowers as it shows through the transparent tissue paper. This time we use a variety of colours on felt tip pens. You can see that I even went so far as to show different ideas for filling space, other than simply coloring the traditional way. Pay attention to the butterfly and the flower with the circles decreasing in size. This is elemental in the foundation of drawing and a very good starting point to teach it from.

My 10-year old drew a pretty intricate garden scene.

Here she is hard at work and wrapped up in the moment.

Tracing is still lots of fun for kids to do and gives them an instant sense of achievement when they get it right. It is also a wonderful exercise for developing fine motor skills.
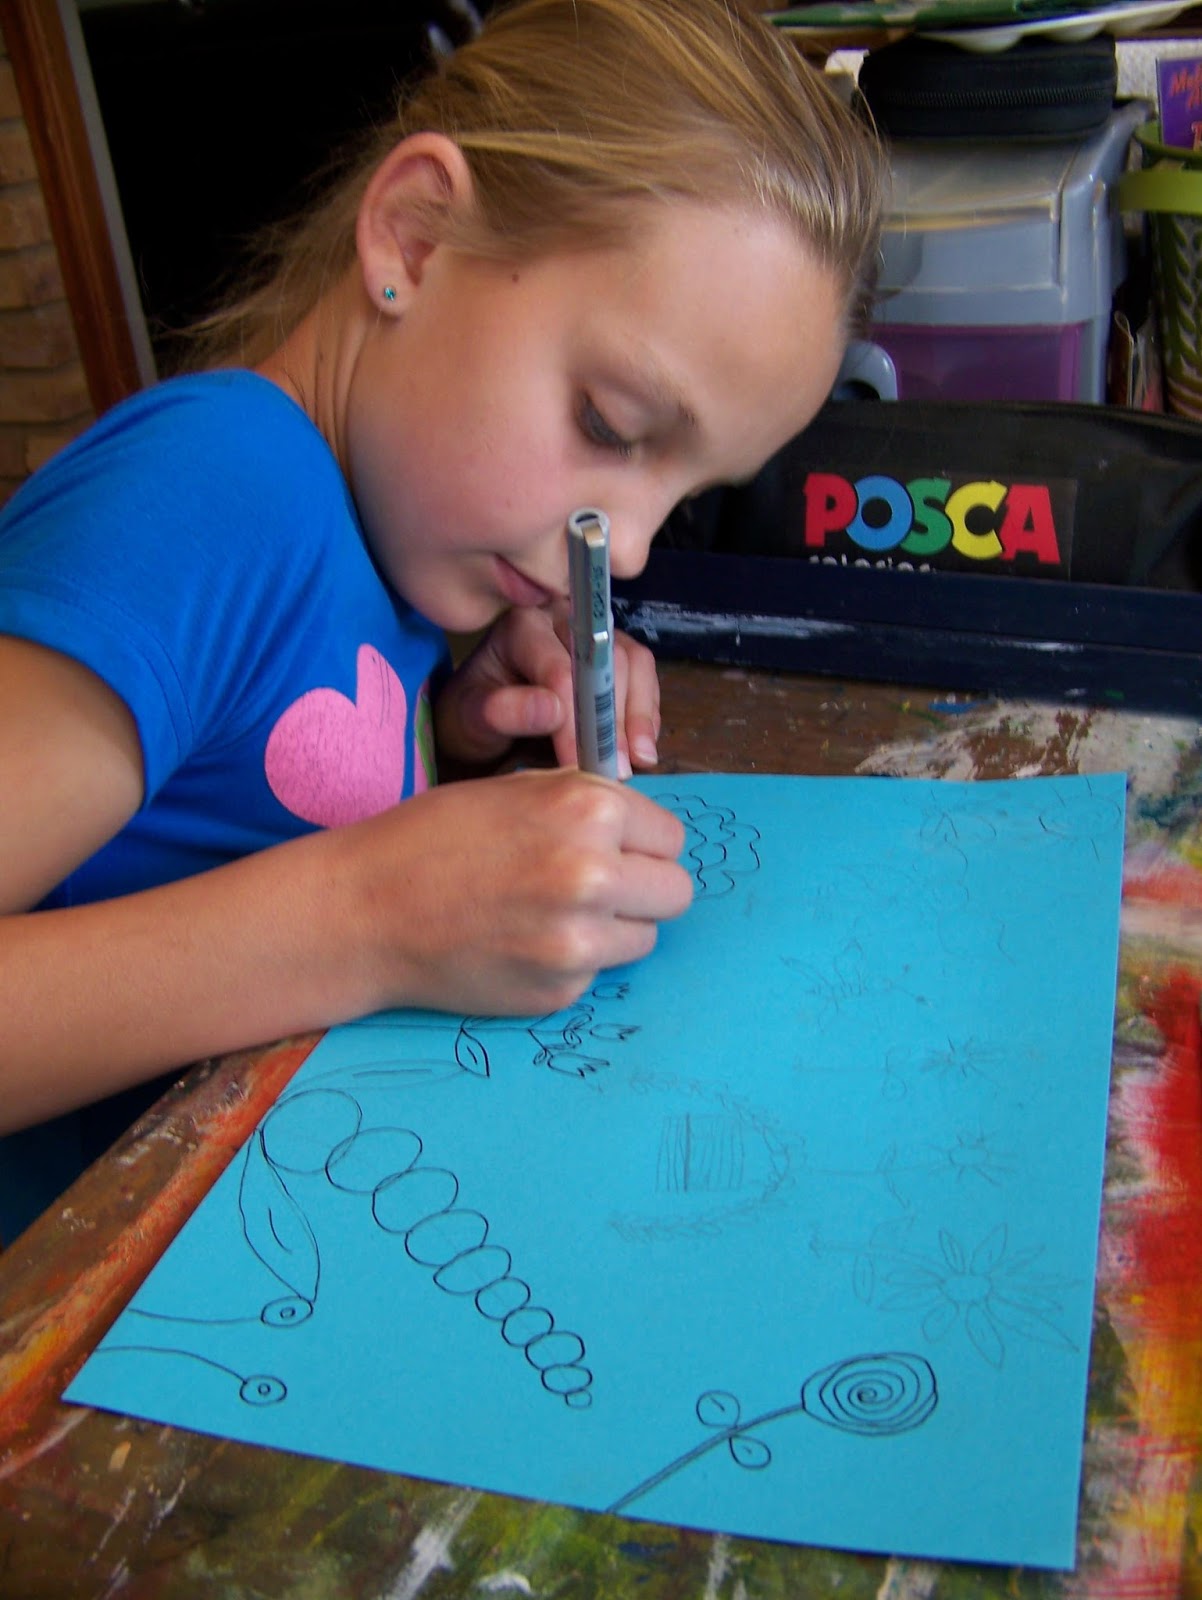
Pay attention to the added arch, garden bench with pillows, etc. that was added by this youngster. She has developed into a very competent and confident young artist already!

The final product once everything was glued down. We broke for lunch at this point and after lunch both kids wanted to go play in the garden, climbing trees, etc. I did not hold them back. If a picture of a garden would inspire a child to get away from incessantly watching TV and to go play outside, I am the last person to stand in their way! I rather consider it to be a bonus benefit to the lesson! Neither of them returned to finish the pictures on this particular day, but there is plenty of time to do so on another day. And if it never gets done, that is quite alright too. They had fun, learned a lot, and things could not be better. Never push too hard. A child's attention span will never match that of an adult. Do not force them past the point of fun to where it becomes a chore.

The younger one struggled to draw the flowers and his niece offered her assistance at last. This is great! Learning to give and accept help are essential life lessons. I silently allowed them to work out the terms of the collaboration for themselves, learning some negotiating skills as they did so.

My little man took his time tracing the drawing very accurately.

You can see the movements of the pen are still hesitant and unsure. That is because he is only 6 years old and still has to grow in confidence when handling a pen.

When I noticed that he was becoming despondent by the sheer magnitude of the job, I offered to trace the last of his flowers. He was very relieved and gladly allowed me to do so. This is fine too. He had done plenty of tracing and could do more on another day. Just, please refrain from offering help because you are too impatient to wait for those tediously slow movements to come to an end! Do it for the right reasons. Children will see right through you if your actions are born from impatience. It will cause them to feel uncertain and give them the sense that they are not measuring up.

He took his time with the cutting and pasting and it was well worth it!

He wanted silver leaves and stems and I had no problem allowing it. This is as far as he got with his picture before making his way to the nearest tree and staying up there for a good deal of the afternoon.

Marietjie Uys (Miekie) is a published author. You can buy the books here:
You can purchase Designs By Miekie 1 here.
Jy kan Kom Ons Teken en Verf Tuinstories hier koop.You can purchase Designs By Miekie 1 here.
Jy kan Kom Ons Kleur Tuinstories In hier koop.
Jy kan Tuinstories hier koop.
For more crafty ideas and great products, visit A Pretty Talent on Facebook.
Remember to keep nurturing your TALENT for making PRETTY things.
You can subscribe to this blog and receive regular updates by email by simply registering your email address at the top of the current blog.


