Search This Blog

Thursday, 28 July 2016

Baking A Quick Light Rye Bread

It is true that we don't always have time to bake a proper bread where we wait for the sourdough to develop, knock back the dough and start the waiting all over again. Life gets rushed and we need to find quicker ways of doing the things we like. This is why I have started sharing a couple of recipes with you for baking your own bread in a fraction of the time required for proper sourdough bread. In today's blog I share one of these quick recipes for baking a light rye loaf.


Add two cups (500 ml) Rye flour, 5 cups (5 x 250 ml) Cake flour and 2 cups (500 ml) White Bread flour to a large mixing bowl.


Add 4 teaspoons (20 ml) salt and 4 tablespoons (50 ml) sugar.


Now add a packet of Instant Dry Yeast and mix all the dry ingredients well. If you have time for the sourdough mixture to develop, you need not add the Instant Dry Yeast.


Add 2 cups lukewarm milk, 200 ml lukewarm water and 4 tablespoons (50 ml) oil.


Add 2 cups (500 ml) sourdough starter. When using the quick method, the sourdough starter is added to add flavour only. When allowing enough time to develop, the sourdough starter can serve as raising agent for the bread and no extra yeast need to be added.


Bring the dough together in the bowl.


Knead the dough thoroughly. Normally, the dough would be allowed to rise up. You would then knock it back and knead it again, ensuring a proper distribution of the sourdough in the dough. As we will not be knocking the dough back, we need to make sure we knead it well to give it the best possible chance of a good and equal rise.


Divide the dough in halve and shape to fit in your bread tins.


Place in two tins prepared with non-stick spray.


Cut grooves in the top to prevent the crust from breaking open when baked.


Cover with plastic and leave in a warm dry place to rise.


Once risen, brush with egg yolk.


Sprinkle with seeds of your choice. I opted for Linseed.


Bake in a preheated oven at 200°C for about 40 minutes. Do not make the mistake I made by turning the grill on accidentally!


Remove from the tins and allow to cool on a wire rack.


Best served fresh from the oven!


Marietjie Uys (Miekie) is a published author. You can buy the books here:
You can purchase Designs By Miekie 1 here.
Jy kan Kom Ons Teken en Verf Tuinstories hier koop.
Jy kan Kom Ons Kleur Tuinstories In hier koop.
Jy kan Tuinstories hier koop.
For more crafty ideas and great products, visit A Pretty Talent on Facebook.
Remember to keep nurturing your TALENT for making PRETTY things.
You can subscribe to this blog and receive regular updates by email by simply registering your email address at the top of the current blog.

Wednesday, 27 July 2016

Making Bottled Curry Beetroot

I love vegetables and can not imagine cooking for anyone who is not as sold on the idea of fresh veggies as I am. However, sometimes this quest for making fresh veggies land me in hot water when I buy too much at the local vegetable market. This is what happened recently when I got beetroot at an incredibly good price! Has that ever happened to you as well? As beetroot does not have a very long shelf life there was nothing else for it, but to bottle the excess. I share my recipe for bottled curry beetroot with you in today's blog.


Chop a kilogram of cooked beetroot into blocks. If you prefer, you may also slice or grate the beetroot.


Put the chopped beetroot and 1 1/2 cup (375 ml) sugar in a large cooking pot.


Add 2 cups (500 ml) water and 2 cups (500 ml) white vinegar to the pot.


Add 1/2 (2,5 ml) teaspoon salt and 1/2 (2,5 ml) teaspoon pepper. Put a cinnamon stick in the pot.


Chop two onions and fry these in a pan in some hot oil.


Add 1 teaspoon (5 ml) curry paste and 1 teaspoon (5 ml) crushed ginger to the pan and fry this with the onions.


Add this to the pot and bring everything to the boil. Allow to boil for 5 minutes.


Mix 50 ml maizena (cornflour) with water and add this to the pot to thicken the sauce.


Remove from the heat as soon as the sauce is thickened and bottle in sterilized bottles that seal tight. It can keep for months if sealed properly.


You may of course be tempted to keep some aside for a 'taster' as well ;-)


Marietjie Uys (Miekie) is a published author. You can buy the books here:
You can purchase Designs By Miekie 1 here.
Jy kan Kom Ons Teken en Verf Tuinstories hier koop.
Jy kan Kom Ons Kleur Tuinstories In hier koop.
Jy kan Tuinstories hier koop.
For more crafty ideas and great products, visit A Pretty Talent on Facebook.
Remember to keep nurturing your TALENT for making PRETTY things.
You can subscribe to this blog and receive regular updates by email by simply registering your email address at the top of the current blog.

Tuesday, 26 July 2016

Discovering Derwent Natural Graphite Bars

What if your favourite pencils could come in the form of a solid graphite bar? Ever thought about it? What new possibilities would open up to you! Derwent has thought about this and they brought out three splendid graphite bars in soft, medium and hard, in answer to this yearning. If you are not sure whether this is something you need to your stash of art products, then today's blog is for you. I put these bars to the test to see what they are capable of, and at the end, I do a quick sketch using only these three bars.


The Graphite Bars come packaged in sets of six, resulting in you getting two each of the soft, medium and hard bars.


The softer the bar is, the more of the graphite will be left on the paper, resulting in darker lines. That means that the soft bar is the darkest, and the hard bar is the lightest.


You can achieve a nice thick line if you draw the bar over the paper on the width of the point.


If you use the corner of the bar, you can achieve a very thin line.


Dragging the bar down on the full length of the bar, gives this very interesting wide column as a result.


It is also equally easy to draw long straight lines by turning the bar on its sharp edge and swiftly moving it in the direction you like the line to run. No more shaky and wobbly lines!


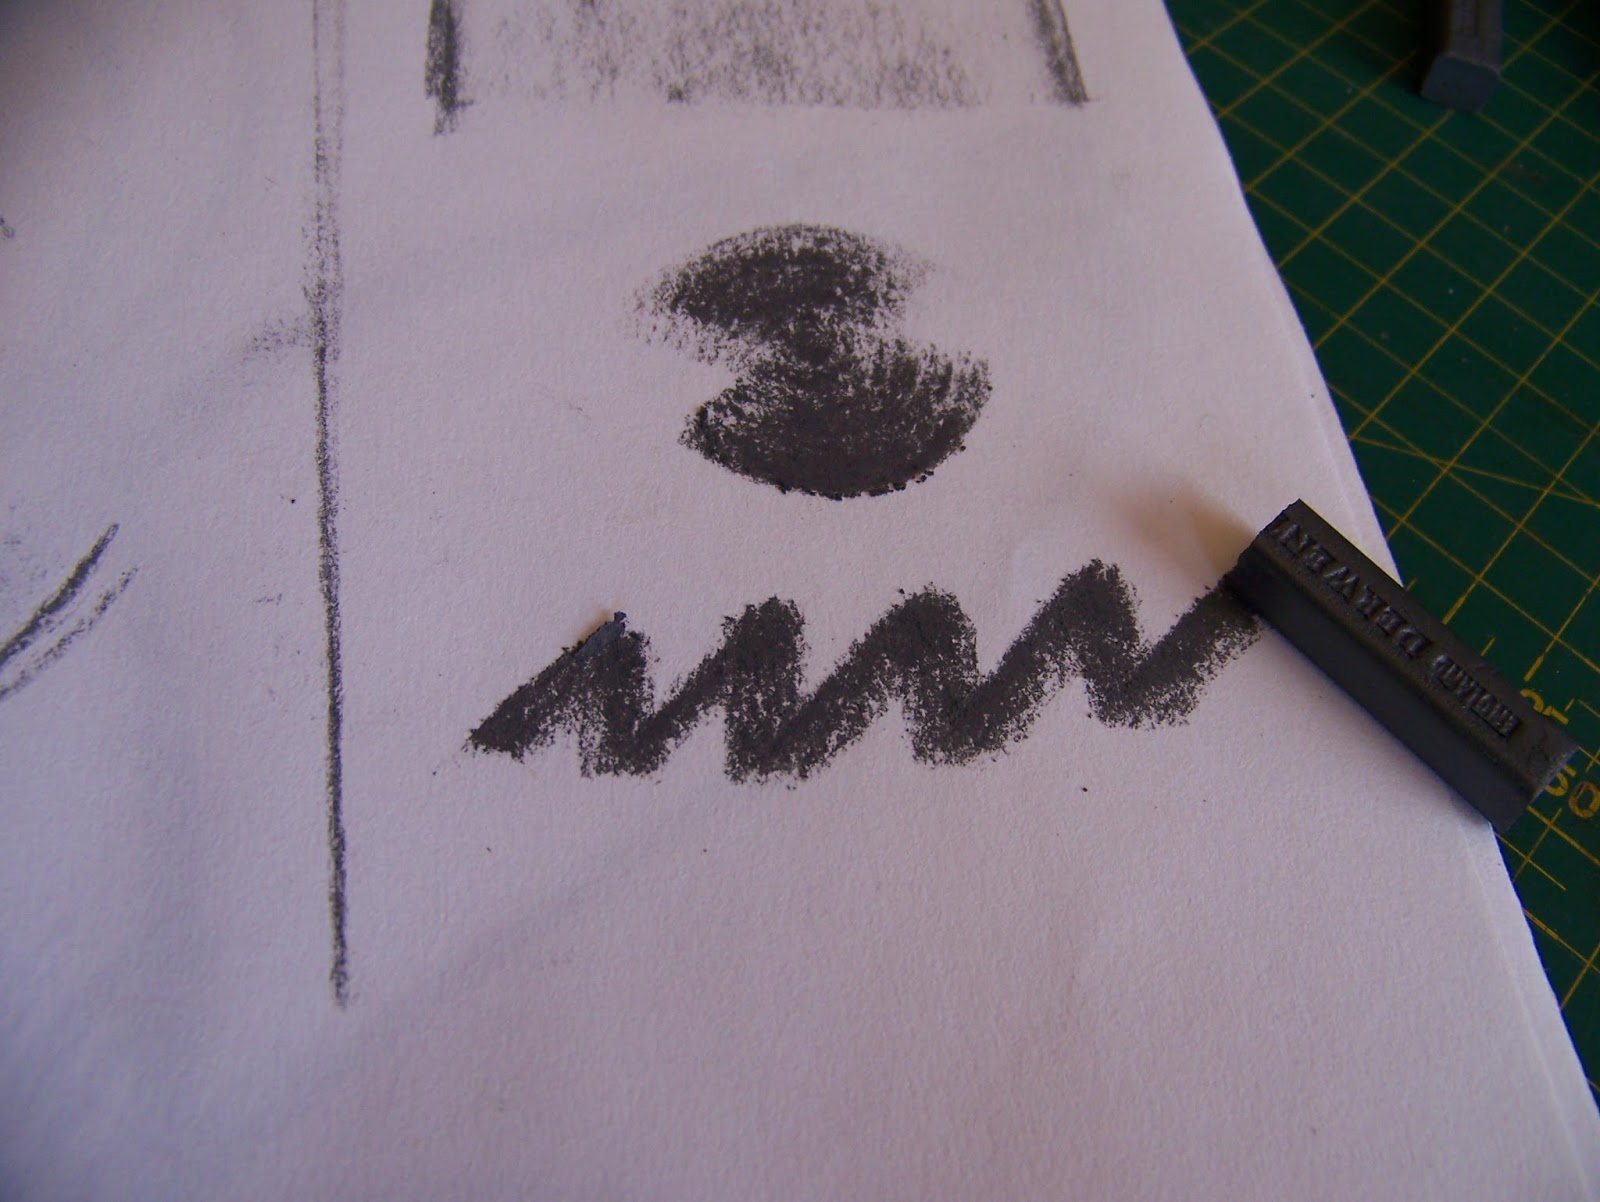
You can also get a very interesting shape by twisting the bar on its center axis.


This same shape changes dramatically if you dare to break the bar into smaller pieces. The fact that you get two of each bar in the pack, makes this a much more acceptable option, somehow.


I played around with a thick zigzag line.


Then I tried the same thing in a wavy line.


Then I used the length of my broken piece to make these interesting broken dashes.


Finally, I wanted to know how the bar would stand up to writing.


Very versatile, was the conclusion I reached.


I would probably never use the graphite bars on their own to produce drawings with, but would choose to combine them with other pencils, etc. However, I wondered if it would be possible and made this quick drawing with the hard bar.


I then used all three of the bars to fill in the shading and I have to be honest that this did not turn out too badly at all. What a wonderful addition to my drawing box!


Marietjie Uys (Miekie) is a published author. You can buy the books here:
You can purchase Designs By Miekie 1 here.
Jy kan Kom Ons Teken en Verf Tuinstories hier koop.
Jy kan Kom Ons Kleur Tuinstories In hier koop.
Jy kan Tuinstories hier koop.
For more crafty ideas and great products, visit A Pretty Talent on Facebook.
Remember to keep nurturing your TALENT for making PRETTY things.
You can subscribe to this blog and receive regular updates by email by simply registering your email address at the top of the current blog.

Monday, 25 July 2016

Cardmaking: Using Transparent Layers To Build A Card

There are so many pretty transparent papers on the market these days, but it is not always easy to know how to use them in our crafts. In today's blog, I make use of a number of transparent layers to build a card, using their unique qualities to add even more nuances to the card, than I would be able to achieve with opaque papers.


I start this card on a blank card that I bought in a pack of five blanks. The card is an off-white colour, which suits me brilliantly as I will be working in a yellow and orange colour scheme.


I found this cloth square in a stash of discards. This was left over from a project that I did with the kids to introduce them to painting on fabric. It started off well, but in the end they enjoyed themselves so much that the picture disappeared and the colours blended into this rather pretty maroon. This is exactly why I chose to keep it and it would come in handy for today's project.


I measure the desired size of the fabric square and draw cutting lines with my pencil.


The fabric is then cut to size.


It is attached to the card with double-sided tape.


I also had this glitter paper strip left over from another project where I needed loads of glitter butterflies. As this line of butterflies allows me to see what is underneath the glitter paper, this becomes my first 'transparent' layer that is added to the card.


The butterfly strip is cut to size and attached to the card with double-sided tape.


I add a second, less obvious, strip above the fabric as well.


I then use a patterned transparen vellum that is cut to size. This too is added, making full use of the attributes of vellum to see the original layer underneath it.


Another reason why I like using vellum, is because it turns a smoky white colour when you emboss on it, making it easy to add highlights or focus points to the card. I use this coffee stencil to emboss two jubilant figures onto the vellum.


These two figures will do well to simulate two people conveying birthday wishes.


I then decide that I need a bright and strong colour to frame my focal figures and add two orange strips on the side.


I use this same orange cardboard to draw speech bubbles on.


The speech bubbles are cut out.


I then use an orange Sharpie marker to draw a frame around the speech bubbles.


A brown Staedtler Fine Liner is used to write the birthday wishes on the speech bubbles.


The speech bubbles are then fixed in place and the card is finished. Can you see how the use of the transparent layers brought these widely different layers together by allowing the bottom layers to show through the top layers?


Marietjie Uys (Miekie) is a published author. You can buy the books here:
You can purchase Designs By Miekie 1 here.
Jy kan Kom Ons Teken en Verf Tuinstories hier koop.
Jy kan Kom Ons Kleur Tuinstories In hier koop.
Jy kan Tuinstories hier koop.
For more crafty ideas and great products, visit A Pretty Talent on Facebook.
Remember to keep nurturing your TALENT for making PRETTY things.
You can subscribe to this blog and receive regular updates by email by simply registering your email address at the top of the current blog.