Search This Blog

Thursday, 3 December 2015

Decorating your Christmas Cake with Fondant

It has been little over a month ago that I baked my Christmas cake and since then it has had regular doses of brandy to ripen it and to keep it moist. The time is right for me to cover the cake with fondant so all of that moist goodness is locked inside. Give it a few more weeks to ripen and it will be just about perfect around Christmas time!


When covering a cake with fondant you always want the fondant to be far more than what will be needed to cover the cake. The further the fondant hangs over the sides of the cake, the easier it is to achieve neat corners. That is why I start with a sizable amount of fondant.


Soften the fondant by kneading it and then form it into a french loaf shape.


Roll out the fondant with a rolling pin. I prefer to work on a large silicone mat as it makes it easier to transfer the fondant to the cake.


Put your cake on a flat surface.


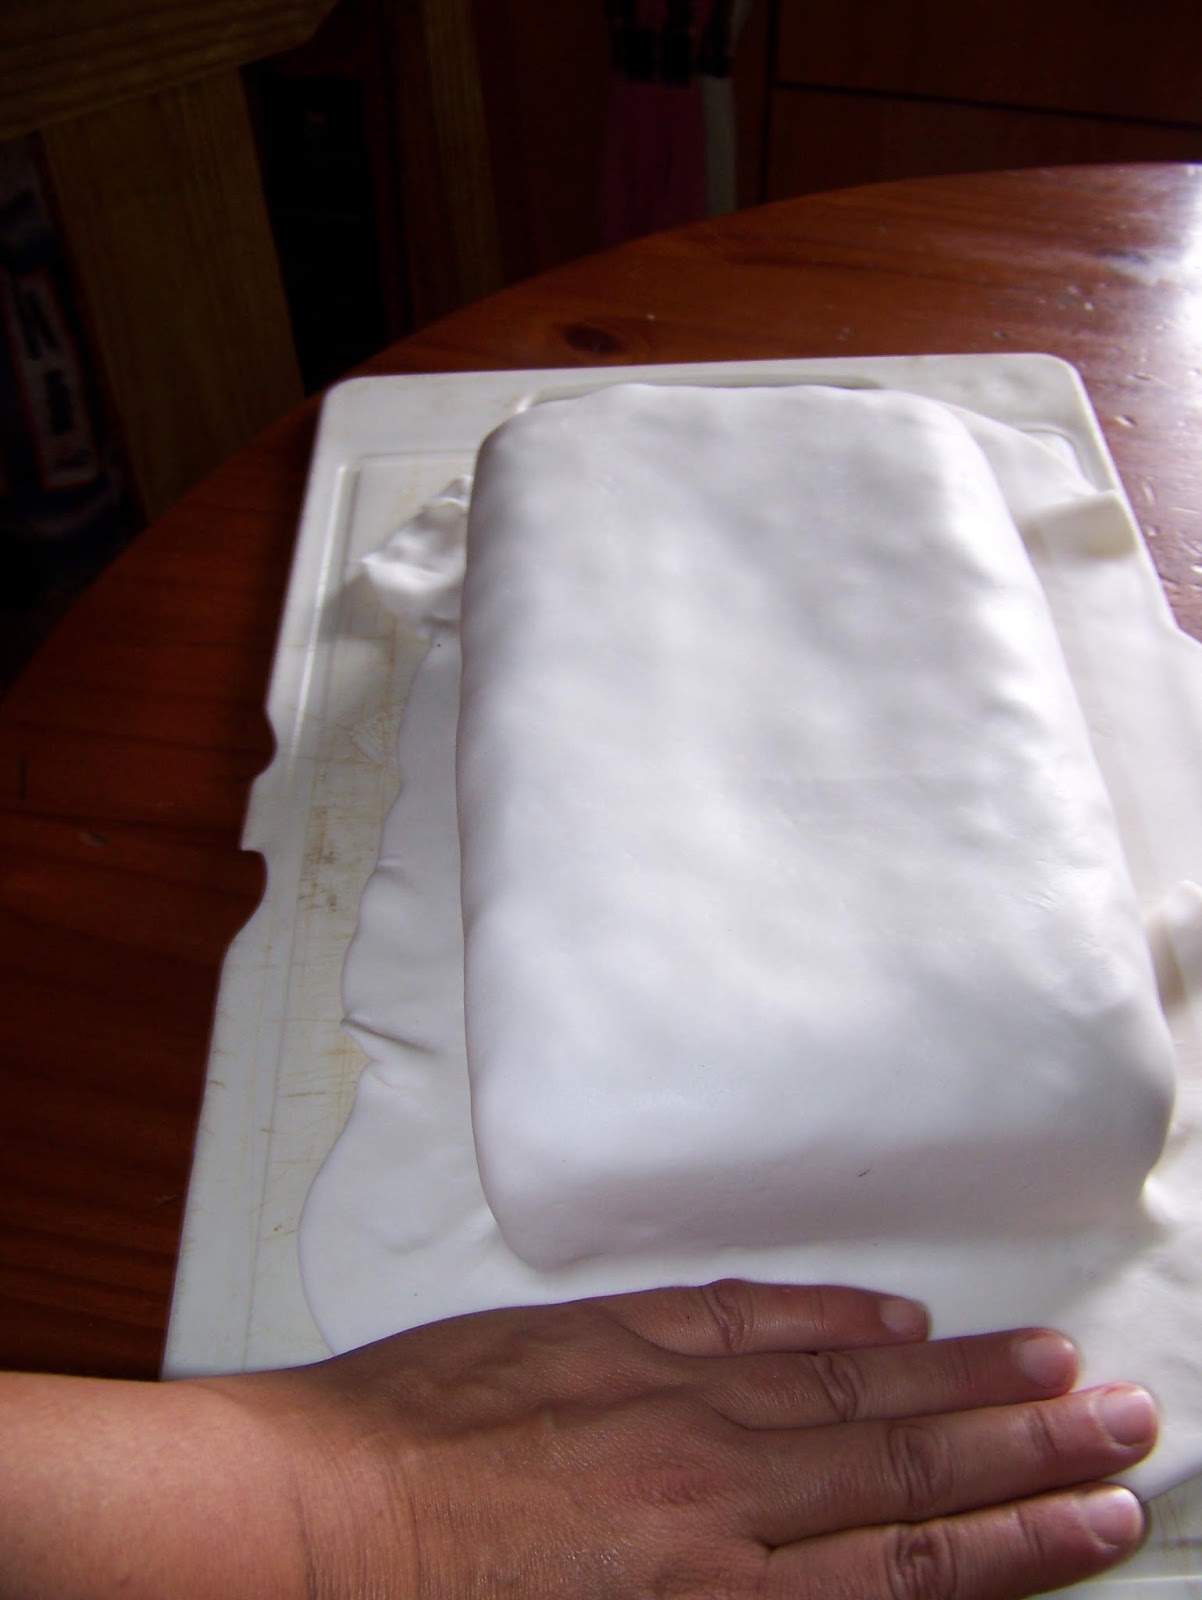
Gently lay the fondant over the cake. Normally you would 'dirty ice' the cake to keep the fondant from cracking. However, this fruit cake is so moist that there is precious little chance of that happening.


Gently lift the silicone mat away (if you used one). You can also roll the fondant over the rolling pin and gently unroll it over the cake, if you do not have a nice big silicone mat.


Gently fold in the corners and sides. With your hands and not your fingers as it is easy to poke holes in the fondant, or to leave finger nail grooves.


Use a sharp knife to cut the excess fondant away. I prefer a pizza cutter. If the fondant is clean of cake crumbs, you can use it again, but do not reuse it if it has cake particles sticking to it.


I now transferred the cake to a polystyrene punnet. It will make it easy to lift the cake out of the plastic container I will be keeping it in until ready to serve.


I then rolled thin strings of red and yellow fondant to make long 'worms'.


These were twisted into each other to form a Christmas rope.


I brought the cake over to the rope and turned the cake to get the rope around the base of the cake. Lifting and manipulating the rope fondant is tricky and it is much easier to manipulate the cake.


I am now ready to decorate the top.


I love these cutters. Not only do they cut the fondant (or cookie) shapes I want, but they also emboss the top with detail. I will be using this set to cut three different sized leaves from green fondant.


Roll out the green fondant and press the cutter into it. Press gently down on the handle to emboss the top of the fondant. Lightly wiggle the cutter to lift the cutout with the cutter. Press down on the lever to release the cutout. That simple!


See how pretty these are?


I make a green fondant 'worm' rolled very thinly for the 'branch'.


I lay the green in place on the cake.


I then roll small red and yellow balls from the fondant to use as berries.


I add the berries and a few more leaves and then I am done. Hmm, bring on Christmas!


For more crafty ideas and great products, visit APrettyTalent.com.
Remember to keep nurturing your TALENT for making PRETTY things.
You can subscribe to this blog and receive regular updates by email by simply registering your email address at the top of the current blog.

Wednesday, 2 December 2015

Making French Toast - A Family Activity

Making French Toast is not hard to do, but I wanted to do a blog on this as it is one of those easy and fun things you can get the kids to 'help' with. I had three very young kids over for lunch today after fetching them from school. On the way home, they assured me they were not hungry and would not eat. When I told them that they would have had to make their own food, they were very keen to eat after all. Let me share a couple of ideas with you to make this fun and manageable.


It is entirely optional, but I like to add some fresh herbs to the egg. Here I have some garlic chives, a few basil leaves and spring onion. All of this will be chopped up before being added to the egg. Older kids find it great fun to help with the chopping and the smaller ones like to pick the fresh herbs from the garden.


Each child gets their own bowl and they get to open the eggs in these. Expect to find shells in the egg. This is why each egg should be opened separately in the bowls. This way you can fish the shells from the egg without the other eggs getting in the way. It is good exercise for kids to learn to open eggs and one should give them an opportunity to do so. Keep a cloth handy!  Each child gets to add a little milk to their eggs as well as a pinch of salt. They then pinch the herbs between fingers and add that as well. Older kids may be encouraged to add crushed garlic and/or chili to their eggs. You may even want to encourage them to come up with their own suggestions and discuss the pros and cons of each in turn.


Let the kids whisk the egg mixture well and empty each child's individually into a flat baking dish. They can take turns here and older kids can be expected to wait for younger kids as they should have mastered patience already.


Place the slices of bread in the egg mix and let it soak for a few seconds. Turn and let the other side soak as well.


Heat some oil or butter in a pan and turn the heat down to medium. Put the soaked bread in the pan. Teenagers can be trusted with this activity, but younger kids should not be allowed to work with warm oil on the stove top.


Turn the bread when it becomes a little more stable. Do not get sidetracked by the little ones and forget to turn the bread, as I have done here!


Once both sides are done (test the middle to make sure it is no longer soggy), turn the bread out on a serving plate.


Everyone has their own ideas for perfect toppings, but I had the kids squeeze syrup onto their warm bread and then sprinkle grated cheese over it. This is always a favorite with the young ones. Everyone ate their bread and two of them even asked for seconds! Not bad for kids who were convinced they were not hungry.


For more crafty ideas and great products, visit APrettyTalent.com.
Remember to keep nurturing your TALENT for making PRETTY things.
You can subscribe to this blog and receive regular updates by email by simply registering your email address at the top of the current blog.

Tuesday, 1 December 2015

Baking a Chocolate Roulade

Today I am going to show you how to bake a delicious Chocolate Roulade. This is the ideal cake to bake for a small gathering as the cake is rather on the small side. If you are feeling adventurous, you can multiply the ingredients and bake a bigger one. Let me show you how to bake, fill and roll this all-time favorite.


Start by sifting the dry ingredients together: 1/2 cup (125 ml) flour, 1/4 teaspoon salt, 1 teaspoon (5 ml) baking powder.


If you want to bake a vanilla roulade, simply leave out the cacao and the water that is added to the eggs later. For the chocolate roulade, add 2 tablespoons (25 ml) of cacao.


Separate three eggs.


Even though we add the egg whites only later, it is always best to beat them first. It is really tough, if not impossible, to beat the egg whites to stiff points with mixer blades that are dirty from beating other ingredients.


For the chocolate roulade, add 2 tablespoons (25 ml) water to the eggs. For a vanilla roulade, leave this out.


Add a tablespoon (12,5 ml) lemon juice.


Add half a teaspoon of vanilla essence.


Add half a cup (125 ml) of castor sugar and mix well.


Fold the dry and wet ingredients together in a bowl.


Using a spoon is better than using an electric beater as you will be able to trap more air in the mix with a spoon.


Fold the egg whites into the mixture.


Spray a baking ting (35 x 25 cm) with non-stick spray and then line the bottom with wax paper.


Spoon the cake mix into the tin, allowing it to fill the corners.  Bake for 10-12 minutes in a preheated oven at 200°C.


You can fill the roulade with anything of your choice. I whipped some leftover caramel to get a smooth and runny consistency.


I then added some vanilla icing that I had leftover from a previous baking session and whipped the caramel and the icing together. This would be the filling for my cake. (This is also the reason I baked the cake as it is a great way to get rid of these leftover ingredients!)


I now dampened a clean dishcloth and laid it out on the table to receive the cake when it came out of the oven.


Allow the cake to cool in the tin.


Turn it over on the dish towel.


Remove the wax paper.


Spread the filling onto the cake.


Cut a small groove into the cake where you will begin the roll.


Use the dishcloth to roll the cake. (I had used too much filling and was forced to scoop it up and return it to the bowl. Fortunately the kids were almost home from school and they would be happy to clean the bowl for me!)


Lift the cake in the folded dishcloth and hang it out of the way. Hanging it helps to keep a nicely rounded shape.


When the cake is completely cold and have hung for about an hour, you can gently place it on a serving dish. The side spillage has ruined the effect of the roulade for me, but you can still see the nice and even roll.


Sift a sprinkling of icing sugar on top of the cake. The white is beautifully offset by the dark of the chocolate and it makes for a nice contrast.


A few cracks on a roulade is acceptable, but it should not crack all the way through to the filling.


Cut and serve with some fresh fruit or a dollop of whipped cream.


For more crafty ideas and great products, visit APrettyTalent.com.
Remember to keep nurturing your TALENT for making PRETTY things.
You can subscribe to this blog and receive regular updates by email by simply registering your email address at the top of the current blog.