Coloring for adults is all the rage these days and people are forking out lots of money to buy the rather expensive coloring books and artists quality coloring pencils. Yet, I have often heard my fellow colorists ask what they could do with all those colored pictures once they were done. It seems a shame to spend all those hours on getting it just right to simply close the book and rarely, if ever, look at it again. Today I will show you how to turn those pictures into a cute card and tomorrow I'll follow up with even some more nifty ideas.
My niece came for a sleepover and I unpacked the coloring stuff so we could spend some quality time together. We worked from the magazine Art Therapy and used the Derwent Coloursoft Pencils and Derwent Sharpener to color the pictures and to keep the pencils sharp without any effort. You can of course use any of the many brilliant coloring books available on the market today.
My niece begged my mom to join us and eventually she agreed. She did not join us in coloring the full pages though, but opted to color these smaller pictures instead. These are the ones I will use in today's project to turn them into cards.
The first thing is to find a pair of sharp-nosed scissors and to carefully cut the colored pictures out.
I found a piece of old corrugated cardboard and trimmed it to size with a metal ruler and craft knife combination. It is always easier to do when working on a self-healing cutting mat that has guides.
I trimmed an A4 paper to fit inside the card as this would be a card with a paper insert. It is no fun writing on corrugated cardboard after all.
Fold the insert in half. I find I get a much tidier fold when I shape the fold line over the ruler.
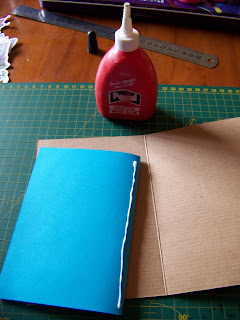
Apply a thin strip of glue or adhesive.
Paste the insert down.
I will leave the right side of the insert open for potential writing, but the left side will be decorated.
I like the idea of a genie popping out of a card to bestow well wishes on a birthday card recipient and when I get to write the card, I will be sure to connect the wording and the pictures with each other. The genie was colored by hand while the envelope was simply cut from the off-cuts on the page where the genie appeared.
I now proceed to work on the outside of the card. I cut a frame from the leftover half of the paper the insert was cut from.
Lastly, I stick both the frame and one of the hand-colored flowers down on the card. This very simple card looks so charming that I had a hard time convincing people that it was colored by hand and not merely printed. This is the benefit of working with great quality pencils!
For more crafty ideas and great products, visit APrettyTalent.com.
Remember to keep nurturing your TALENT for making PRETTY things.
You can subscribe to this blog and receive regular updates by email by simply registering your email address at the top of the current blog.


No comments:
Post a Comment