I bought these two large round canvasses a couple of months ago and I could hardly wait to get started on them. Then, quite unexpectedly, my life took a strange turn as the relief post I was teaching in became more fixed. I also had to move house and settle in the town I was now working in, rather than stay in the temporary accommodations I had been occupying. The canvasses took a back seat to all of this. However, things have finally calmed down enough for me to throw myself back into that which I love to do - art. I had a lot of fun with this project. A little bit of decoupage, a bit of drawing and a tidbit of paint; it all makes for fun and relaxation. I show you step by step how to go about creating these canvasses yourself, in today's blog.
This is what the canvasses looked like when I bought them.
The first thing I did, was to cover them in a coat of gesso to prepare the surface to accept paint.
I then measured the diameter of the canvasses to determine how much paper I would need to cover the sides with decoupage.
I decided on a range of papers that would support my theme.
Then I cut two papers into 5 cm strips.
The strips were then cut in half.
I painted Dala Acrylic Gel Medium on the backs of the strips.
The strips were then stuck to the side of the canvas and another layer of the Acrylic Gel Medium was painted over it to seal it.
I did this all the way around each of the two canvasses, alternating the two papers I had cut up.
I then found two sheets of paper that had the lightest designs in the range. I randomly trimmed their corners.
I painted the outer perimeters of the canvasses with Dala Craft Paint in a colour that matched my colour scheme. This would largely be covered later on.
I then drew the first design on one my selected papers. This was a picture I found on Pinterest and fell madly in love with.
I used black markers to redraw the pencil picture once I was satisfied with the design.
I then erased all of the pencil markings.
The second picture was also drawn on the selected paper, in pencil.
I redrew it in black, using markers.
Again the pencil lines were erased.
I then covered the canvas in Dala Acrylic Gel Medium.
The picture was carefully laid in place on the canvas and sealed with another layer of Dala Acrylic Gel Medium.
I did the same with the other canvas. The canvasses were then left to dry.
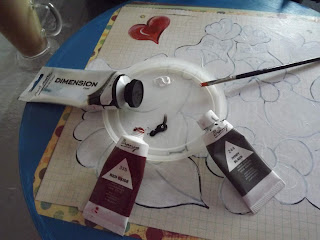
I am going to be painting these designs with acrylic paints, of which many are transparent, or semi-transparent. For this reason, I start by painting the designs white. A white background will prevent the colours from appearing dull.
I start with Red Oxide. The whole area is painted in this colour. Then I add white highlights and black shadows. This makes the shape appear more rounded and dimensional.
A close-up of what I've done. I will do this throughout the painting, with each area that is painted.
I finish all the areas that are to be done in Red Oxide.
I then use Burnt Umber on some areas.
I use Titanium White on some areas.
Raw Sienna is my next colour of choice. I allow the colours in the paper range that I've selected, to dictate my choices of paint colours.
I now add an aqua colour.
This is followed by a pale blue, which is used on only one of the canvasses.
Sap Green comes next.
Lastly I use a bright orange.
Once the paint is dry, I draw the blacks of the eyes with a marker.
The colour of the eyes is added with a blue paint marker.
I highlight the whites of the eyes with a white marker.
I then give the chickens some blushing pink cheeks.
The cheeks are toned down a bit with a thin layer of unbleached titanium that is smudged onto it.
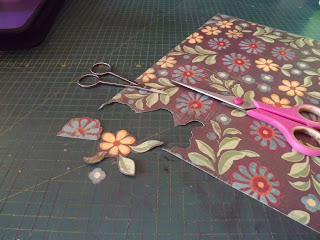
I now need to finish the background. I select a sheet of paper from my collection and cut the flowers from it.
I do the same with yet another sheet of paper from the collection.
I then arrange the cut flowers on the canvasses, only to find that it is way too busy, causing the paintings to disappear into the background.
As an alternative, I paint over the blue backgrounds with Buff Titanium, using a dry brush with stiff bristles. This gives the paint a streaked effect, allowing the blue to show through.
I then arrange only a selection of the cut flowers on the canvasses. I like this effect. The cut flowers are then decoupaged onto the canvasses using Dala Acrylic Gel Medium.
The final result!
Marietjie Uys (Miekie) is a published author. You can buy my books here:
You can purchase Designs By Miekie 1 here.
Jy kan Kom Ons Teken en Verf Tuinstories hier koop.
Jy kan Kom Ons Kleur Tuinstories In hier koop.
Jy kan Tuinstories hier koop.
You can follow Miekie's daily Bible Study blog, Bybel Legkaart, here in English & Afrikaans.
You may prefer to follow the traveling blog, A Pretty Tourist.
For more crafty ideas and great product reviews, visit A Pretty Talent on Facebook.
If you are in a literary mood, follow Miekie's musings, stories and poetry on A Pretty Author - Miekie.
Remember to keep nurturing your TALENT for making life PRETTY.
You can subscribe to any of these blogs and receive regular updates by email. Simply register your email address at the top of the applicable blog.


No comments:
Post a Comment