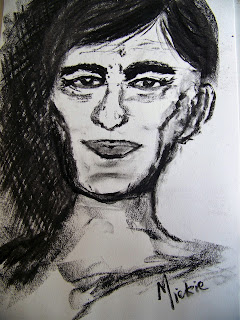
Portrait 1
I start this drawing by selecting a good quality paper as base. Bockingford has never disappointed me in this regard.
More often than not, you will find that artists start with guidelines to get the features of the face in the right place. I do too. But sometimes a drawing simply begs to be dived into and then I don't bother. Instead I start with the line that speaks most clearly to me. In this case it was the left side of the face (as I'm facing it), followed by the eye.
I used a normal charcoal stick to do this drawing in. I followed the first eye up with the nose and then added the second eye. I also included some of the most prominent wrinkles to serve as guidelines.
Establishing the width of the face seemed essential at this stage and I drew the right hand ear.
The thick, bushy eyebrows set the mood so effectively that I had to start developing them next.
Continue the developments of the eyes and wrinkles.
I am now finally ready to add some of the detail inside the eyes and in an instant the man becomes alive with personality.
The most crucial lines for developing the mouth were then added.
I added the facial hair at the top of the mouth.
I then drew the mouth and continued with the hair below the mouth.
More wrinkles and shading was added to the face.
Now comes the hat that had captured my attention from the start in this drawing.
Detail is added to the hat by doing some essential shading. Pay attention the hatching and cross-hatching techniques used.
A floating head is seldom a good idea. Therefore we now need to add some clothes to anchor the head.
I am finally happy after adding a few more tweaks.
Use a fixative on your charcoal work to prevent it from smudging.
Portrait 2
This drawing is also started on Bockingford paper.
Most of the drawing in this picture is done with a charcoal stick, although this time I will make use of alternative charcoal products as well.
This time I start with a very feint center line, running from the forehead, through the tip of the nose to the cleft in the chin. Intersecting this line right in the middle, is the line running through the eyes. Halfway between that and the bottom of the chin is the line marking the space for the tip of the nose. Halfway down from there is the line running through the mouth.
This time round I start with the tip of the nose and the outline of the mouth.
I then add the eyes and the connecting bridge of the nose.
This is followed by the prominent male eyebrows.
A very simple hairline is added to mark the top of the head.
Now follows some rough looking ears.
I am always astonished by how much is gained in a drawing/painting when the detail inside the eyes are added.
A little more work on the mouth.
The beginning of the muscular chin. Although I can immediately see it is too exaggerated.
A little bit more shading and detail all around.
This is when I switch to a Charcoal Block in a slightly lighter shade. I can achieve broader strokes that are just a shade lighter than the rest of my lines.
A putty eraser removed the too prominent chin line and the charcoal block added the deep shadow on the left.
The putty eraser is quite handy for removing or toning down dark lines in charcoal.
My face now has a nice shape, but still needs the darkest darks to be darkened.
I used a thick charcoal stick to add thickness to the hair and finally I was satisfied with the likeness created in charcoal.
For more crafty ideas and great products, visit APrettyTalent.com.
Remember to keep nurturing your TALENT for making PRETTY things.
You can subscribe to this blog and receive regular updates by email by simply registering your email address at the top of the current blog.
Remember to keep nurturing your TALENT for making PRETTY things.
You can subscribe to this blog and receive regular updates by email by simply registering your email address at the top of the current blog.


No comments:
Post a Comment