Search This Blog

Monday, 31 October 2016

Cardmaking: Making A Doodle Card In Minutes

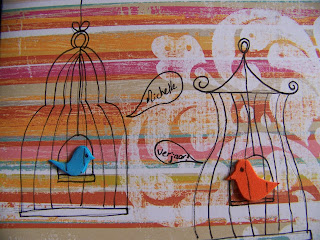
We don't always have time to make intricate cards. Sometimes a birthday or event catches us by surprise and then we have to come up with a stunning card that can be made in a matter of minutes. I show you how to turn some simple doodles into just such a card in today's blog.


It is best to start quick cards on pretty backgrounds. I have this half of an original 12" x 12" craft paper left over from a previous project. It will be perfect for today's card.


I start by folding it in half to form a card.


Then I use a pencil to draw a quick outline of a bird cage with a perch.


I add some detail to hang both the perch and the cage.


Then I fill in the bars of the cage.


The second cage will be on a stand and I start by drawing this.


I draw a differently shaped cage on the stand to keep it interesting. Do not aim to get the sides exactly even. It will distract from the doodling effect we are attempting to achieve. Remember the perch inside the cage.


Add the bars of the second cage.


I then used a marker to redraw the pencil lines.


I found some off-cuts in my Dala foam rubber stash and drew two small birds on it. Keep it very simple. Simplicity is key in this project. If you don't have foam rubber, you can cut the birds from paper, or even newspaper.


Cut the birds out and glue them onto the card, placing them on the perches inside the cages.


Draw the lines of the bars over their bodies and add eyes.


Add your message. Translated, this means: "A little birdie told me ..."


Now add some speech bubbles and the message of the card. This can be anything you wish. Mine has the name of a birthday girl. Translation: "Michelle ... is having a birthday."


I used a thicker marker to fill in the solid areas and my card was done. Quick, easy and very effective.


Marietjie Uys (Miekie) is a published author. You can buy the books here:
You can purchase Designs By Miekie 1 here.
Jy kan Kom Ons Teken en Verf Tuinstories hier koop.
Jy kan Kom Ons Kleur Tuinstories In hier koop.
Jy kan Tuinstories hier koop.
For more crafty ideas and great products, visit A Pretty Talent on Facebook.
Remember to keep nurturing your TALENT for making PRETTY things.
You can subscribe to this blog and receive regular updates by email by simply registering your email address at the top of the current blog.

Sunday, 30 October 2016

Baking A Sorghum Loaf Using A Sourdough Starter

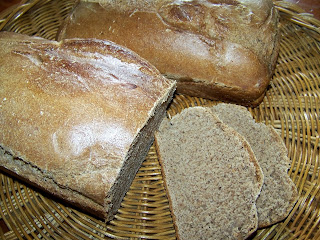
I bought some Sorghum Meal to make Maltabella with. This is an old childhood favorite of mine. However, making the porridge made me wonder how this tasty flour would work if I turned it into a bread. I simply had to try it. I am delighted to report that this is one of the tastiest loafs I have ever baked, considering I did not add any extra flavours or herbs. You simply have to try this to believe how filled with flavour it is.


Measure 2 cups (500 ml) maltabelle/sorghum meal in a large bowl. Add 4 cups (4 x 250 ml) cake flour. I don't use bread flour in this recipe as the sorghum is already a heavy flour and I need to get the bread slightly lighter.


Add a tablespoon (12,5 ml) salt and 2 tablespoons (25 ml) sugar.


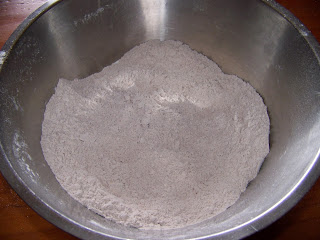
Mix the dry ingredients well.
Option 1: If you wish to speed up the process or eliminate using the sourdough starter, you can add a packet of Instant Dry Yeast to the dry ingredients.


Add a cup (250 ml) lukewarm milk, 4 tablespoons (50 ml) cooking oil and an egg to the dry ingredients.
Option 2: If you wish to speed up the process or eliminate using the sourdough starter, you can add a packet of Active Dry Yeast to the milk. Allow about 10 minutes for it to froth up.


Add 2 cups (500 ml) sourdough starter.


Bring the dough together.


If the dough is too dry, you may need to add some water. I needed only about a tablespoon (12,5 ml) in mine. It depends very much on the consistency of your sourdough starter whether you will need to add more liquids, or not.


Knead the dough for about 10 minutes to turn it into an elastic ball of dough.


Divide the dough in two.


Shape the dough into oblongs.


Prepare two small bread tins with non-stick coating and lightly flour the bottoms of the tins.


Place the dough in the tins.


Cover with plastic and allow to rise in a warm dry place for a couple of hours.


Once risen, bake the bread in a preheated oven at 200 °C for about 40 minutes.


Pour some milk in a small bowl to brush on the loaves as soon as they come out of the oven.


The baked bread has risen a little more in the oven.


Brush with milk.


Turn out on a wire rack to cool.


If you want a softer crust, you can cover the hot loaves with a damp cloth. The steam will soften the crust.


Serve with any of your normal condiments.


Marietjie Uys (Miekie) is a published author. You can buy the books here:
You can purchase Designs By Miekie 1 here.
Jy kan Kom Ons Teken en Verf Tuinstories hier koop.
Jy kan Kom Ons Kleur Tuinstories In hier koop.
Jy kan Tuinstories hier koop.
For more crafty ideas and great products, visit A Pretty Talent on Facebook.
Remember to keep nurturing your TALENT for making PRETTY things.
You can subscribe to this blog and receive regular updates by email by simply registering your email address at the top of the current blog.

Saturday, 29 October 2016

Cardmaking: Japanese Geisha Greetings

We have a lot of fun with paper piecing in today's blog when we make a special greeting card. Mine was made as a bon voyage to a couple going on holiday in Japan, but you can use this as a birthday card, or for any other purpose as well. I show you how to cut some very simple shapes from paper to build theses cute Japanese girls. I especially love how they overlap and extend past the perimeters of the card. It gives the card a playfulness and make the dolls seem to interact with each other.


You will need three coordinating patterned papers, as well as a monochrome paper to serve as basis for the card. This one should measure 12" x 12" or 6" x 12".


I cut my base paper in half so it would measure 6" x 12".


I then folded it in half to create the card.


On the back of one of my coordinating papers, I measured a rectangle of dimensions 4 x 7,5 cm.


I cut this rectangle out.


I then semi-folded it in half to create a rounded shape at the top.


I cut the top with the paper still folded in half.


This was the shape I was looking for!


I used this first shape to cut one more from each of the remaining 2 coordinating papers.


I now had 3 of these.


I then cut a rectangle of dimensions 4 x 2,5 cm from each of the 3 papers.


You may once again wish to use the first as a template to cut the remaining 2 from.


These would serve as sashes (or whatever the proper name is) for the dolls.


I set my compass to radius 4 cm and constructed a semicircle.


I drew a line to cut the semicircle in half.


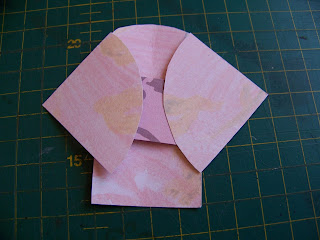
These quarter circles would become the sleeves of the kimonos.


Progress photo.


I now set my compass to radius 2,5 cm.


I drew 2 semicircles and extended them to the open ends. I also drew a full circle. I added a bun to the one and 2 pigtails to the other. I outlined my original pencil lines in white for you for illustration purposes. This has to be done on black paper, or a very dark blue or purple.


These become the hair on my dolls.


I then set my compass to radius 1,5 cm.


I drew 3 semicircles from a flesh-colored paper.


I now had all the pieces to build the 3 little geisha's with.


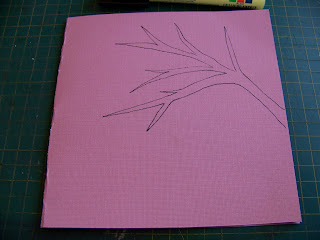
I used a black marker to draw a very simple branch on the card.


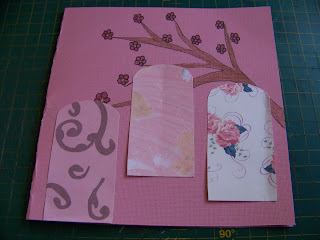
Very simple flowers were drawn to represent cherry blossoms.


I used coloring pencils to color the background with.


I now had to build my dolls on the card, attaching the different pieces with double-sided tape.


I wanted them on three different levels.


Next came the hair and faces.


Facial features were drawn in with a black marker and the cheeks were colored with  a coloring pencil.


Now it was time to put the sashes in place.


The doll in the center would be furthest back and her sleeves were still attached with double-sided tape.


The other sleeves were all attached with 3-D double-sided tape.


I extended these sleeves past the perimeters of the card to create a playful effect.


Marietjie Uys (Miekie) is a published author. You can buy the books here:
You can purchase Designs By Miekie 1 here.
Jy kan Kom Ons Teken en Verf Tuinstories hier koop.
Jy kan Kom Ons Kleur Tuinstories In hier koop.
Jy kan Tuinstories hier koop.
For more crafty ideas and great products, visit A Pretty Talent on Facebook.
Remember to keep nurturing your TALENT for making PRETTY things.
You can subscribe to this blog and receive regular updates by email by simply registering your email address at the top of the current blog.