I use a 12" x 12" paper that I have used in a previous project as base for the card. I cut it in half to measure 6" x 12".
This paper is then folded to form a 6" x 6" card.
I find a coordinating paper that has also already been used in previous projects.
I measure a rectangle of 6" x 3" on this paper and then cut the shape out.
I position the paper about a third from the top of the card and stick it down with double-sided tape.
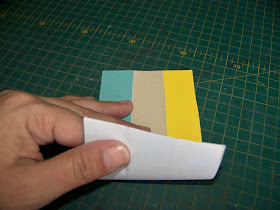
I then use three differently coloured glitter paper. From each of these I cut a rectangle measuring 6" x 1".
It fits perfectly on my coordinating paper, but I do NOT fix it in place just yet.
I now cut a rectangle from plain printer paper to use as backing for my glitter paper. This should measure 6" x 3".
The glitter paper is glued down on the white paper.
Once the glue is dry, I punch flowers on the sides of inset.
This punch gives me a very pretty and interesting finish.
I now use another punch to punch a square into the center of the inset. I punch from top and bottom to turn the square into a rectangle. Position your punch carefully when you do this.
I now fix my inset to the card with double-sided tape.
I punch 4 hearts from a fourth colour of glitter paper.
These are mounted on 3D double-sided tape.
The four hearts are used to make yet another flower in the center of the card. Easy, wasn't it?
Marietjie Uys (Miekie) is a published author. You can buy her books here:You can purchase Designs By Miekie 1 here.
Jy kan Kom Ons Teken en Verf Tuinstories hier koop.Jy kan Kom Ons Kleur Tuinstories In hier koop.
Jy kan Tuinstories hier koop.
For more crafty ideas and great products, visit A Pretty Talent on Facebook.
Remember to keep nurturing your TALENT for making PRETTY things.
You can subscribe to this blog and receive regular updates by email by simply registering your email address at the top of the current blog.


No comments:
Post a Comment