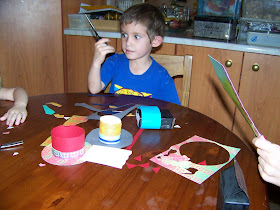
It is time to keep the youngsters busy again and today I show you a fun project that is done entirely from waste and off-cuts. We make these cute figures from jelly boxes. This project combines a number of skills where the kids need to paint, cut and paste. It also allows wide scope for putting their own personal touch on the projects.
I start by preparing parts of the project before I gather the kids together. This makes it easier to do the actual project once those busy little hands arrive. I describe a circle of radius approximately 6 cm for each child. This will become the brim of the hat.
I also draw the top of the hat. This should be about 10 cm in length and 7 cm wide.
I mark off the 5 cm mark on the width as well.
I then draw freehand triangles into the distance between the 5 cm line and the 7 cm line. These triangle will be cut loose and folded in. The glue will be applied to it so the top of the hat can be stuck to the brim. Put these papers aside and gather the supplies for the painting together.
I have four kids participating today and have accordingly emptied four jelly boxes. I also have paint brushes, water and black paint ready. I lay down newspapers on the table to protect the table top. This is the right time to gather the kids together.
Allow the kids to paint the boxes on all four sides. I choose to use black as this will completely cover the writing on the boxes.
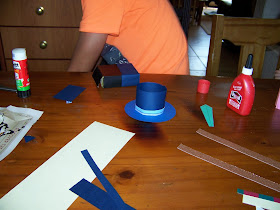
While the boxes are drying on the side, we start with the cutting out. The kids are each given small scissors to cut out the circle and the top of the hat. Here you can see how the top should be cut and folded.
Fold the top in a circle and glue it to the brim.
The hat remains open at the top so the figures can be used as storage boxes as long as they last. Kids love nifty crafts like these with 'secret' storage spaces.
We now add a hat band to the hat. The older kids who work faster can use the time to create decorations for their hat bands.
We then cut a length of paper approximately 25 cm x 5 cm to fold around the bottom of the boxes as pants or dresses. Do not be surprised if a small child announces in the middle of a project that they are hungry. Give them something to munch and continue working. This is part of the deal when working with kids.
We had these tie-shaped pieces left over from when we made the windmills and they come in very handy now. You can read more about the windmills by clicking here.
All that remains to be done now is to glue the hat and the eyes on. If you are working with older kids you may want to spend some more time on adding detail to the faces and clothes. You will probably find though that the younger kids have been exhausted by this rather lengthy project. This is a good time to call it a day then and release them into the garden. You can always do a follow-up activity where you decorate it some more, although I am cautious about that. Children don't like to hear that something is done only to be called back to do more work on it. Choose your words wisely.
For more crafty ideas and great products, visit APrettyTalent.com.
Remember to keep nurturing your TALENT for making PRETTY things.
You can subscribe to this blog and receive regular updates by email by simply registering your email address at the top of the current blog.


No comments:
Post a Comment