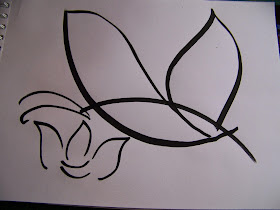
I have been busy with the planning and measurements of a quilt all day and my brain was stuck in the left gear. I needed something to jolt the right lobe awake and found this lovely drawing on my iPad that I've copied off the internet years ago. This was just the thing to draw when testing markers and served my purposes well. All credit to the original artist, whoever they may be.
I was doubtful of using the huge chisel point marker that I wanted to use, but I believe that all things needed to be tested to the limits and sprang into action with this black chisel point marker by Posca. Draw the line for the body of the butterfly. I worked on a 120 gsm drawing pad with a piece of cardboard slipped in behind the top page in case the markers leaked through the page. They did not.
Draw the line for the first half of the front wing.
Draw the line for the first half of the hind wing.
Complete the back wing.
Complete the front wing.
Draw the first of the antennae.
Draw the second of the antennae.
I loved this drawing so much that I did not want to be finished and decided to add a flower. Draw the cup of a flower.
Draw the left petal of the flower to mimic the wings of the butterfly.
Draw the middle petal.
Draw the last petal.
Add a stem to the flower and sign your name.
I still did not want to be finished and added some shading to the drawing.
I still had the black Posca Marker with the brush tip left to test and pulled it over. At first the ink moved slowly into the brush, but once it was there, things worked smoothly. I drew the body in the same fashion as above and won't bore you by repeating the steps.
I discovered that is was possible to get very feint lines with the marker as well as intense dark ones. See the contrast in shading at the flowers and the wings of the butterfly.
This was when I decided that this darling creature was too cute to be reduced to some test paper in the art journal. I pulled a small page out of my mini A5 art journal.
I used the same two markers to draw a similar drawing on this small scale, although I developed the drawing a little further this time around. The drawing was done with the chisel point marker.
The shading was done with the brush tip marker.
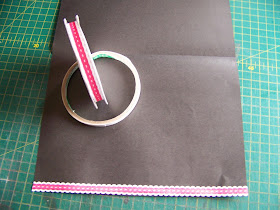
I folded an A4 piece of cardboard in half, save 1 cm.
I used double-sided tape to stick a length of red ribbon to the 1 cm edge of the card.
I used a ruler and a red Sharpie marker to draw a border around a piece of white printer paper.
This white space will leave me with a place where I can write my message as it is not always easy to get your hands on something that will write legibly on a black background.
I decide this too boring and quickly draw a butterfly in the corner.
I accentuate it with the black marker.
Then I add another butterfly to the opposite bottom corner.
I mount my main drawing on red matting and stick it on the cover of the card. Was that not fun?!
For more crafty ideas and great products, visit APrettyTalent.com.
Remember to keep nurturing your TALENT for making PRETTY things.
You can subscribe to this blog and receive regular updates by email by simply registering your email address at the top of the current blog.


No comments:
Post a Comment