I use these index cards which are blank on one side and lined on the other.
DAY 22
The theme for day 22 was Bicycle. I decided to use Tim Holtz Distress Stain on my cards. This comes in a handy bottle with a sponge-like tip that makes it easy to smear the ink onto any surface.
I had a beautiful diecut bicycle in this package, which I would use.
I stuck it to the card with double-sided tape.
I also wanted to use these tape stickers on the card, to tie in with the theme of geometric patterns.
I used a tearing ruler to draw a partial border around the card.
I used a straight ruler to draw yet another partial border around the card.
Then I found this sentiment to stamp onto the card with VersaMagic ink in Midnight Black.
I stamped it onto the card.
The completed index card for Day 22.
DAY 23
The theme for Day 23 was poem. I once again stained my card with Tim Holtz Distress Stain. This time I used Fired Brick.
I spritzed the wet ink with water to get a mottled effect.
I then used only the last stanza from a poem I wrote to use on the card, to tie in with the theme.
I used a tearing ruler to tear out the stanza, rather than cutting it. First wet the tear line slightly with water, to make it easier to get an accurate tear.
Tear along the wetted line, keeping the ruler in place.
I then used Tim Holtz Distress Ink in Espresso to stain the stanza of the poem.
I then found a diecut in Art by Marlene's Designer Collection to use on the card.
I fixed the elements to the card with double-sided tape.
I then found wax and a seal with my initial to include on the card.
I lighted the wax and dripped it onto the card.
Then I pressed the seal into the hot wax.
This made for a very pretty embellishment on the card.
I used Tombow glue to glue some golden embellishments onto the empty borders of the card.
The completed index card for Day 23.
DAY 24
The theme for Day 24 was Music Box. I used three different colours of Distress Stain by Tim Holtz to stain the card.
I then spritzed the wet ink to create a mottled effect.
I found diecuts from the Designer Collection from Art by Marlene to use on the card.
I used 3D tape to mount the diecut on the card.
I used an Artline marker to draw a whimsical frame around the edges of the card. This time I opted to use the card in portrait layout, which was a first for this ICAD challenge.
I then found these notes to add to the card to tie in with the idea of music box - somewhat.
I used Tombow glue to attach them to the card.
The completed index card for Day 24.
DAY 25
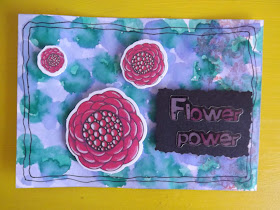
The theme for day 25 was Rose. I dotted the card with Tim Holtz Distress Stain.
Then I filled in the gaps with a second colour.
I used Ranger Archival Ink to stamp a feint accent to the card.
This image was not meant to overpower.
I found some diecuts in the Designer collection from Art by Marlene, to use.
I mounted it on the card with 3D squares.
I also found some sentiment stickers to use on the card.
I stuck the sticker down on black paper that I cut out with fancy scissors.
I used an Artline marker to draw a double margin around the card.
The completed card.
DAY 26
The theme for Day 26 was Tinker Toys. I used Tim Holtz Distress Inks in four colours to ink squares across the whole card.
I found these wooden diecuts in my stash, that I could use on the card.
I used an Artline marker to draw the winding crank at the back of the diecuts, to make them appear to be tinker toys.
I used a tearing ruler to draw a frame around the card with an Artline marker.
I added some shadows to the toys with yet another Artline marker, so that they would not appear to be floating on the page.
I returned to my sticker sentiments.
The completed index card for Day 26.
DAY 27
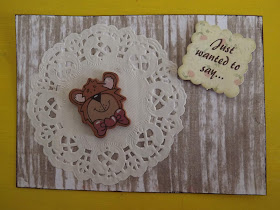
The theme for Day 27 was Corduroy. I used the sharp edge of a Tim Holtz Distress Ink to mimic the lines of corduroy pants on an index card.
I found a paper doilie to use on the card.
I stuck it down with a combination of double-sided tape and Tombow glue.
I found diecut sentiments to add to the card.
I also found a wooden embellishment to add. These would be stuck to the card with Tombow glue and 3D squares.
I then inked the edges of the card with Espresso Distress Ink.
The completed Index Card for Day 27.
DAY 28
The theme for Day 28 was Architecture. I used a Distress Ink by Tim Holtz in Walnut Stain to randomly stamp squares all across the card.
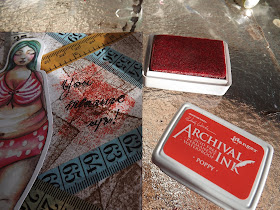
I then found some Washi Tape that looked like measuring tape, to use on the layout, tying into the theme.
I laid the Washi tape down in random strips.
I folded the ends of the tape over to the back of the card.
I then found diecuts in the Designer Collection book from Art by Marlene, which I would use in the project.
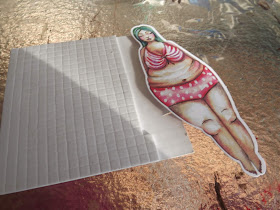
I used 3D squares to stick the diecut down with.
I wrote my sentiment with an Artline marker. It reads 'You measure up!'
I highlighted the sentiment by stamping it with Archival Ink so that the eye would focus on this spot.
The completed index card for Day 28.
The completed range of index cards for Week 4.
You can watch a compilation video of the above steps on YouTube:
https://youtu.be/OkEUVlvqyaI
Marietjie Uys (Miekie) is a published author. You can buy my books here:
You can purchase Designs By Miekie 1 here.
Jy kan Kom Ons Teken en Verf Tuinstories hier koop.
Jy kan Kom Ons Kleur Tuinstories In hier koop.
Jy kan Tuinstories hier koop.
You can follow Miekie's daily Bible Study blog, Bybel Legkaart, here in English & Afrikaans.
You may prefer to follow the traveling blog, A Pretty Tourist.
For more crafty ideas and great product reviews, visit A Pretty Talent on Facebook.
If you are in a literary mood, follow Miekie's musings, stories and poetry on A Pretty Author - Miekie.
Remember to keep nurturing your TALENT for making life PRETTY.
You can subscribe to any of these blogs and receive regular updates by email. Simply register your email address at the top of the applicable blog.


No comments:
Post a Comment