I drew up this idea for the blouse, but soon decided that those sleeves would be too hot for the summer months. I replaced these. I also found the collar to be ever so slightly too girly, along with the frills, and discarded that idea altogether.
This was the final design for the complete outfit.
I drew up a quick pattern, using a shirt from my wardrobe to guide me.
The pieces was then cut from fabric.
The sleeves were cut from strips of fabric that was tapered towards the end.
Second layer of sleeves.
Third layer of sleeves.
The facings also had to be reinforced with stiffening.
I started by finishing all of the edges with a zigzag stitch.
I then contemplated that it would be best if I cut facings for the sleeves as well, and did as I planned.
The stiffening was ironed on to the facings.
I then 'hemmed' the different layers of the sleeves with a fine satin stitch.
The remaining sides of the sleeves were zigzagged.
I pinned the shoulders and sewed them together.
I also pinned the shoulders of the neck facings and sewed these together.
I sewed the neck.
I notched the neckline.
I set my machine to do top stitching.
I ironed the neckline flat and then sewed all around the neckline, 10 mm away from the opening.
I sewed a second top stitched line, 40 mm from the opening.
I basted all of the sleeves.
The first layer of sleeves was pinned to the armholes.
The second layer of sleeves was pinned to the armhole.
The third layer of sleeves was pinned to the armhole.
The sleeve facings were pinned to the armholes (after I had sewn the sleeve facings together at the shoulder seams).
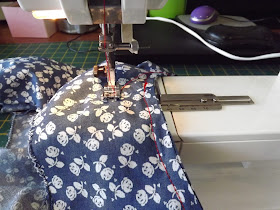
I sewed all around the armholes.
I then decided that I would like the top to be longer. I cut a length of fabric to the desired width, and basted it.
The fabric was pinned to the hems of the blouse and sewn on.
Pin the side seams, from the arm facings, through to the extended hem.
Sew the side seams.
The final product.
A short compilation video of these steps can be seen on YouTube:
https://youtu.be/e1k0FO4wFe8
Marietjie Uys (Miekie) is a published author. You can buy my books here:
You can purchase Designs By Miekie 1 here.
Jy kan Kom Ons Teken en Verf Tuinstories hier koop.
Jy kan Kom Ons Kleur Tuinstories In hier koop.
Jy kan Tuinstories hier koop.
You can follow Miekie's daily Bible Study blog, Bybel Legkaart, here in English & Afrikaans.
You may prefer to follow the traveling blog, A Pretty Tourist.
For more crafty ideas and great product reviews, visit A Pretty Talent on Facebook.
If you are in a literary mood, follow Miekie's musings, stories and poetry on A Pretty Author - Miekie.
Remember to keep nurturing your TALENT for making life PRETTY.
You can subscribe to any of these blogs and receive regular updates by email. Simply register your email address at the top of the applicable blog.


No comments:
Post a Comment